SZZS specific CEF50-main thread (initial builds and troubleshooting related only)

TCFlowClyde

Active member
Feb 26, 2022
1,335
863
Mesa, AZ
Thx bro, I'm gonna call it 65 mil. Enough for a few words of wisdom and what an awesome bike.

And on a different note, if I pieced all of your posts together correctly regarding the headset saga, you currently have and are happiest with: Hope ZA56 regular upper (purple obviously) and Arcos lower bearing/cup. From the price you mentioned I'm guessing you ordered the lower directly from Arcos in Germany chosing the slower shipping method and the Hope from one of the many places here in US? If so, was the Arcos shipping time fine with you and where would you suggest to order the Hope upper?

Im still a good 4 weeks out so have plenty of time.
I went with UK store Twenty 20...it took about a week to get to AZ. But the LBS bike shop in Tx has Hope in stock (just not purple at the time). The Acros from Germany was a week and a half??? Fairly fast overall.👍
 

TCFlowClyde

Active member
Feb 26, 2022
1,335
863
Mesa, AZ
I had to drop my motor and remove my battery to change out my old dropper cable for the new dropper. Since, I never got a chance to last May, I thought I would weigh my 720 Wh battery with it's Al casing.
PXL_20240512_004323578.jpg

Yep, 8.74 +/- lbs or 3.97 kgs. Can't wait soon enough for the better battery chemistry of solid state to cut it down 80% with 1000 Wh capacity....c'mon Science!!!🔬🧬
PXL_20240512_004347980.jpg
 

92se-r

New Member
Dec 23, 2023
161
60
United states
PSA: check your bolts

Sorry dont have any good pictures. Here is one before a ride.

1000011147.jpg

Final build came out to right around 20kg even. Its a heavier enduro build with cushcore pro in the rear and a DD casing rear. 170mm front lyrik with a mullet wheelset from ztto. I put a dt swiss star ratchet on the rear hub. This is a small frame and a full size water bottle will not fit.

Headset is still no longer knocking with the new upper bearing and 3 1.5mm shims. This is the non headset cable routed setup.

The other clunk i was feeling randomly I had assumed was from cables rattling. Turns out one of my battery bracket bolts was just a hair loose. Loctite everything. During the build, i had loctited all pivot bolts but did not check the battery bracket.

Since i had the bike torn apart, i foam wrapped all the cables as well.

My most recent ride i did around 11 miles with 1800ft of climbing. At the end of the ride I had 70% battery remaining. Pretty damn respectable. On the longer climbs, I kept the bike in boost and kept an eye on housing temps. It got fairly warm with 85f ambients. I estimate around 45c. Sorry i think in celsius when im looking at electronics. Next ride i will bring an ir temp gun. I would love to see others here with 36v systems post their temps as well. You know, for science.

All in all, i am getting used to the bike. The longer chainstays are making me turn slower so i need to get used to that. I was also holding back because of the previous clunking issues and cant stop thinking of cracking motor covers. I need to make an aluminum plate with my brake.
 

92se-r

New Member
Dec 23, 2023
161
60
United states
Also, Mike kelly, where did you get your crank arms? These 170mm crank arms are terrible in the rocks, i need a shorter and wider crank arm setup.
 

mike_kelly

Well-known member
Subscriber
Aug 11, 2022
929
759
US
Also, Mike kelly, where did you get your crank arms? These 170mm crank arms are terrible in the rocks, i need a shorter and wider crank arm setup.
I started out with Miranda carbon which I really like but they are 170 and could not find shorter. I ended up with FSA CK from ebay 155 for only $35 but that seller is out now. Not light but durable. But they should be around elsewhere.
 

TCFlowClyde

Active member
Feb 26, 2022
1,335
863
Mesa, AZ
I started out with Miranda carbon which I really like but they are 170 and could not find shorter. I ended up with FSA CK from ebay 155 for only $35 but that seller is out now. Not light but durable. But they should be around elsewhere.
 

92se-r

New Member
Dec 23, 2023
161
60
United states
I started out with Miranda carbon which I really like but they are 170 and could not find shorter. I ended up with FSA CK from ebay 155 for only $35 but that seller is out now. Not light but durable. But they should be around elsewhere.
Do you know what the q factor on the ones supplied by bafang are compared to your fsa? I want to run some carbon ones but scared to run any from non brand name companies. Ive seen too many people snap crank arms.
 

mike_kelly

Well-known member
Subscriber
Aug 11, 2022
929
759
US
In this thread I posted a picture with measurements of all the cranks I had. The fun part is finding it.
 

happi777

Member
Nov 17, 2020
19
11
singapore
PSA: check your bolts

Sorry dont have any good pictures. Here is one before a ride.

View attachment 140279
Final build came out to right around 20kg even. Its a heavier enduro build with cushcore pro in the rear and a DD casing rear. 170mm front lyrik with a mullet wheelset from ztto. I put a dt swiss star ratchet on the rear hub. This is a small frame and a full size water bottle will not fit.

Headset is still no longer knocking with the new upper bearing and 3 1.5mm shims. This is the non headset cable routed setup.

The other clunk i was feeling randomly I had assumed was from cables rattling. Turns out one of my battery bracket bolts was just a hair loose. Loctite everything. During the build, i had loctited all pivot bolts but did not check the battery bracket.

Since i had the bike torn apart, i foam wrapped all the cables as well.

My most recent ride i did around 11 miles with 1800ft of climbing. At the end of the ride I had 70% battery remaining. Pretty damn respectable. On the longer climbs, I kept the bike in boost and kept an eye on housing temps. It got fairly warm with 85f ambients. I estimate around 45c. Sorry i think in celsius when im looking at electronics. Next ride i will bring an ir temp gun. I would love to see others here with 36v systems post their temps as well. You know, for science.

All in all, i am getting used to the bike. The longer chainstays are making me turn slower so i need to get used to that. I was also holding back because of the previous clunking issues and cant stop thinking of cracking motor covers. I need to make an aluminum plate with my brake.
Is this CEF50 frame? just wondering the main frame body has cable routing inlet. Did you DIY drill it? Or is this the lastest stock?

Screen Shot 2024-05-15 at 11.37.37 am.png
 

happi777

Member
Nov 17, 2020
19
11
singapore
You can request to have the frame drilled for cable routing. I knew headset routing would never work for me.
Oh. Just wondering why did you DIY . Ya, headset routing is a failure design. It expect all user to run wireless systems. Thanks for the swift reply.
 

TCFlowClyde

Active member
Feb 26, 2022
1,335
863
Mesa, AZ
Oh. Just wondering why did you DIY . Ya, headset routing is a failure design. It expect all user to run wireless systems. Thanks for the swift reply.
A few were able to do the ICR headset using specifically and only (so far) the Nukeproof/Token ZS56 ICR headset. We put up a separate thread on the subject.

I 86'd it myself and did the ICR frame conversion. I feel that I have a better setup now, just not as clean of course. A separate thread was created for that as well.

That being said, the frame (my Enduro build) was worth the hassle!👑

Although, many of us have certainly have had our patience pushed to their limits wiith the build updates. 🤯🫨🤬
 
Last edited:

8Grunf

New Member
Jan 29, 2024
21
65
Italia
Hello. what is your approximate range with a 48wh battery?

I make a translated copy/paste of a small report written on the Italian emtb forum:

"As is clear, the beautiful weekend proved to be a good opportunity to test the bike.

Day 1: before departure I adjusted the parameters on the 5 levels as per the following screen, leaving only the Boost mode at 100% to check the 75Nm declared on this little engine and get an idea of the consumption."

1712569182271.jpg


The distance of the tour was 27km with a total altitude difference of just over 1,200m; approximately 13 km of asphalt, on these used Tour mode in the uphill sections and Eco in the flat sections, the rest of the route is all trail with the most varied characteristics: technical and rocky sections with both positive difference in altitude and downhill, steep on loose surfaces, fast on compact surface, heavy with mud from the recent rains... in short, for all tastes.
On the off-road sections I didn't spare myself in using high assistance in the most difficult passages: bad and muddy sections, maximum assistance.
Tour time including picnic 3 hours, consumption detected on arrival less than half of the 480Wh available.

Day 2: climb on a path that is sometimes very rough, exposed at the top, great attention...6 km for 900 m of altitude covered in just over an hour including photo stops and to check the engine temperature as I wanted keep the highest assistance levels, Sport/sport+/Boost throughout the ascent, to check whether or not it tends to heat up: no overheating detected; great engine, smooth and powerful, the Boost mode is very powerful and, thanks to its 75Nm, it gets in the way in any situation.

1712570868048.jpg


Battery consumption in the second short ride was 45%
It's important to add that I'm a pretty light rider"

Forgive me if you read possible heresies in the automatic translation. :D


Feedback
 

patdam

Well-known member
Jan 17, 2019
889
598
france
I make a translated copy/paste of a small report written on the Italian emtb forum:

"As is clear, the beautiful weekend proved to be a good opportunity to test the bike.

Day 1: before departure I adjusted the parameters on the 5 levels as per the following screen, leaving only the Boost mode at 100% to check the 75Nm declared on this little engine and get an idea of the consumption."

View attachment 140424

The distance of the tour was 27km with a total altitude difference of just over 1,200m; approximately 13 km of asphalt, on these used Tour mode in the uphill sections and Eco in the flat sections, the rest of the route is all trail with the most varied characteristics: technical and rocky sections with both positive difference in altitude and downhill, steep on loose surfaces, fast on compact surface, heavy with mud from the recent rains... in short, for all tastes.
On the off-road sections I didn't spare myself in using high assistance in the most difficult passages: bad and muddy sections, maximum assistance.
Tour time including picnic 3 hours, consumption detected on arrival less than half of the 480Wh available.

Day 2: climb on a path that is sometimes very rough, exposed at the top, great attention...6 km for 900 m of altitude covered in just over an hour including photo stops and to check the engine temperature as I wanted keep the highest assistance levels, Sport/sport+/Boost throughout the ascent, to check whether or not it tends to heat up: no overheating detected; great engine, smooth and powerful, the Boost mode is very powerful and, thanks to its 75Nm, it gets in the way in any situation.


Battery consumption in the second short ride was 45%
It's important to add that I'm a pretty light rider"

Forgive me if you read possible heresies in the automatic translation. :D


Feedback
I constat +- the same low comsumtion, It's the raison why i thing that 480 will be enough and i have orderd one to replace my 600W.

Surprized that you use max acceleration, mostly if you ride "exposed". i prefer using 2 for this parameter.

About Boost at 100%, i don't use it anymore, because can't use it more than few seconds (+- 5) before i had motor cuts. Bafang (via linda) said that it"s because motor will be too hot (i don"t feel that with hand on motor ?). May be it"s my wheight (100 kg) and my legs torque (330 W max at last stress test) solicitat too many the motor who explain that ?

I constat also that i have a few power variations in my modes max (S at 80% and S+ at 90%), if i can't keep upper 80 rpm, when i climb hard (upper 20%).
 

8Grunf

New Member
Jan 29, 2024
21
65
Italia
I constat +- the same low comsumtion, It's the raison why i thing that 480 will be enough and i have orderd one to replace my 600W.

Surprized that you use max acceleration, mostly if you ride "exposed". i prefer using 2 for this parameter.

About Boost at 100%, i don't use it anymore, because can't use it more than few seconds (+- 5) before i had motor cuts. Bafang (via linda) said that it"s because motor will be too hot (i don"t feel that with hand on motor ?). May be it"s my wheight (100 kg) and my legs torque (330 W max at last stress test) solicitat too many the motor who explain that ?

I constat also that i have a few power variations in my modes max (S at 80% and S+ at 90%), if i can't keep upper 80 rpm, when i climb hard (upper 20%).

You're right about acceleration: I lowered the value.
as regards the problem you report in boost mode, I believe it depends both on your weight and the power you express: with my weight of 62kg I did not encounter any operating anomalies and as I said, no overheating problems even on long stretches with maximum or almost maximum assistance.
 

ficorama

Active member
Oct 9, 2021
350
301
Croatia
I make a translated copy/paste of a small report written on the Italian emtb forum:

"As is clear, the beautiful weekend proved to be a good opportunity to test the bike.

Day 1: before departure I adjusted the parameters on the 5 levels as per the following screen, leaving only the Boost mode at 100% to check the 75Nm declared on this little engine and get an idea of the consumption."

View attachment 140424

The distance of the tour was 27km with a total altitude difference of just over 1,200m; approximately 13 km of asphalt, on these used Tour mode in the uphill sections and Eco in the flat sections, the rest of the route is all trail with the most varied characteristics: technical and rocky sections with both positive difference in altitude and downhill, steep on loose surfaces, fast on compact surface, heavy with mud from the recent rains... in short, for all tastes.
On the off-road sections I didn't spare myself in using high assistance in the most difficult passages: bad and muddy sections, maximum assistance.
Tour time including picnic 3 hours, consumption detected on arrival less than half of the 480Wh available.

Day 2: climb on a path that is sometimes very rough, exposed at the top, great attention...6 km for 900 m of altitude covered in just over an hour including photo stops and to check the engine temperature as I wanted keep the highest assistance levels, Sport/sport+/Boost throughout the ascent, to check whether or not it tends to heat up: no overheating detected; great engine, smooth and powerful, the Boost mode is very powerful and, thanks to its 75Nm, it gets in the way in any situation.

View attachment 140426

Battery consumption in the second short ride was 45%
It's important to add that I'm a pretty light rider"

Forgive me if you read possible heresies in the automatic translation. :D


Feedback
ok that means 2 rides. 33 km 2100 m altitude. and there is approx. 5-10% battery left?
 

8Grunf

New Member
Jan 29, 2024
21
65
Italia
how long can you drive with one battery charge?

In truth I haven't had the chance to completely discharge the battery yet, for long rides I'm using my Dengfu E10; in any case I think I can say that if I don't abuse the high assistance and mainly use eco and tours, I could get close to 2,000 m of altitude difference.
 

souftosouf

New Member
May 4, 2024
22
2
Marseille - France
So, new headset arrived today.
View attachment 130257
I'll do my best to explain each piece to avoid any misinterpretations.
View attachment 130258
Starting with the headset top cover, you'll note that three of the holes are specific for either a gear outer cable or brake hose (depending on your preference for cable routing and orientation.
View attachment 130260
Whereas the bigger hole is specific for 1 to 2 cables from the wiring loom/harness.
View attachment 130261
Moving to the upper headset ring, four slots have been made to allow each of the cables to pass through the upper headset without interfering or cross-cabling when preloading the headset.
View attachment 130262
Take note that the upper part of the ring is aluminium. Whereas the core body of the ring is plastic.
View attachment 130263
From what I've been told, making the body of the ring out of plastic should prevent cables from getting scored or tarnished through steering. But I suspect that this peice 'may' require replacing at some stage, (possibly before the upper headset bearing).
View attachment 130264
Regardless, I'd still recommend using grease. Especially on the ring, to prevent it from seizing to the fork steerer to ensure easy disassembly when the time comes.
View attachment 130265
The orientation of the headset upper ring to the headset top cover isn't difficult to fathom.
View attachment 130266
And the use of the metal piece on the ring should enable the headset to preload equally without unwanted distribution of force (which would have made the ring overall questionable in terms of longevity if it was all plastic).
View attachment 130267
Moving to the upper headset cup. Whilst it is a zs56 cup, you'll note that one side has a groove on the top.
View attachment 130268
In addition, the depth of the zs56 upper headset cup is bigger than most I've seen previously. Rest assured, it is designed to fully seat into the headtube of the CEF50 frame.
View attachment 130269
Looking at the zs56 headset cup from underneath, you'll see that the headset cup has a curved lip. Again, different to most zs56 cups. Usually, they have ridged edges to allow easier headset cup installation (when using a headset press).
View attachment 130271
Not much to say about the bearing. It feels smooth. But I tend to run bearings for headsets which offer a greater lifespan.
View attachment 130272
Nevertheless, you can see that the depth of the zs56 upper cup Is deeper. Again, please use grease when assembling the headset.
View attachment 130273
Please note, that this is the orientation in which the ring should face in conjunction with the headset cup. The ingressed part of the headset upper cup should be installed facing towards the back.
View attachment 130274
DO NOT install in this orientation, as you run the risk of preventing your steering from fully turning the full 180°+.
View attachment 130275
But like I said, you get the gist of what the upper headset looks like. The above image shows the orientation facing forward. Essentially, the writing should be on the back.
View attachment 130276
This is what the headset upper assembly will look like when facing towards the bike from the front.
View attachment 130277
Again, you can see that the ring and the headset top cover are designed to have the cables pass through it without crossing or tarnishing when preloading the headset.
View attachment 130278
Moving to the lower headset cup, this zs66 is similar to others I've seen.
View attachment 130279
The outer lip of the cup is ridged.
View attachment 130280
And the depth is no different compared to others. Essentially, if you already have a zs66 lower headset cup installed, you don't technically need to swap it.
View attachment 130281
Again, nothing to say or add about the bearing. It spin free.
View attachment 130282
And you can always keep them as spares. Or you can use. Your choice😅
View attachment 130283
Like I said, you don't need to swap the lower headset cup if you have one already installed. Believe me, its the same headset cup as what you already have.
View attachment 130284
The headset comes with optional crown races, depending on whether you chose to use a 1.5 tapered fork or a 1.8 supertapered fork. The above image is the 1.5 crown race.
View attachment 130286
The crown race itself doesn't have a rubber seal around it. Unlike other headset (UK made headsets) which I'm more familiar with.
View attachment 130287
You can see a slight gap between the race and the lower headset cup where the bearing is visible. Crown races aren't specific to a particular headset manufacturer. Rather, they're specific to a headset cup size, bearing diameter and fork steerer diameter. So basically, a crown race which uses a seal which is designed for the exact same headset cup will work and prevent the lower bearing from prematurely wearing out quicker.
View attachment 130288
Remember, the lower headset cup IS IDENTICAL to other zs66 headset cups.
View attachment 130289
The same thing for the 1.8 crown race as well.
View attachment 130290 No seal around the crown race.
View attachment 130291
And again, you can see the bearing showing. But like I said, a different crown race (from Hope, Works Components, Superstar Components etc) will work. Just make sure the crown race is designed for a zs66 headset cup👍🏿
View attachment 130292
So hopefully, I've explained this new headset. Again, there are some questions I have about the longevity side of things. Particularly, the upper ring. But the headset top cover seems decent. And I'd even go as far as to say that it's not just designed for an ebike which uses the Bafang system. Speaking of, View attachment 130293
You'll forgive me for choosing to use this headset with this Nukeproof Megawatt which also uses the same headset cable routing. And I can easily compare and contrast between,
View attachment 130294
This new headset.
View attachment 130295
And the original. FYI, I haven't had issues with this headset so far.

Thanks for reading and I'll keep you all updated👍🏿

Oh yeah, no star nut, 5mm bolt or headset top cap included with this headset✌🏿 View attachment 130270

Hello guys, is the headset still an issue as of today ?
Edit : is the crane still a better option than OEM ?
 

voigtkampff

Member
Oct 18, 2023
96
96
Poland
Folks, when doing routine check if threadlocker holds my suspension mounting bolts I managed to round the imbus socket on M8 shock mounting screw in the rocker (pic below). The threadlocker apperently was holding tight and imbus socket tolerance on OEM screw seems very loose... Anyway, I need to order replacement bolt and I don't have easy way of unscrewing it now for taking measurements. Has anybody measured this bolt already, could you share your dimensions, advise what do I need to order? I will unscrew it with help of special rounded head removal bit (which bites into the head destroying it) once I have the replacement ready.

IMG_1410.jpg


I mean I could probably ask SZZT folks about that but I'm kinda tired explainig things to them across time zones, resulting in multi-day roundtrips.
 

Herculesridesebikes

New Member
Jun 19, 2023
42
26
Australia
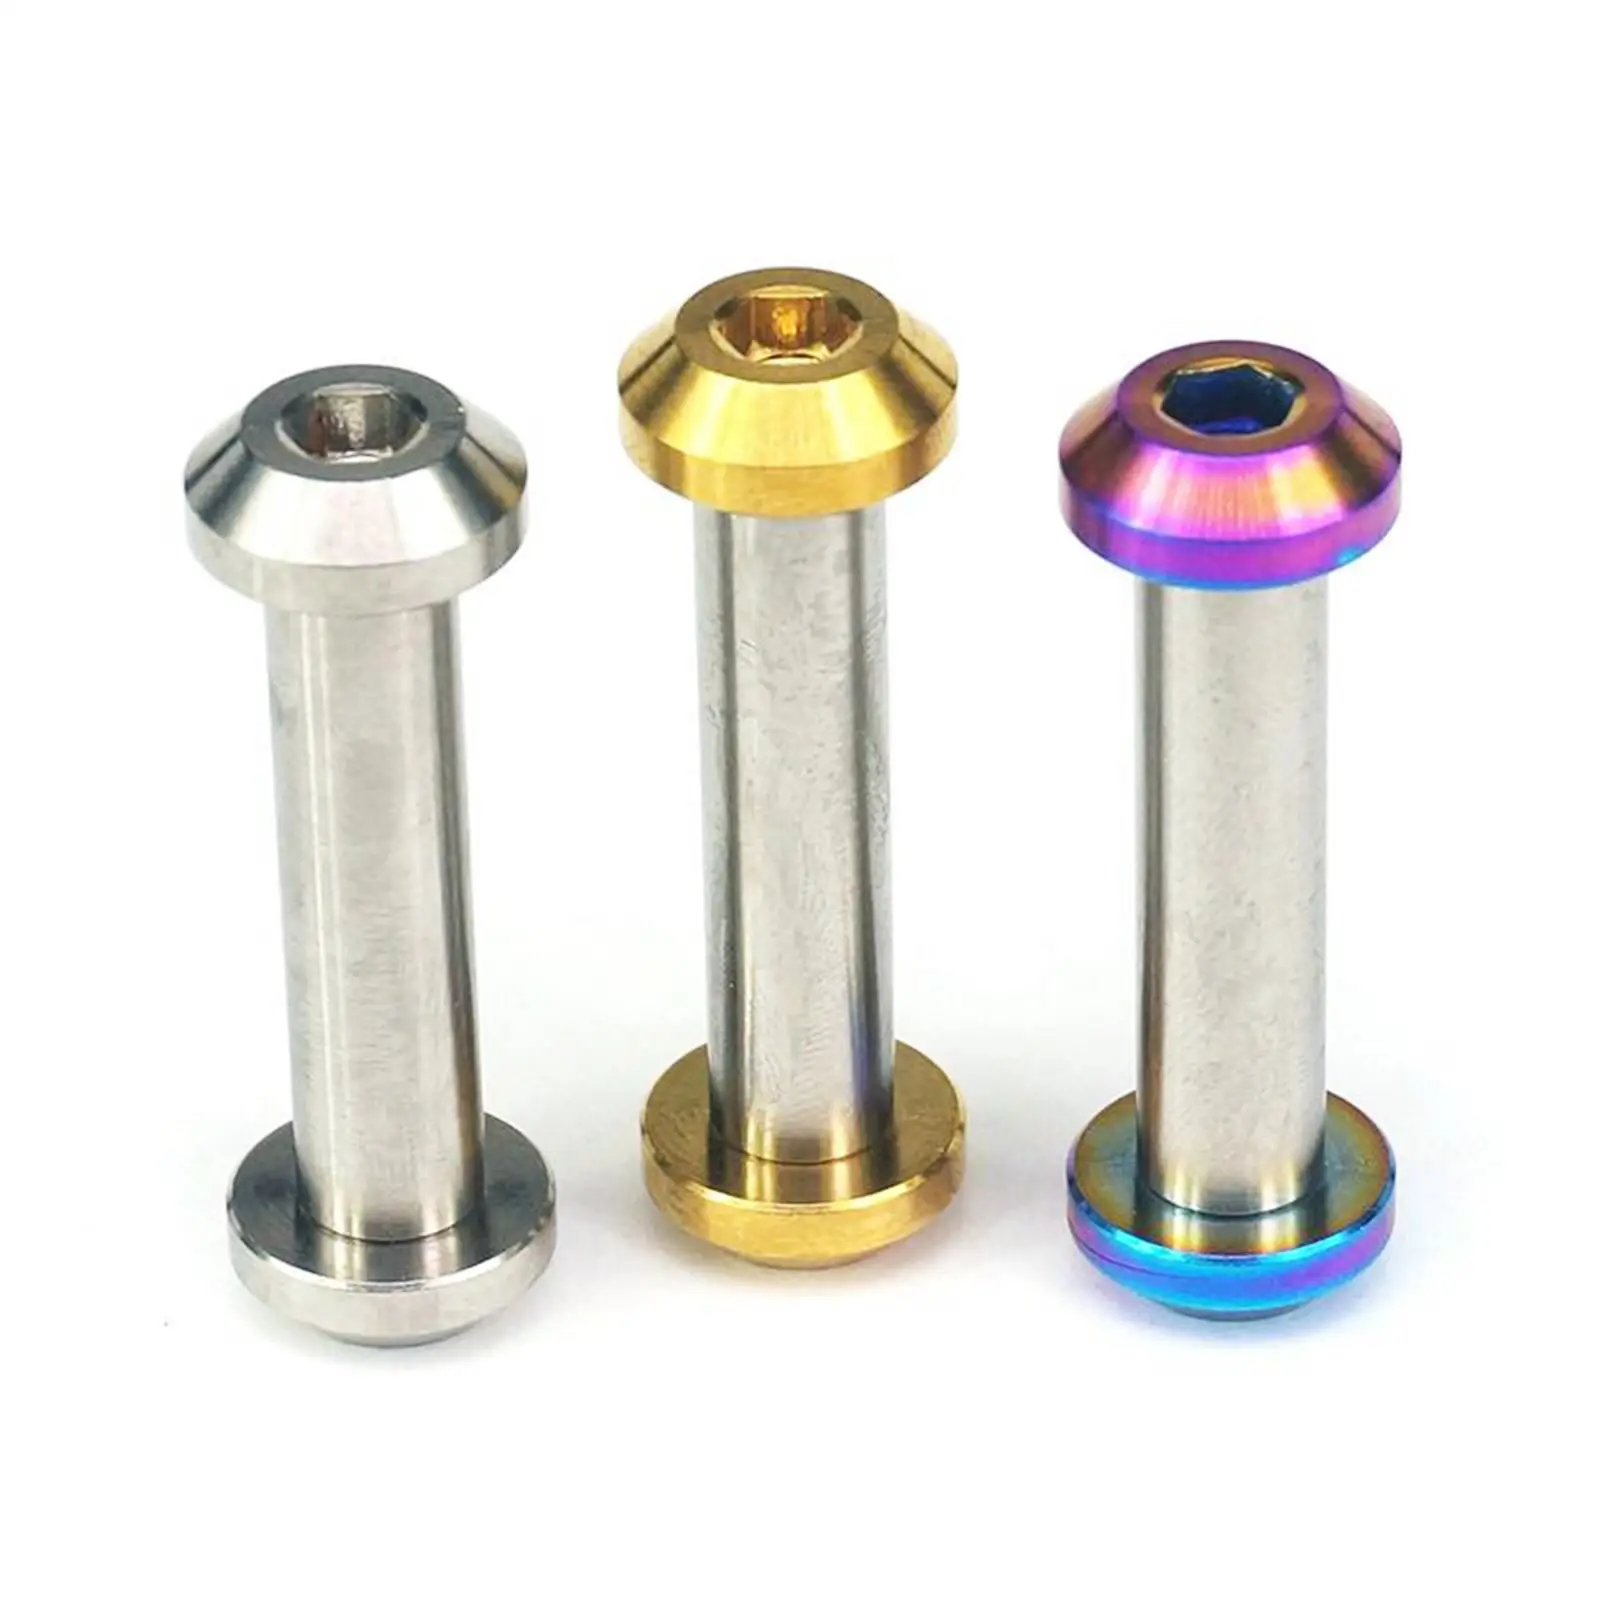
That sucks, not sure how you might remove them, Maybe a drill is you best bet. I snapped one of the shock bolts trying to torque to spec, I found the bolts are quite weak but when speaking to Jean they said they would make them stronger for future. I now use these TI bolts from Ali and they have been great so far.
You need a 33mm and. 38mm

AU$8.40 5%OFF | M6x1 Middle Nut Length 18-75mm Ti/Golden/Rainbow GR5 Titanium Bolts & Rod Nut For Bike Rear Suspension
 

EMTB Forums

Since 2018

The World's largest electric mountain bike community.

552K
Messages
27,898
Members
Join Our Community

Latest articles


Top