Part # 1: Orbea Rise - Upper Linkage Axle and Bearing Service

b33k34

Active member
Apr 15, 2021
279
102
UK
So my bearing tools are still in Aberdeen so I've had to resort to a quick regrease of bearings in order to ride tomorrow. On K's bike both of the shock lever pivot bearings in the frame were dry and needed new grease. On my bike weirdly one of them was running smoothly, the other notchy as hell so definitely needs replacing (can't feel it moving the back end as a whole though).

One last question - what do you use to clean off the old Loctite (on the axle more than bolts)
 

Rod B.

Well-known member
Aug 18, 2021
537
937
USA, Orange County Ca.
So my bearing tools are still in Aberdeen so I've had to resort to a quick regrease of bearings in order to ride tomorrow. On K's bike both of the shock lever pivot bearings in the frame were dry and needed new grease. On my bike weirdly one of them was running smoothly, the other notchy as hell so definitely needs replacing (can't feel it moving the back end as a whole though).

One last question - what do you use to clean off the old Loctite (on the axle more than bolts)
It depends upon how crusty and built up the blue thread locker is. If it's just a slight amount of buildup in the threads, I use an old tooth brush or stiff bristle nylon brush to remove as much as I can. I then apply a small dab of blue thread locker and re-install the bolt/hardware.

If you frequently service the linkage or remove the EP8 motor, you'll encounter build up of blue thread locker on bolt threads. There are several ways to remove old thread locker. The first method is to use heat to soften the thread locker so it can be removed. I have not used this method, but my buddy said he placed the linkage bolts in a pan of water and boiled them for a while. He then used a small dental pick and brush to remove the buildup from the threads. On occasion I've experimented with using the tip of a soldering iron or lighter to lightly heat and soften the thread locker so it can be removed. I use a stiff nylon gun cleaning brush and a dental type pick to clean the threads.

The EP8 motor bolt mounting holes (6) will also build up with blue thread locker after several removals and installations. You don't want to cram the bolt into the motor mounting hole and force the threading due to excessive build up of thread locker. This will eventually lead to either a cross thread or stripped threads. Purchase a tap which corresponds to the metric M8 threading. Gently use the tap to chase out the motor mounting bolt hole threads and remove the build up in the hole with a blast of air.

When thread locker cures it forms into a plastic which is mostly immune to chemicals. I have seen on forums where people say WD-40, Acetone, or Methylene Chloride will work. I haven't had "Easy" success with chemicals. The process is tedious. Here's a YouTube video of a guy using Acetone to remove thread locker from threads.

Because I'm that kind of guy, I 've saved the best method for last. This method works every single time and doesn't require you to spend a tedious hour burning your fingertips, losing your mind due to the tediousness of removing the thread locker, prevent you from riding your bike with your mates, or developing an addiction from breathing the chemical fumes......Buy a new set of bolt hardware from Orbea's spare parts catalog. It works like a champ every time.

Linkage Hardware Kit
Screenshot 2023-01-21 09.32.37.jpg


Motor Mounting Hardware Kit
Screenshot 2023-01-21 09.32.57.jpg


You Tube Video on Removal of Thread Locker From Threads
 

neilo

Member
Jan 25, 2022
50
21
Australia
I read it as Jene is having trouble removing the axle, not the linkage arms?

Jene - I have a stuck pivot axle and I've bought (but not yet tried) some penetrant oil at Rod's suggestion. Next time I have the linkage arms off I am going to try this. At this stage my pivot is still working ok.

Rod, Jene, and others, I thought I would provide a little update on my upper pivot axle situation.

I eventually ordered a new pivot axle and bearings, and just managed to get the old axle out now. I had to press it out (home made press using all-thread, washers, nuts, and a large/long socket as a receiver). It was a real struggle, I had it stuck halfway through at one point - i.e. even after pushing it out of the first bearing I still couldn't get it through the second bearing. Had to modify the press a bit to get the second half done.

Anyway the interesting things to report are:

1. No sign of ANY corrosion or damage to the shoulders of the axle or the inner bearing races. It appears in perfect condition.
2. The new axle slides in and out easily, just as described by others. The old axle cannot be reinserted by hand.
3. Measurement of the axle with a digital vernier confirms why - the new axle measures around 19.98mm OD whereas the old one measures around 20.00mm or even 20.01mm.

Bearings themselves were buggered, my LBS pressed them out and inserted the new ones for me no trouble.

Thanks for all the assistance.
 

neilo

Member
Jan 25, 2022
50
21
Australia
any reason you would not knock them out with a brass drift then tap new ones back in on the carbon model? Pretty sure the local dealer said that is how they would do them...
Tried that, but I just don't trust myself enough taking a hammer to the bike, leading to a limit to how hard I was prepared to tap :). But that was the method used by the mechanic when I asked. He did say he used an actual hammer on the drift, rather than a rubber mallet which was my chosen tool. Perhaps the mallet doesn't generate the necessary shock to dislodge them?
 

b33k34

Active member
Apr 15, 2021
279
102
UK
Replaced the bearing that had gone on my linkage pivot yesterday. Was surprisingly hard to remove - the button popped off my power button in the process so I'm guessing there must have been a hell of a twist on the frame when I was hammering at it...
I did work out a good way of removing the levers from the splined axle as if it doesn't come off by hand there's not really anything to tap on. However, a 15mm piece of wooden dowel lets you tap it out from the centre of the lever on the other side. Then a 19mm dowel to removed the axle through the other bearing and the the 15mm dowel again to remove the axle from the second lever once it's off the bike.
 

Frankyspec

Member
Dec 3, 2022
59
19
Belgium
Hi, I have a rise m team 2023 on the way and i already contacted Orbea twice with the questions if the bearings on the new pivot link are the same as the ones on the previous model, but still no answer … maybe better quality, does anyone have an idea on this question?
 

Rod B.

Well-known member
Aug 18, 2021
537
937
USA, Orange County Ca.
Hi, I have a rise m team 2023 on the way and i already contacted Orbea twice with the questions if the bearings on the new pivot link are the same as the ones on the previous model, but still no answer … maybe better quality, does anyone have an idea on this question?
Frankyspec,

I checked on Orbea’s website and I don’t see the 2023 Rise Blue Paper posted yet. I also checked the “Spare Parts” section and don’t see any parts listed for the 2023 model yet.

In the past I’ve tried emailing Orbea Spain and never got a response. You might want to try emailing Orbea USA and see if they can help. They are usually good about responding and answering technical questions.. Their email address is [email protected].

Hopefully they can help you out.
Rod
 

Frankyspec

Member
Dec 3, 2022
59
19
Belgium
Frankyspec,

I checked on Orbea’s website and I don’t see the 2023 Rise Blue Paper posted yet. I also checked the “Spare Parts” section and don’t see any parts listed for the 2023 model yet.

In the past I’ve tried emailing Orbea Spain and never got a response. You might want to try emailing Orbea USA and see if they can help. They are usually good about responding and answering technical questions.. Their email address is [email protected].

Hopefully they can help you out.
Rod
Hi Rod,

thank you for the feedback and i’ll try Orbea USA .
Frank
 

Frankyspec

Member
Dec 3, 2022
59
19
Belgium
It seems that the bearings on the new pivot are the same as on the model 2022… so no increase in quality or durability … is the answer from Orbea.
 

Decolocsta

Active member
Aug 10, 2022
71
215
Germany
It seems that the bearings on the new pivot are the same as on the model 2022… so no increase in quality or durability … is the answer from Orbea.

But it seems that the new designed linkage has a seal between the Link and the Frame. So there may be a increase in durability.
 

Rod B.

Well-known member
Aug 18, 2021
537
937
USA, Orange County Ca.
But it seems that the new designed linkage has a seal between the Link and the Frame. So there may be a increase in durability.
The upper linkage arm attachment is a weak spot on an otherwise fantastic bike. As I've noted in several technical articles, it requires frequent maintenance in order to prevent play developing in the rear triangle and or noise issues developing.

Hopefully the new pivot linkage arm and axle design will prove itself to be a solid design.
Screenshot 2023-02-01 08.21.35.jpg


Note that the drive side linkage arm does not appear to feature a pinch bolt. The addition of an axle seal is a very welcome improvement.
Screenshot 2023-02-01 08.23.02.jpg


The non-drive, left side linkage arm does feature a pinch bolt for clamping the arm to the axle. It'll be interesting to view the 2023 Rise Blue Paper, to see how the new design works. More importantly, can it be retrofitted onto the older "M" series Orbea Rise?
Screenshot 2023-02-01 08.24.46.jpg


Bearings:
In regards to your comment on the new and older Rise sharing the same bearings. I've spent a lot of time trying to find a quality replacement for Enduro bearings, such as what's found on the Rise. I have a love hate relationship with Enduro bearings. I ride a lot, about 2,500 miles/4000 kilometers a year and I tend to ride very rocky trails. The addition of an eBike motor doesn't help and I go through bearings rather quickly.

Gooseberry Mesa, Hurricane Utah.......So good.
IMG_1763.JPG


Entrance to the canyon section, Captain Ahab, Moab Utah
IMG_5829.JPG


Captain Ahab, Moab Utah
Screenshot 2023-02-01 09.19.32.jpg


Absolutely beautiful Mount Nebo and it's incredible rock sections, Mount Nebo State Park, Dardenelle Arkansas. My buddy John (Yellow shorts) is riding a Trek Rail, I'm on my modified Rise M20.
IMG_2068 (2).JPG


There are bearing manufacturers who make excellent bearings, i.e. Temken, SKF, NTN, NSK, etc. However, they do not always manufacturer bearings in the smaller sizes or rugged type needed for mountain bikes. Moreover, the cost per unit for a quality bearing is triple the cost of an Enduro bearing.

Enduro bearings used on the Rise are decent bearings, they are not great, but they are not bad. The linkage arm bearings lasted me 3,200 miles. I replaced the upper and lower pivot axle bearings at 1,800 miles. The Enduro Bearing company provides a useful resource to the mountain bike industry. Here's the thing, Enduro offers bearings which are readily available, feature a decent rubber seal and they manufacture "Max" type bearings which are designed to withstand the impacts associated which mountain bike suspension. The cost per unit is also pretty cheap. I can usually buy two or three Enduro bearings for the cost of one quality bearing. You get what you pay for, but here's the thing. When I did replace Enduro bearings with a high quality and expensive pivot bearing, I did not get a corresponding increase in lifespan or performance to justify the cost increase. Wheel hub and freehub bearing are a different story. I do not care for Enduro wheel hub bearings, they do not last. I always go as high in quality as possible when it comes to wheel hub and freehub bearings.

Be safe,
Rod
 

MOG

Member
Feb 24, 2022
80
94
Abergavenny
Well just spent a happy couple of hours replacing all the rear triangle/linkage bearings (except main pivot whihc was fine). All done easily enough with nothing more than a halfords socket set and a treaded M8 bar, plus a decent vice to squeeze the pivot bearings back into the 2 side pivot bars. Much much better on the back end now.
 

Erjabato

Member
May 28, 2022
41
33
The great Spain
Great post @Rod B. !!!
Thanks for takeing the time to produce such a complete and helpful guide.
I inspected my upper linkage after 1 year riding and some creaking sounds last days, and this was really useful. I cleaned and re-greased it following blueprint + this guide.
My enduro 6804 bearings red rubber seal and a bit of the paint in the frame around it were a bit worn already due to sand and dust there moving up and down.
That worried me a bit (damaged seal + exposed bearing = problems coming soon) and made me think about a way to improve durability. I found 2 interesting ideas:

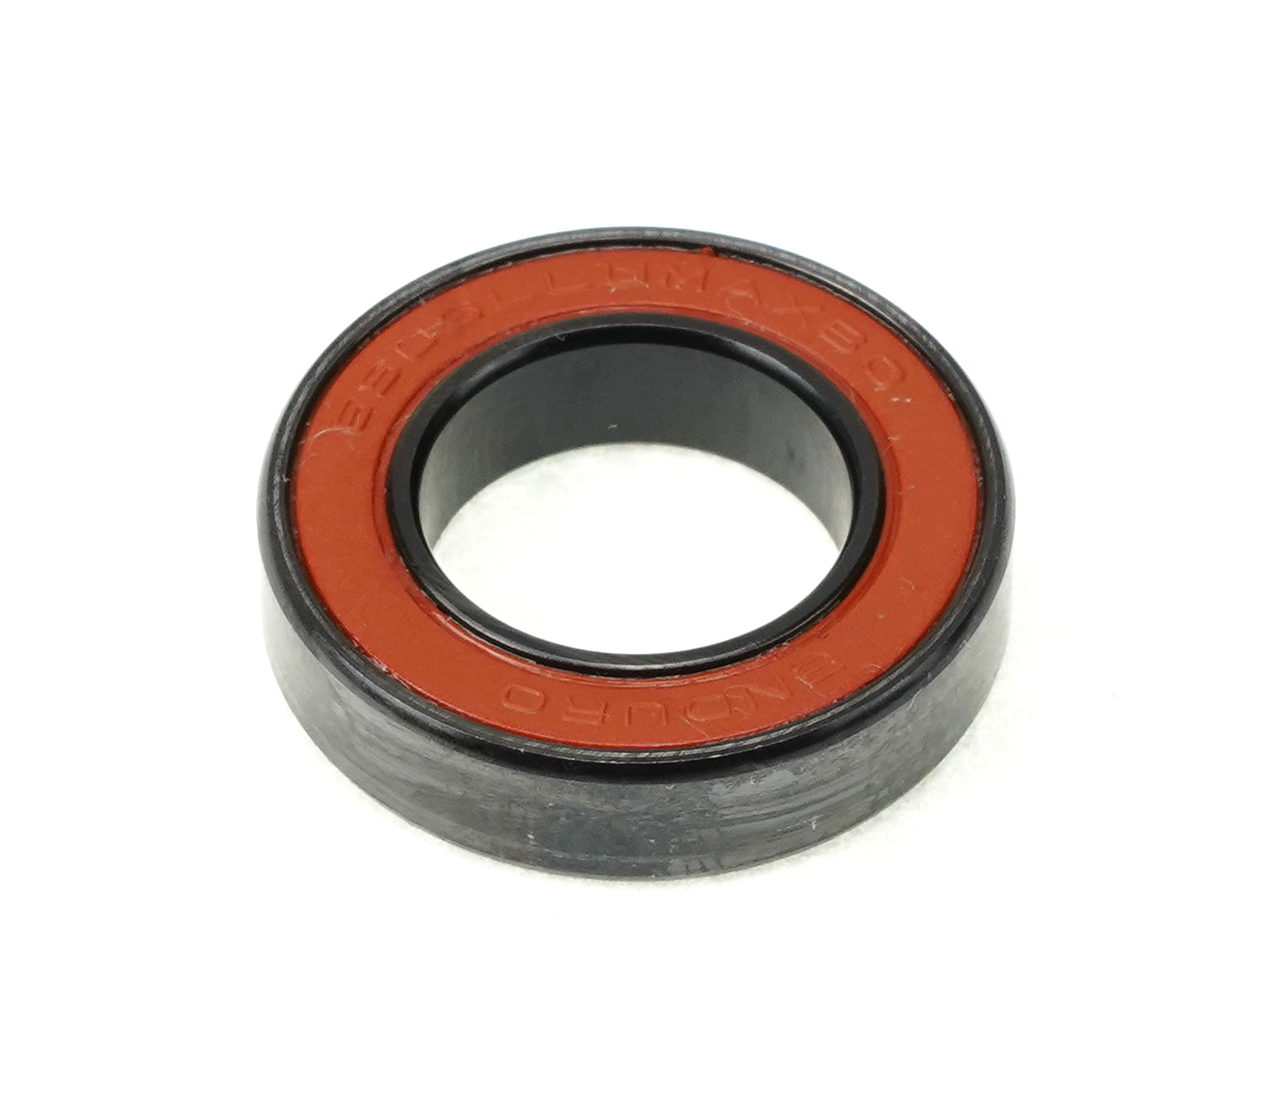
1) Using Enduro 6804 MAX LLU BOSL: 6804 LLU MAX BOSL - Solid-Lube, MAX-Design, Black-Oxide, ABEC-3, radial suspension bearing - 20mm x 32mm x 7mm claiming to be maintenance free by using solid lube.

2) Using Orbea Rise 2023 Carbon upper axle bearings rubber seals in my 2022 Hydro: SEAL RING KIT AXLE LINK-FRAME RISE CARBON 23 It is really cheap, and could make a big difference, I didn't know about it before my inspection work, and I still doubt about compatibility of seals with 22 models (I couldn't find yet 23 blue paper).

Any experience with any of the 2 above points anyone?
 
Last edited:

Rod B.

Well-known member
Aug 18, 2021
537
937
USA, Orange County Ca.
Great post @Rod B. !!!
Thanks for takeing the time to produce such a complete and helpful guide.
I inspected my upper linkage after 1 year riding and some creaking sounds last days, and this was really useful. I cleaned and re-greased it following blueprint + this guide.
My enduro 6804 bearings red rubber seal and a bit of the paint in the frame around it were a bit worn already due to sand and dust there moving up and down.
That worried me a bit (damaged seal + exposed bearing = problems coming soon) and made me think about a way to improve durability. I found 2 interesting ideas:

1) Using Enduro 6804 MAX LLU BOSL: 6804 LLU MAX BOSL - Solid-Lube, MAX-Design, Black-Oxide, ABEC-3, radial suspension bearing - 20mm x 32mm x 7mm claiming to be maintenance free by using solid lube.

2) Using Orbea Rise 2023 Carbon upper axle bearings rubber seals in my 2022 Hydro: SEAL RING KIT AXLE LINK-FRAME RISE CARBON 23 It is really cheap, and could make a big difference, I didn't know about it before my inspection work, and I still doubt about compatibility of seals with 22 models (I couldn't find yet 23 blue paper).

Any experience with any of the 2 above points anyone?
Erjabato,
I'm happy you found the post useful. My experience with the paint damage around the upper and lower pivot axles was similar to your Rise. Orbea never sealed these areas or protected them. Because of this, small pebbles, dirt and sand can work into the these areas and damage the paint. I used to have a Yeti SB130 and it had a similar issue. Some manufacturers do a better job than others at providing frame protection.

I had not heard of Enduro, solid lube bearings, thank you for letting me know about them. I think they are an excellent suggestion, especially for those riding areas where a lot of moisture or a lot of dust exists. I owned my Rise for 18 months and it had 3,200 miles on it when I sold it to my brother. Before selling it, I replaced the linkage arm bearings for the first time. On the other hand, I replaced the two lower and two upper pivot axle bearings three times in 18 months of riding. I would definitely use Enduro Solid Lube bearings for the axle bearings.

Regarding the seal rings offered for use on the 2023 Rise. I have looked into their use on 2020/2022 Rises. I have not had the opportunity to look at a 2023 Rise out on the trails. If I can find one, I'll be able to know if it'll work.

Here's the issue I'm concerned about. The pivot axle diameter is the same on older Rises and the new 2023 Rise. This means the seal would slip over the older style pivot axle. What I'm concerned about is the clearance between the linkage arm and frame on the older models. As you've noted, the paint around the areas where the pivot bearings mount gets pretty chewed up. If we were to wedge a pivot axle seal between the linkage arm and frame, I would be worried this could cause paint damage from the seal rubbing on the frame and eventually lead to carbon fiber damage. I don't know this would actually happen, however it's a concern.

If somebody reading this has the new 2023 Rise. Please take some detailed pictures of the linkage arm assembly and upper pivot axle area and post them to this thread. I would appreciate it.

Cheers,
Rod
 

Decolocsta

Active member
Aug 10, 2022
71
215
Germany
My Upper Shock Mount is driving me Crazy.

Since day 1 its creaking.
Its 100% the Upper Shock Mount.

Ive tryed with grease, without, higher torque. But the noises keep comming Back.

Its getting so annoying.

Is there any Solution?

I think the Space inbetween the Frame Mount where the shock eye gets torqued in is a Little Bit to Wide. But dont Know if this causes the Problem.

Thank you

Edit: H Frame
 
Last edited:

Rod B.

Well-known member
Aug 18, 2021
537
937
USA, Orange County Ca.
My Upper Shock Mount is driving me Crazy.

Since day 1 its creaking.
Its 100% the Upper Shock Mount.

Ive tryed with grease, without, higher torque. But the noises keep comming Back.

Its getting so annoying.

Is there any Solution?

I think the Space inbetween the Frame Mount where the shock eye gets torqued in is a Little Bit to Wide. But dont Know if this causes the Problem.

Thank you

Edit: H Frame
Decolocsta,

Have you serviced your upper axle yet? By service, I am referring to removing the linkage arms from the upper axle and applying a very slight amount of Loctite 638 cylindrical retaining compound to the splines. After apply the retaining compound, following my procedures listed in this thread for setting linkage arm pre-load, using the pre-load tool that came with your Rise.

When the creaking started on my Rise (About two months after owning it), the noise drove me crazy. I had a hard time isolating the noise. I initially thought it was the rear shock, headset, my seat post, a bad saddle rail and lack of upper axle grease. I finally figured out that it was the upper axle linkage arms which had loosened and moved on the upper axle. When this occurs, it introduces play in the axle and the axle is allowed to shift side to side. The creaking noise is the alloy axle moving across the steel pivot bearings.

I know you say you are 100% certain it's the rear shock mount however, at one point I too was 100% certain it was the rear shock.......The thing about bikes is that you are dealing with a rigid frame. A rigid frame much like a guitar, will cause sound to travel. I've lost count of how many people have brought me their bikes for a bad bottom bracket, when it was actually a bad rear wheel hub bearing or a loose headset. Noise travels on a bike.

If you have serviced the upper axle, applied 638 retaining compound and set proper linkage arm pre-load and the noise persists, then I would examine the rear shock mount. I would remove the shock from the frame and disassemble the mounting hardware. I would examine the bushings in both shock eyes for looseness and re-grease them. I would examine the bolting hardware used to attach the rear shock yoke to the linkage arms. I would examine the linkage arm bearings which the shock yoke mounts to. I would insure all of the linkage arm shock yoke spacers were installed by the factory and that none were accidentally left out. Lastly, your Rise will have a very slight amount of play where the shock bolts to the yoke. This play is required or else there would be binding.

Does the noise occur only while riding, or does it also occur with the bike stationary and you moving your weight up and down on the bike?

Cheers,
Rod
 

Decolocsta

Active member
Aug 10, 2022
71
215
Germany
Decolocsta,

Have you serviced your upper axle yet? By service, I am referring to removing the linkage arms from the upper axle and applying a very slight amount of Loctite 638 cylindrical retaining compound to the splines. After apply the retaining compound, following my procedures listed in this thread for setting linkage arm pre-load, using the pre-load tool that came with your Rise.

When the creaking started on my Rise (About two months after owning it), the noise drove me crazy. I had a hard time isolating the noise. I initially thought it was the rear shock, headset, my seat post, a bad saddle rail and lack of upper axle grease. I finally figured out that it was the upper axle linkage arms which had loosened and moved on the upper axle. When this occurs, it introduces play in the axle and the axle is allowed to shift side to side. The creaking noise is the alloy axle moving across the steel pivot bearings.

I know you say you are 100% certain it's the rear shock mount however, at one point I too was 100% certain it was the rear shock.......The thing about bikes is that you are dealing with a rigid frame. A rigid frame much like a guitar, will cause sound to travel. I've lost count of how many people have brought me their bikes for a bad bottom bracket, when it was actually a bad rear wheel hub bearing or a loose headset. Noise travels on a bike.

If you have serviced the upper axle, applied 638 retaining compound and set proper linkage arm pre-load and the noise persists, then I would examine the rear shock mount. I would remove the shock from the frame and disassemble the mounting hardware. I would examine the bushings in both shock eyes for looseness and re-grease them. I would examine the bolting hardware used to attach the rear shock yoke to the linkage arms. I would examine the linkage arm bearings which the shock yoke mounts to. I would insure all of the linkage arm shock yoke spacers were installed by the factory and that none were accidentally left out. Lastly, your Rise will have a very slight amount of play where the shock bolts to the yoke. This play is required or else there would be binding.

Does the noise occur only while riding, or does it also occur with the bike stationary and you moving your weight up and down on the bike?

Cheers,
Rod


Hey Rob, no its not the Upper Axle, did. that several times. But it wasnt the Upper Shock Mount.

It was the lower main pivot, son of a b….

29B17CAA-FD32-45AB-931C-082784789191.jpeg
 
Last edited:

Rod B.

Well-known member
Aug 18, 2021
537
937
USA, Orange County Ca.
Hey Rob, no its not the Upper Axle, did. that several times. But it wasnt the Upper Shock Mount.

It was the lower main pivot, son of a b….

View attachment 112318
The lower pivot axle will bite you on the ass every time........That's awesome you tracked the noise down. Been there and done that.

If you haven't seen it, here's my tech article on servicing the lower pivot axle.


You know how the upper pivot axle is fully enclosed by the frame? The lower pivot axle looks like it too is fully enclosed by the frame. This is not so. If you were to remove the motor, you'll see that the lower pivot axle is fully exposed it's entire length, accept where the axle rides on bearings and screws into the chain stay. This openness exposes the lower pivot axle bearings to water and dirt much more than the upper pivot axle. This in turn dries out the axle and bearing lubrication quickly. I also found the lower pivot bearings tended to become contaminated with dirt and thus wear out quicker than the upper pivot bearings.

Be safe,
Rod
 

Decolocsta

Active member
Aug 10, 2022
71
215
Germany
Yeah, thats why i fitted a Sicomtb fender from the Start. But the Rise seems like a Diva, steady complaining.

Creaking from Upper Axle, After that creaking from the Motor Bolts, and now the lower Axle.

Not even 1000km in.

Never had a bike that was so extra.
 

Rod B.

Well-known member
Aug 18, 2021
537
937
USA, Orange County Ca.
Yeah, thats why i fitted a Sicomtb fender from the Start. But the Rise seems like a Diva, steady complaining.

Creaking from Upper Axle, After that creaking from the Motor Bolts, and now the lower Axle.

Not even 1000km in.

Never had a bike that was so extra.
That's funny, I had the exact same impression with the bike. It's why I started writing the articles. I figured I wasn't the only one out there dealing with the creaks. I've never had a bike that required so much up front maintenance. On a positive note, once you get everything dialed in, the bike's good to go....until the next chain or rear wheel hub bearing (Drive side). Wahoo!
 

theremotejuggernaut

Active member
Aug 2, 2022
392
281
UK
So... I guess my linkage is knackered...

Last ride, had a hell of a rattle develop. Thought shock bushings at first but it was a definite rattle rather than a knocking.

Stripped it all down earlier in the week and found pretty much all the bearings needing either regreasing or replacing. Some of them notchy and some of them have noticeable play after regreasing everything.

Knocked out the upper linkage axle and cleaned everything up. It had been assembled dry (no grease or loctite).

I planned to use a retaining compound to tighten things up a bit but on reassembly, torqued to 15nM, the left hand rocker doesn't grip the axle even slightly. Can't preload anything as the axle just pulls out of the rocker.

Looking on the Orbea website, the estimated delivery date isn't until the end of April for the axle and if I want a left hand rocker, those aren't available until July!

Pretty annoyed at myself for not checking everything sooner.

Still, it's only only covered about 1000 miles in the last 9 months and I'm fairly unimpressed by the state fo the bearings in that time. Not really keen on using OEM bearings again given how little grease remained.

I never heard any creaking or had any noticeable signs that something was wrong with it until the death rattle started last weekend. It's surprised me a little. Although I hadn't checked any of the bearings, I had checked the preload on the axle when I got the bike and had loosened the pinch bolts and checked the preload a couple of times. Nothing ever seemed to be out of place.

Anyway, onto retaining compounds...

I had dismissed the recommendation of Loctite 638 as its stated to be a permanent bond which seems daft when the rockers will need to come off to change the bearings. I had chosen something equivalent to 641 that was available locally. My understanding was that the Loctite is used to prevent rotational movement of the axle in the rocker.

It's not there to stick the 2 together to allow the preloading of the axle is it?
 

Rod B.

Well-known member
Aug 18, 2021
537
937
USA, Orange County Ca.
So... I guess my linkage is knackered...

Last ride, had a hell of a rattle develop. Thought shock bushings at first but it was a definite rattle rather than a knocking.

Stripped it all down earlier in the week and found pretty much all the bearings needing either regreasing or replacing. Some of them notchy and some of them have noticeable play after regreasing everything.

Knocked out the upper linkage axle and cleaned everything up. It had been assembled dry (no grease or loctite).

I planned to use a retaining compound to tighten things up a bit but on reassembly, torqued to 15nM, the left hand rocker doesn't grip the axle even slightly. Can't preload anything as the axle just pulls out of the rocker.

Looking on the Orbea website, the estimated delivery date isn't until the end of April for the axle and if I want a left hand rocker, those aren't available until July!

Pretty annoyed at myself for not checking everything sooner.

Still, it's only only covered about 1000 miles in the last 9 months and I'm fairly unimpressed by the state fo the bearings in that time. Not really keen on using OEM bearings again given how little grease remained.

I never heard any creaking or had any noticeable signs that something was wrong with it until the death rattle started last weekend. It's surprised me a little. Although I hadn't checked any of the bearings, I had checked the preload on the axle when I got the bike and had loosened the pinch bolts and checked the preload a couple of times. Nothing ever seemed to be out of place.

Anyway, onto retaining compounds...

I had dismissed the recommendation of Loctite 638 as its stated to be a permanent bond which seems daft when the rockers will need to come off to change the bearings. I had chosen something equivalent to 641 that was available locally. My understanding was that the Loctite is used to prevent rotational movement of the axle in the rocker.

It's not there to stick the 2 together to allow the preloading of the axle is it?
Brother, I’m sorry to hear about your issues. Orbea isn’t the quickest when it comes to shipping parts. I live in California. It’s been my experience that it usually takes Orbea a week to recognize the order. Then another week to process the order, then another one to two weeks to ship the order. You’re in the UK, so hopefully it’ll be quicker. When you place your order, you should consider also ordering a chain guide kit and a new chain stay guard. These are high wear items. Check you chain stay guard at the front near the chain ring. You’ll see a groove developing from chain rub. You don’t want the chain to rub through into the frame. The inner arm on the chain guide head also tends to get thin after a while. When it does, it’ll allow the chain to jump off the chainring. In full Boost, it’s like a chainsaw when the chain comes off.

Regarding your linkage arms. They typically do not wear. It’s the splines on the axle that wear. It’s made of a softer alloy than the linkage arms. I would still order the axle and arm to avoid problems. I have a suggestion you may want to try. I don’t know if this will work, but it may allow you to keep riding while waiting for parts. I would remove the axle from the frame and place it on a block of soft wood. I would take a fine point center punch and using a small hammer, dimple the axle splines in a few places 360 degrees around the axle’s splines. The dimples should raise material on the axle and allow the linkage arm to get a bite on the splines. This isn’t a permanent fix, but it may get you by while waiting for the new parts.

Loctite 638 isn’t a permanent bond.….Unless you go full monty and saturate everything likes it’s a spring UK rain. Use Loctite 638 very sparingly, a little bit on the splines and smear it about with your fingertip. It’ll hold the axle and spline together like glue, but you can disassemble the parts at a later date. Loctite 638 has a long curing time. You can apply the compound and easily have enough time to set pre-load. I know there are weaker retaining compounds, but I don’t think they can withstand the stress of the linkage arms wanting to pull away from the axle splines. You need holding power or else you’ll be doing this again.

If I were riding in the UK with such wet riding conditions, I would look into Enduro’s “Solid Lube” bearings. I think they would suit your riding environment much better than stock bearings.


Let me know how you make out.

Be safe,
Rod
 

theremotejuggernaut

Active member
Aug 2, 2022
392
281
UK
Brother, I’m sorry to hear about your issues. Orbea isn’t the quickest when it comes to shipping parts. I live in California. It’s been my experience that it usually takes Orbea a week to recognize the order. Then another week to process the order, then another one to two weeks to ship the order. You’re in the UK, so hopefully it’ll be quicker. When you place your order, you should consider also ordering a chain guide kit and a new chain stay guard. These are high wear items. Check you chain stay guard at the front near the chain ring. You’ll see a groove developing from chain rub. You don’t want the chain to rub through into the frame. The inner arm on the chain guide head also tends to get thin after a while. When it does, it’ll allow the chain to jump off the chainring. In full Boost, it’s like a chainsaw when the chain comes off.

Regarding your linkage arms. They typically do not wear. It’s the splines on the axle that wear. It’s made of a softer alloy than the linkage arms. I would still order the axle and arm to avoid problems. I have a suggestion you may want to try. I don’t know if this will work, but it may allow you to keep riding while waiting for parts. I would remove the axle from the frame and place it on a block of soft wood. I would take a fine point center punch and using a small hammer, dimple the axle splines in a few places 360 degrees around the axle’s splines. The dimples should raise material on the axle and allow the linkage arm to get a bite on the splines. This isn’t a permanent fix, but it may get you by while waiting for the new parts.

Loctite 638 isn’t a permanent bond.….Unless you go full monty and saturate everything likes it’s a spring UK rain. Use Loctite 638 very sparingly, a little bit on the splines and smear it about with your fingertip. It’ll hold the axle and spline together like glue, but you can disassemble the parts at a later date. Loctite 638 has a long curing time. You can apply the compound and easily have enough time to set pre-load. I know there are weaker retaining compounds, but I don’t think they can withstand the stress of the linkage arms wanting to pull away from the axle splines. You need holding power or else you’ll be doing this again.

If I were riding in the UK with such wet riding conditions, I would look into Enduro’s “Solid Lube” bearings. I think they would suit your riding environment much better than stock bearings.


Let me know how you make out.

Be safe,
Rod
Thanks Rod,

I had thought that the linkage arms would be less likely to wear. I figured I'd order one anyway due to the long wait. Don't really want to wait for weeks for the axle to arrive and then find I also need to wait for the arm.

Interesting point on the solid lube bearings. I've actually been looking at those already. I have a wheelset from Superstar Components here in the UK that came with SKF MTRX bearings which I believe to be similar.

Even woth regular greasing, I was trashing a set of wheel bearings at least once a year and those solid lube bearings just kept going despite riding through axle deep puddles week in, week out.

I agree that they would be good to try but my god, they're expensive if it doesn't work out as planned 😂

I had considered using a length of threaded rod and some nuts/ washers to clamp the linkage assembly together as a temporary measure but I think I'll just get the bits on order from Orbea and cross my fingers that they arrive sooner that stayed. I've still got my hardtail so it's not like I'm without a bike. It just needs to come off the turbo trainer and be turned back into mtb lol.
 

BiGJZ74

E*POWAH Master
Subscriber
Mar 17, 2021
573
444
American Canyon, CA
Brother, I’m sorry to hear about your issues. Orbea isn’t the quickest when it comes to shipping parts. I live in California. It’s been my experience that it usually takes Orbea a week to recognize the order. Then another week to process the order, then another one to two weeks to ship the order. You’re in the UK, so hopefully it’ll be quicker. When you place your order, you should consider also ordering a chain guide kit and a new chain stay guard. These are high wear items. Check you chain stay guard at the front near the chain ring. You’ll see a groove developing from chain rub. You don’t want the chain to rub through into the frame. The inner arm on the chain guide head also tends to get thin after a while. When it does, it’ll allow the chain to jump off the chainring. In full Boost, it’s like a chainsaw when the chain comes off.

Regarding your linkage arms. They typically do not wear. It’s the splines on the axle that wear. It’s made of a softer alloy than the linkage arms. I would still order the axle and arm to avoid problems. I have a suggestion you may want to try. I don’t know if this will work, but it may allow you to keep riding while waiting for parts. I would remove the axle from the frame and place it on a block of soft wood. I would take a fine point center punch and using a small hammer, dimple the axle splines in a few places 360 degrees around the axle’s splines. The dimples should raise material on the axle and allow the linkage arm to get a bite on the splines. This isn’t a permanent fix, but it may get you by while waiting for the new parts.

Loctite 638 isn’t a permanent bond.….Unless you go full monty and saturate everything likes it’s a spring UK rain. Use Loctite 638 very sparingly, a little bit on the splines and smear it about with your fingertip. It’ll hold the axle and spline together like glue, but you can disassemble the parts at a later date. Loctite 638 has a long curing time. You can apply the compound and easily have enough time to set pre-load. I know there are weaker retaining compounds, but I don’t think they can withstand the stress of the linkage arms wanting to pull away from the axle splines. You need holding power or else you’ll be doing this again.

If I were riding in the UK with such wet riding conditions, I would look into Enduro’s “Solid Lube” bearings. I think they would suit your riding environment much better than stock bearings.


Let me know how you make out.

Be safe,
Rod
I haven't had the need the brake the 638 free yet, but may have used a bit more than sparingly. When I do, whats the best way to break it free? I did rub it on w/ fingertip, but linkage axle was a bit worn as it loosened about 10 times by the time I found ur post. I want to replace the linkage arms and axle whenever Orbea gets them back in stock.
 

theremotejuggernaut

Active member
Aug 2, 2022
392
281
UK
Regarding your linkage arms. They typically do not wear. It’s the splines on the axle that wear. It’s made of a softer alloy than the linkage arms. I would still order the axle and arm to avoid problems.
Had another look at it today.

The issue I've got is that the left hand spline on the axle doesn't sit tight in the left hand arm.

I got the linkage back on the bench and flipped the axle. With the right hand spline in the left arm, it's perfectly tight with no play which points to the axle being worn but I think the arm is good still. It's even a tight fit without torquing the pinch bolt.

Given the long lead time (July) I think I'll take a chance and just order a new axle and get some loctite 638.
 

Rod B.

Well-known member
Aug 18, 2021
537
937
USA, Orange County Ca.
I haven't had the need the brake the 638 free yet, but may have used a bit more than sparingly. When I do, whats the best way to break it free? I did rub it on w/ fingertip, but linkage axle was a bit worn as it loosened about 10 times by the time I found ur post. I want to replace the linkage arms and axle whenever Orbea gets them back in stock.
BiGJZ74,
I posted this on another Orbea thread. A user had asked how difficult it was to get the linkage arms back off after Loctite 638 has been used.

Here was my response.

It depends................If the 638 was applied sparingly, you can usually take a soft rubber mallet and tap the outer end of the drive side linkage arm back and forth. This should be sufficient to break the bond of the 638 and walk the linkage arm off of the axle.


Screenshot 2023-03-26 06.25.13.jpg


The Rise Blue Paper states that the inside threaded portion of the upper pivot axle should be on the right (Drive Side) of the bike. My bike and other Rises have come from the factory with the threaded side of the axle located on the left (Non-Drive Side) of the bike. Per the Blue Paper, I separated the axle from the linkage arms, removed it from the frame and turned the axle so that the threaded side faces towards the right.

This was the only time I have separated the left linkage arm from the upper splined axle. Every time you remove a linkage arm, you remove a small amount of material from the splined interface between the axle and linkage arm. I always remove the axle and left linkage arm as a one piece unit. Unless you plan to replace the upper axle and or, the left linkage arm, then leave the two pieces attached permanently.

Here's where I que the theme song from Jaws.....

If the 638 has been heavily applied, you will need to do a few additional steps to break the bond between the splined axle and right linkage arm.

Application of Loctite 638 defined:

Light Application:
You think of yourself as Bob Ross. With a few small drops applied to the axle splines, you spread the 638 around with your fingertips to form a very very light coating on the splined interface of the axle and linkage arm. While doing the finger painting, you think of pretty trails and trees.

10-03-bobross-toc.jpg


Heavy Application: You drenched the axle and linkage arm splines thinking to yourself, 'A few drops is for pussies, I say "Let's really go big. Let's drench it, I don't want this sucker to ever come off.'

Note: I've used the heavy application method and Yes...it works....

Okay, so you went big, you really sent it........and really applied the 638.

Remove all the mounting hardware from the right and left linkage arms. Remove the pinch bolt from the drive side (Right) linkage arm. Take a blow dryer and really heat up the linkage arm in the area of the axle. I do this to soften the 638 and make it more pliable. I prefer to use a blow dryer because it won't develop enough heat to damage the frame, paint, bearing, etc.

With the linkage arm warmed up, I take my soft rubber mallet and strike the end of the linkage arm in a back and forth manner to loosen the bond between the axle and linkage arm. As I tap the arm, my goal is to walk the linkage arm off of the axle splines.

If heating and tapping the linkage arm doesn't work, I take a thin tapered chisel and insert the tip into the gap where the pinch bolt threads into the linkage arm.

Screenshot 2023-03-26 07.42.34.jpg


I tap the chisel into the gap. My goal is to slowly insert the chisel into the gap and release clamping pressure on the axle. Do not drive the chisel deeply into the gap, you'll ruin the linkage arm. You just want to wedge it firm enough into the gap to slightly spread and release clamping pressure on the axle.

I prefer to use a thin tapered chisel so that I do not mar or mushroom the edges of the gap in the linkage arm. I can be more precise with a thin tapered chisel. If you use a thickly tapered chisel, you will have to really drive it hard into the gap and this will mushroom the edges of the linkage arm. The objective here is to release clamping pressure and avoid marring and rounding over/mushrooming the edges of the linkage arm gap. A flat tipped screwdriver will cause marring due to the small width of the screwdriver blade. Use a thin tapered chisel, it's wide surface area is less likely to cause marring or damage.

Example of a thin tapered mechanics chisel
Screenshot 2023-04-23 08.44.03.jpg


With the chisel inserted into the gap on the linkage arm and applying pressure to the gap, I once again apply heat and use my soft rubber mallet to tap and release the linkage arm from the axle. This method works.

As a side note, I've not had to use the chisel method once I began channeling my inner Bob Ross and I began to sparingly apply the 638. You live and you learn.....

Cheers,
Rod
 
Last edited:

EMTB Forums

Since 2018

The World's largest electric mountain bike community.

563K
Messages
28,539
Members
Join Our Community

Latest articles


Top