Rod B.
Well-known member
Hello,
This tech article will describe how to convert a Shimano "Non-Magnetic" RT-MT800 center lock brake rotor into a "Magnetic" RT-EM810 brake rotor. I hope you find this article useful.
If your bike has Shimano brakes, you will have likely noticed there is a shortage of Shimano brake parts. This is especially so in the United States. Attempting to locate eBike parts can be a difficult process and premium prices are charged by vendors for parts when they are available.
An example of this is the 203mm "Magnetic" RT-EM810 center lock brake rotor seen pictured below. In the United States, a 203mm "Magnetic" RT-EM810 center lock brake rotor, much like a unicorn, is almost impossible to source. To complicate matters further, Shimano prevents USA customers from purchasing Shimano parts from European vendors. Because of the scarcity, prices in the area of $100 to $120 are typically charged for the 203mm RT-EM800 rotor.

The "Non-Magnetic" RT-MT800 203mm version, seen pictured below can be readily sourced and commands a much cheaper price, typically in the area of $50 to $55.

So....what's the difference between the two rotors? An examination of the back of the RT-EM810 rotor revels a removable magnetic insert which is held in place by two 3MM screws.
Backside of a RT-EM810 center lock brake rotor with magnetic insert secured via two 3mm screws

Backside of a RT-EM810 center lock brake rotor with magnetic insert and screws removed.

The $50 dollar question.......is it possible to retrofit the magnetic insert onto a non-magnetic RT-MT800 brake rotor? If so, how hard would the process be? What tools would I need? I purchased a RT-MT800 203mm rotor for $55 and decided to find out. The process turned out to be easy and took about 15 minutes. The process required only a few tools which I will discuss below.
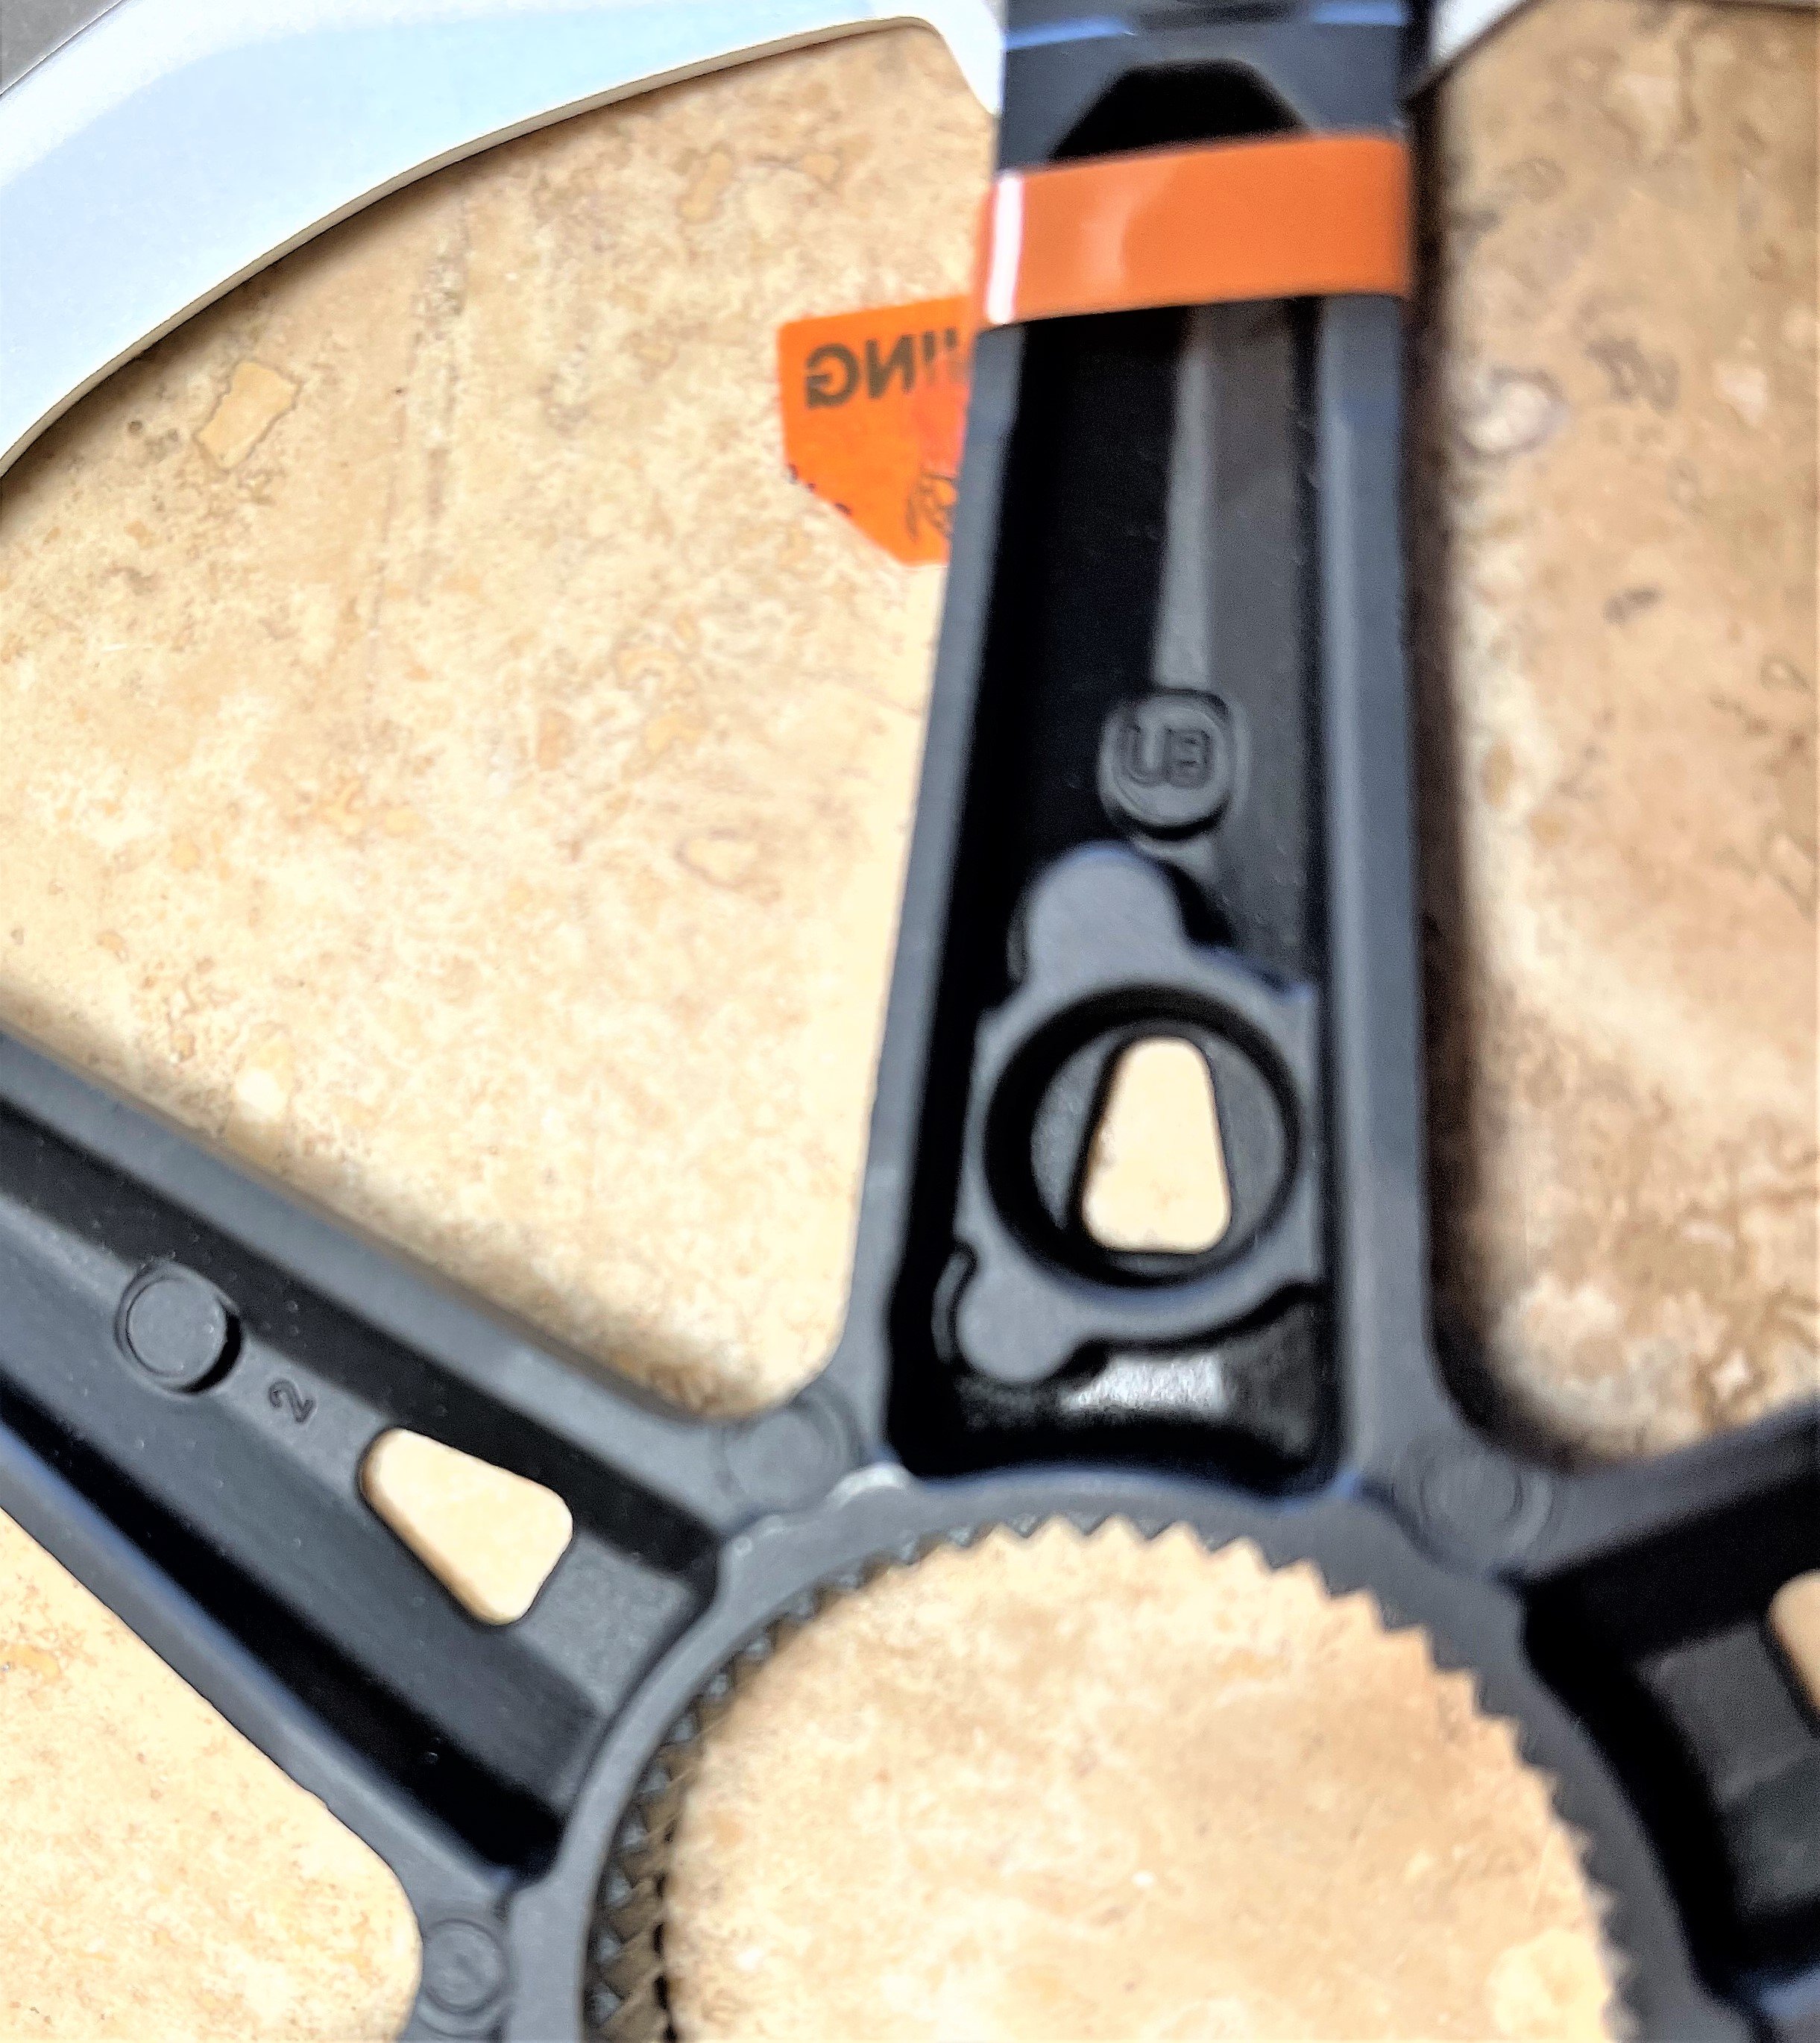
Backside view of a non-magnetic RT-MT800 rotor. It is identical to the RT-EM810 rotor, however the magnet assembly is missing and the hole where the magnet goes is not bored all the way through the rotor carrier. Also, the two 3mm screw holes are not drilled and threaded.

Close up view of the RT-MT800 hole

Frontside view of the same RT-MT800 brake rotor. Note the lack of bore hole through the carrier for the magnet assembly.

To convert a RT-MT800 non-magnetic brake rotor into a magnetic RT-EM810 brake rotor, you will need the following part and tools:
1. A used RT-EM810 brake rotor from which you can harvest the magnetic insert and two 3mm screws. If you do not have an old RT-EM810 in the used parts bin, check with your local bike shop. They may have a worn out rotor sitting in the rubbish bin.
2. A "Metric" M3 x 0.5 Spiral Flute Tap and 2.5mm drill bit. I purchased a tap and drill bit set on Amazon for $9.49. Pictured below is the set I bought and used.
3. I used an American size "X" drill bit to bore the hole for the magnetic insert. If you have trouble sourcing a size X drill bit, a 10mm drill bit will work.

Note: I performed the conversion process on a 203mm RT-MT800 brake rotor. I cannot confirm if you can use this conversion process on a 160mm or 180mm RT-MT800, however I would think the process would be the same for these rotors also.
Conversion Process:
1. I started off by drilling out the magnetic insert bore hole using the size X/10mm drill bit. Start from the inner side using the existing bore hole as a guide. The brake rotor carrier is made out of soft aluminum and the process to drill the hole was easy. Be sure to support the brake rotor so it does not rock back and forth during the drilling process.

10mm hole drilled through the carrier on the Rt-MT800 carrier

2. I next placed the magnetic insert into the bore hole. I lined up the magnet plate with the two untapped bosses. Using a fine tip pencil, I marked the center of each hole and boss. This is where the 2.5 mm holes will be drilled and threaded. I removed the magnetic insert. Using a fine point center punch, I stamped the center of each mark left by the pencil.

3. Using the 2.5mm drill bit, I drilled out the two bosses (Looks like the ears on Mickey Mouse) which I previously marked with a center punch. Drill the bosses only to a depth sufficient to fully screw in the 3mm screws. Use caution not to drill all the way through the bosses and rotor carrier. I placed my drill motor on slow speed and took my time drilling the holes to a sufficient depth.
4. Using the M3 x 0.5 tap, thread the two holes which you made using the 2.5mm drill bit.
5. Placed the magnetic insert back into the bore hole. Place a small dab of blue thread locker on each 3mm screw. Thread the screws into their holes and secure the magnetic insert to the carrier.
6. You may have some slight scratching around the bore hole. Take a black permanent marker and touch up the paint.
10mm hole drilled through the carrier. Two, 2.5mm holes drilled and taped to M3 thread standards.

Conversion completed. Magnet assembly installed on the RT-MT800 brake rotor.

Front side of RT-MT800 carrier with magnet assembly installed.

I hope you've enjoyed this tech article and find it useful. If you have any questions, feel free to comment or send me a message.
Be safe,
Rod
This tech article will describe how to convert a Shimano "Non-Magnetic" RT-MT800 center lock brake rotor into a "Magnetic" RT-EM810 brake rotor. I hope you find this article useful.
If your bike has Shimano brakes, you will have likely noticed there is a shortage of Shimano brake parts. This is especially so in the United States. Attempting to locate eBike parts can be a difficult process and premium prices are charged by vendors for parts when they are available.
An example of this is the 203mm "Magnetic" RT-EM810 center lock brake rotor seen pictured below. In the United States, a 203mm "Magnetic" RT-EM810 center lock brake rotor, much like a unicorn, is almost impossible to source. To complicate matters further, Shimano prevents USA customers from purchasing Shimano parts from European vendors. Because of the scarcity, prices in the area of $100 to $120 are typically charged for the 203mm RT-EM800 rotor.
The "Non-Magnetic" RT-MT800 203mm version, seen pictured below can be readily sourced and commands a much cheaper price, typically in the area of $50 to $55.
So....what's the difference between the two rotors? An examination of the back of the RT-EM810 rotor revels a removable magnetic insert which is held in place by two 3MM screws.
Backside of a RT-EM810 center lock brake rotor with magnetic insert secured via two 3mm screws
Backside of a RT-EM810 center lock brake rotor with magnetic insert and screws removed.
The $50 dollar question.......is it possible to retrofit the magnetic insert onto a non-magnetic RT-MT800 brake rotor? If so, how hard would the process be? What tools would I need? I purchased a RT-MT800 203mm rotor for $55 and decided to find out. The process turned out to be easy and took about 15 minutes. The process required only a few tools which I will discuss below.
Backside view of a non-magnetic RT-MT800 rotor. It is identical to the RT-EM810 rotor, however the magnet assembly is missing and the hole where the magnet goes is not bored all the way through the rotor carrier. Also, the two 3mm screw holes are not drilled and threaded.
Close up view of the RT-MT800 hole
Frontside view of the same RT-MT800 brake rotor. Note the lack of bore hole through the carrier for the magnet assembly.
To convert a RT-MT800 non-magnetic brake rotor into a magnetic RT-EM810 brake rotor, you will need the following part and tools:
1. A used RT-EM810 brake rotor from which you can harvest the magnetic insert and two 3mm screws. If you do not have an old RT-EM810 in the used parts bin, check with your local bike shop. They may have a worn out rotor sitting in the rubbish bin.
2. A "Metric" M3 x 0.5 Spiral Flute Tap and 2.5mm drill bit. I purchased a tap and drill bit set on Amazon for $9.49. Pictured below is the set I bought and used.
3. I used an American size "X" drill bit to bore the hole for the magnetic insert. If you have trouble sourcing a size X drill bit, a 10mm drill bit will work.
Note: I performed the conversion process on a 203mm RT-MT800 brake rotor. I cannot confirm if you can use this conversion process on a 160mm or 180mm RT-MT800, however I would think the process would be the same for these rotors also.
Conversion Process:
1. I started off by drilling out the magnetic insert bore hole using the size X/10mm drill bit. Start from the inner side using the existing bore hole as a guide. The brake rotor carrier is made out of soft aluminum and the process to drill the hole was easy. Be sure to support the brake rotor so it does not rock back and forth during the drilling process.
10mm hole drilled through the carrier on the Rt-MT800 carrier
2. I next placed the magnetic insert into the bore hole. I lined up the magnet plate with the two untapped bosses. Using a fine tip pencil, I marked the center of each hole and boss. This is where the 2.5 mm holes will be drilled and threaded. I removed the magnetic insert. Using a fine point center punch, I stamped the center of each mark left by the pencil.
3. Using the 2.5mm drill bit, I drilled out the two bosses (Looks like the ears on Mickey Mouse) which I previously marked with a center punch. Drill the bosses only to a depth sufficient to fully screw in the 3mm screws. Use caution not to drill all the way through the bosses and rotor carrier. I placed my drill motor on slow speed and took my time drilling the holes to a sufficient depth.
4. Using the M3 x 0.5 tap, thread the two holes which you made using the 2.5mm drill bit.
5. Placed the magnetic insert back into the bore hole. Place a small dab of blue thread locker on each 3mm screw. Thread the screws into their holes and secure the magnetic insert to the carrier.
6. You may have some slight scratching around the bore hole. Take a black permanent marker and touch up the paint.
10mm hole drilled through the carrier. Two, 2.5mm holes drilled and taped to M3 thread standards.
Conversion completed. Magnet assembly installed on the RT-MT800 brake rotor.
Front side of RT-MT800 carrier with magnet assembly installed.
I hope you've enjoyed this tech article and find it useful. If you have any questions, feel free to comment or send me a message.
Be safe,
Rod

Last edited:
