PART # 2: ORBEA RISE - LOWER MAIN LINKAGE AXLE AND BEARING SERVICE

neilo

Member
Jan 25, 2022
50
21
Australia
I’ve had the same issues (Orbea Rise M10). Started with a cracking sound. I thought it was the rear chain/seatstay bearings. However located it to rear hub a RF vault. Cleaned, pawls and ratchet. No change but actually got worse the next ride. Could hear it just rocking bike with rear brake on. Took to LBS (JE James who have been brilliant). Said they’d had a few of issues with this hub. Returned to Silverfish, RF distributed in UK. Sent out a new hub. Got it today. 👍 They said it wasn’t the actual drive mechanism but the hub itself. Not exactly sure what. Apparently some of the hubs had a bonded body which worked loose. I only got 760miles out of it. Temped to sell on and get a DTSwiss 350.
I tried the PTFE fix, but no joy for me. If you do try it, make sure it doesn’t get anywhere near your brake rotor. I removed mine.

I will update here once I hear what RF say.
FYI RF also warrantied my wheel, and they chose to provide a complete new wheel, not just a new hub. Didn't get any specific details as to the problem. Can't fault the service, it's great when a company stands behind their products (y).
 

Livo

Member
Mar 10, 2023
9
2
Nottingham
FYI RF also warrantied my wheel, and they chose to provide a complete new wheel, not just a new hub. Didn't get any specific details as to the problem. Can't fault the service, it's great when a company stands behind their products (y).
Checked and yes they did the same a complete new wheel too but not freehub body. Great service. Wheel seems fine tho on first ride a rock hit new wheel broke two spokes which the punctured rim tape! Rear mech smashed too. Expensive ride! Hey that’s E=Mtb²!!
 

Blinkie

Active member
Jan 11, 2020
112
86
aberdeen
This is Part Two in a two part series on servicing the Rise pivot bearings and linkage. Part Two will discuss servicing the Rise's lower main pivot axle and bearings. If possible, please read Part One before continuing with this article.

In Part One, "Orbea Rise - Upper Linkage Axle and Bearing Service" I discuss:
  1. Upper linkage disassembly and reassembly.
  2. Pivot bearing inspection and type of Enduro bearings used on the Rise.
  3. How to remove a bearing seal, clean the bearing and re-lubricate the bearing.
  4. Bearing greases recommended by Enduro.
Preface:
After you've been riding your Rise for awhile, you may notice your Rise has started to make a creaking noise while riding. The sound will sound similar to a creaking seat post or seat. You may also notice that the rear suspension may begin to feel stiff and not as plush as it used to be. You may question your shock/settings due to the stiffness in the suspension. In most circumstances, there is nothing wrong with your rear shock, the seat post or saddle rail clamp. The stiff suspension and or creaking noise may be attributed to a upper or lower pivot axle, linkage arms and or bearings in need of cleaning and lubrication.

Like many things on a bike, the pivot linkage needs the occasional bit of love. As a personal rule, I like to full service clean, inspect and lube the suspension linkage on my bikes every six months. I grease the upper and lower pivot axles every few months. This keeps noises to a minimum and the suspension functioning smoothly. You don't want to skip servicing the suspension linkage on your bike, it will make a good bit of difference in how your bike performs. Depending upon the frequency of your rides, distance covered, the riding climate and type of terrain your ride, you may only need to service your linkage once a year, or you may need to do it more frequently than every six months.

It’s important to keep in mind that the upper and lower pivot axles on the Rise do not have any seals or O rings which prevent water or dust from working its way into where the alloy axle contacts and rides upon the steel bearings. I’ve found that if the bike is exposed to frequent moisture or powdery dust, it will eventually wash out or dry up the pivot axle grease. Depending upon which axle runs dry of lubrication, it will start making a creaking noise caused by the alloy axle rubbing on the steel pivot bearing races. As I stated before, the noise will sound exactly the same as a seat post or saddle creaking. It’s also been my experience the upper pivot axle needs to be lubricated more frequently than the lower pivot axle.

View attachment 89869

To determine the condition of your rear suspension, place the bike in a bike stand. Remove the rear wheel. Wrap a soft rag around the front area your rear shock. Remove the shock's front mounting bolt. Lower the shock down so that it rests on the downtube. The rag will protect the paint.

With your hands, slowly raise and lower the rear triangle. With your ears listen for noise as you move the triangle up and down. There should be no grinding, grittiness, or squeaking noise. With your fingers, feel for resistance in the movement, any stiff spots, as you rotate the triangle. The movement should be smooth and easy. If you encounter noise and or, resistance, then your linkage needs service.

In most instances during disassembly and inspection, you will find the pivot bearings on your Rise will be fine. You will only need to clean and re-lubricate the exterior contact points where the bearing touches bolts, linkage arm and or the axle.

Occasionally, you will come across a pivot bearing that is frozen or stiff to spin. This may be because the bearing has flat spots, dirt has contaminated the bearing grease and or, water has worked past the bearing seal and rusted the steel bearing components. Stiff bearings will cause your Rise suspension to perform like an overinflated rear shock and your bike will track poorly on rough terrain.

If you encounter a frozen or hard to spin pivot bearing, you will need to determine why the bearing isn't functioning. To do this, remove the bearing's outer seal, fully clean the bearing, and inspect it for function. If after cleaning, the bearing spins freely without any bumpy or rough feeling, then all you will need to do is re-lubricate the bearing. If after cleaning the bearing does not spin easily, or exhibits a rough feeling, then the bearing will need to be replaced.

Enduro recommends the following greases for the bearings used on the Rise:

I do not cover replacing the pivot bearings in this tech series. While it's not too difficult to replace a pivot bearing, it does require some mechanical skill and a few specialized tools. If you don't know what you are doing, you can easily damage the frame where the bearing inserts, the paint, or the new bearing itself by improper installation. If you do not possess the mechanical skills or tools to replace a pivot bearing, I recommend taking your Rise to your local bike shop and have the bearings replaced.

Here are several good YouTube videos on servicing a pivot bearing and also the removal and replacement of pivot bearings should you wish to do the work yourself.


The Lower Main Pivot Assembly:
The lower main pivot axle bearing assembly consists of two Enduro bearings which are housed in the main frame. The two bearings differ in size. The left, non-drive side of the frame, uses is an Enduro 6803LLU Max BOSL (Black Oxide Coating) bearing. The right, drive side of the frame, uses an Enduro 6802LLU Max BOSL bearing.

Note: "LLU" refers to the seal design used on the bearing, which is a "Dual Lip" and "Full Contact" seal. This is one of the better designs at keeping contaminants out of the bearing. "Max" refers to the absence of an inner bearing retainer and allows room for the "Maximum" amount of bearings to be installed in the bearing. Refer to Part One in my series for further explanation on "LLU" and "Max" terminology.

The Lower Main Pivot Axle Assembly:


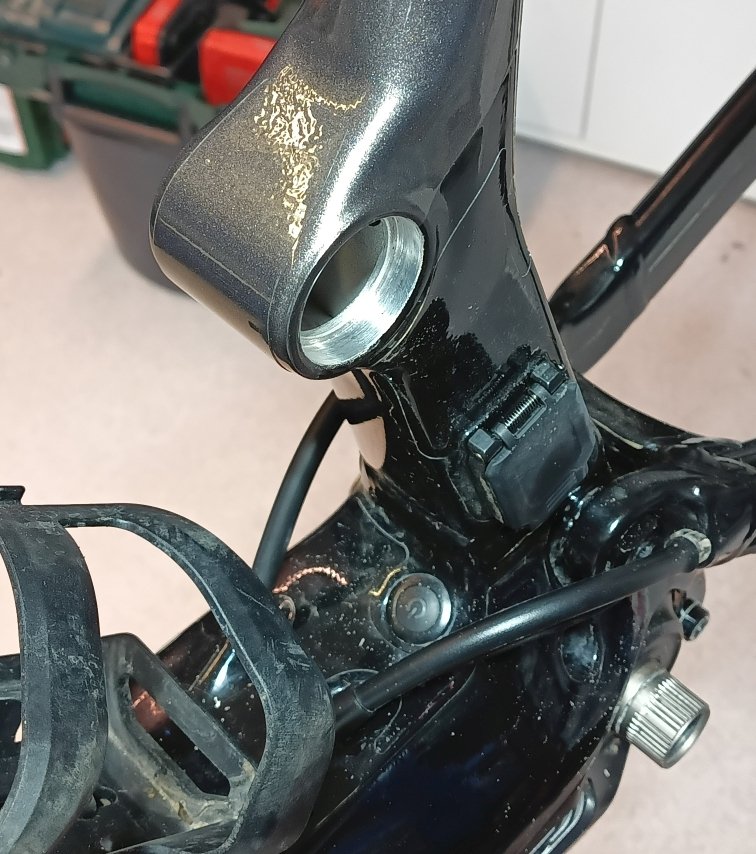
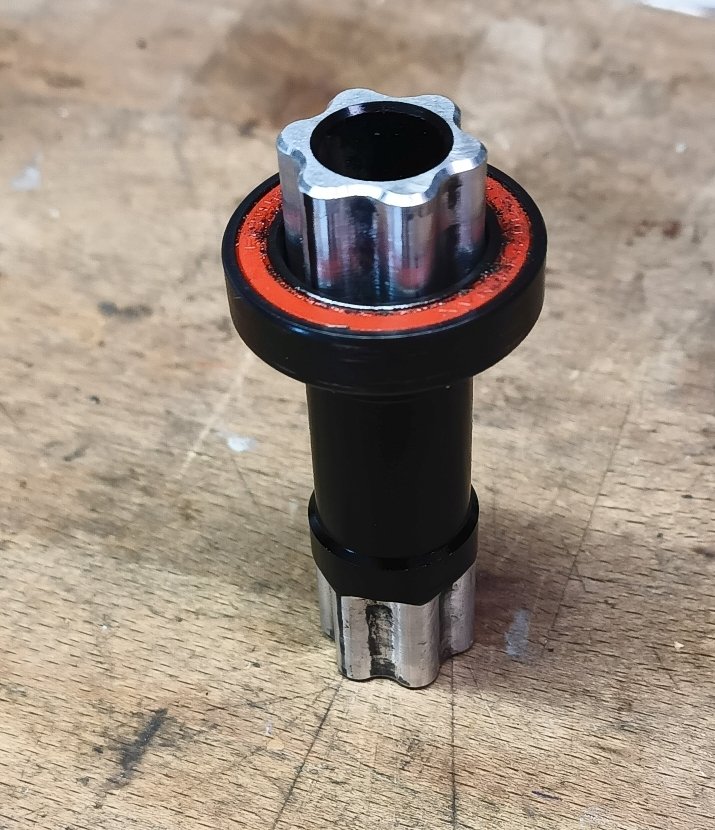
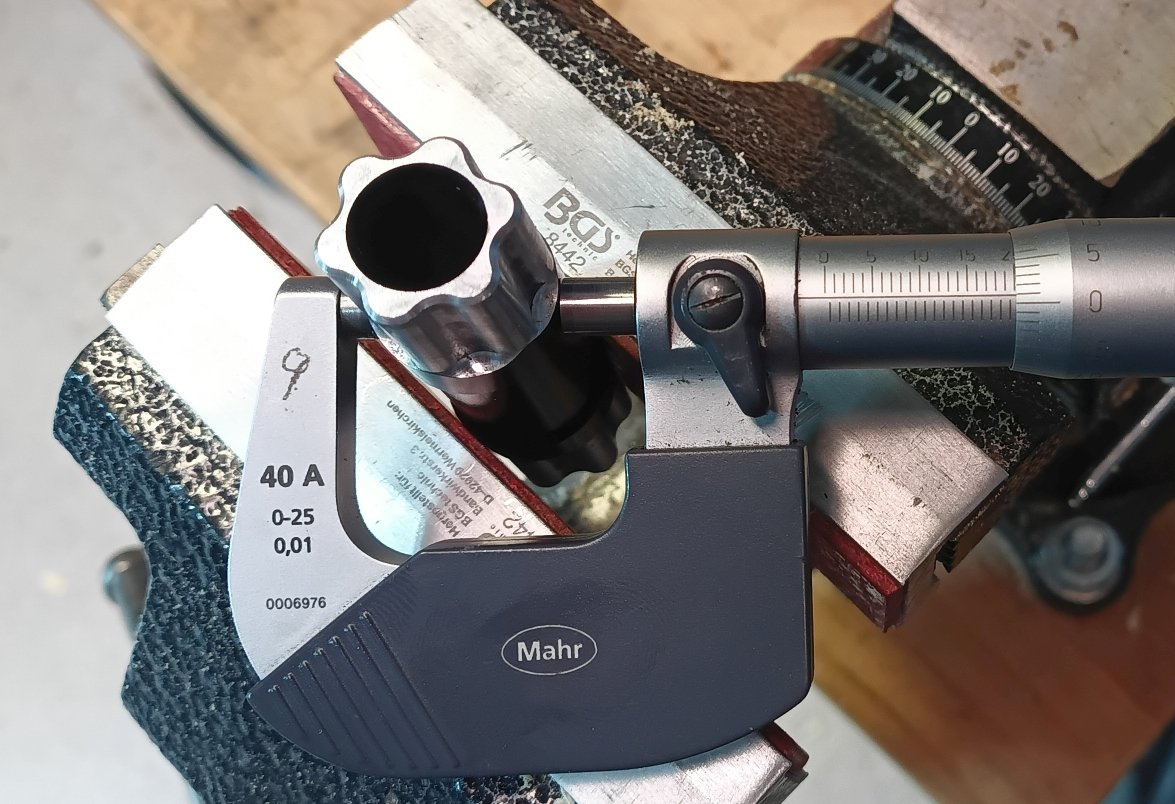
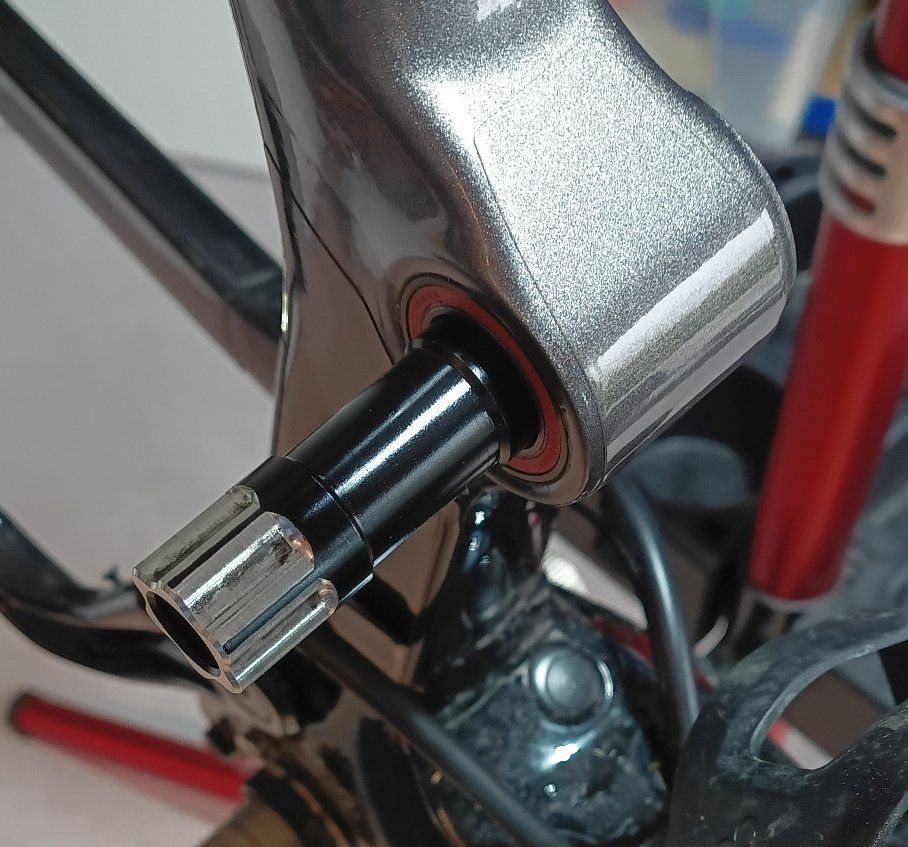
View attachment 80984

View attachment 80985

View attachment 80986

You have the option of removing the upper and lower linkage and allow the rear triangle to hang off the bike of the bike. Or, as I personally like to do, remove and replace the upper and lower pivot sections one at a time as separate procedures. Either way will work.

How the lower main pivot axle functions:
The Orbea Rise, Blue Paper diagram below details the lower pivot axle assembly and grease points. Also listed are the proper torque settings.
View attachment 80992

How it all works:

A split bronze bushing is inserted into the opening located on the left, "non-drive" chain stay. The lower pivot axle is threaded on one end and machined on the inside to accept an 8mm hex wrench. The axle is inserted through the bushing, the left chain stay, through the two frame pivot bearings and threaded into the right, drive side chain stay. A 8mm hex driver is used to tighten the axle to the correct torque setting.

The axle is prevented from backing out due to the split bushing and collet wedge. After the axle has been threaded into the chain stay, the collet wedge and collet wedge bolt are threaded into the end of the axle. As the collet wedge is tightened, it expands the head of the axle outward, which in turn expands the split bushing and locks the axle in place. Some mad engineering going on here.....

View attachment 80993

View attachment 80991

Lower Main Pivot Axle Service Procedure:
1.
Place your Rise in a bike stand. Remove the rear wheel.

2. Wrap a rag around the front of the rear shock to cushion it. Remove the from shock mounting bolt. Lower the front of the shock until it rests on the downtube.

3. Using a hex driver, remove the collet bolt from the lower pivot axle. Remove the collet wedge from the axle.

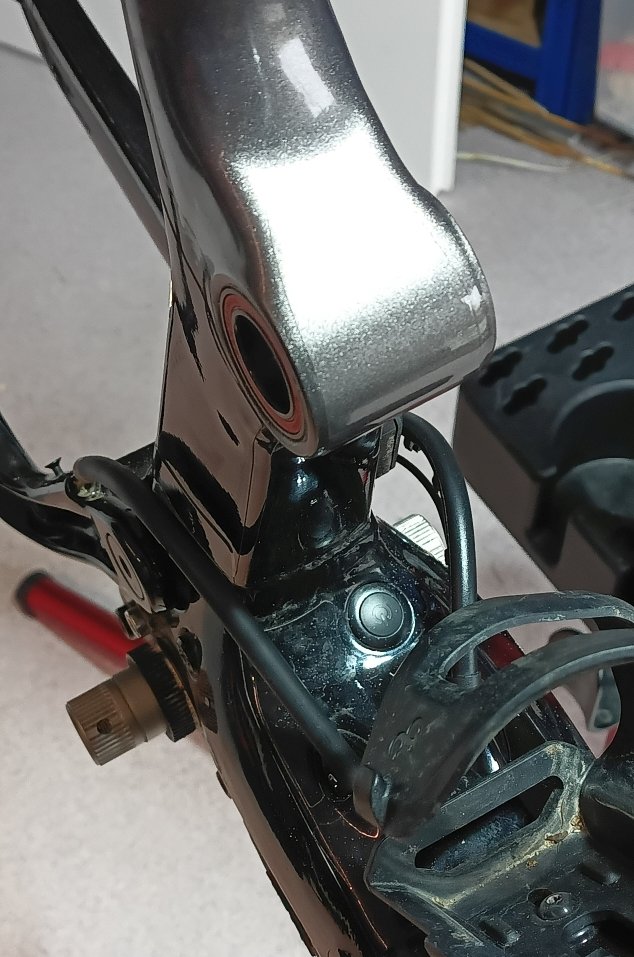
4. On the left, non-drive side of the motor a black rubber routing tube which will hinder removal of the axle. The routing tube is used to route the rear brake hose from above the motor to the rear triangle. Clipped to the bottom of the routing tube is the small speed sensor wire coming from the rear triangle speed sensor to the motor.

Screenshot 2022-01-22 11.35.52.jpg


Right and left routing tubes
View attachment 80994

In order to remove the axle, the left side routing tube will need to be folded slightly out of the way. Don't go crazy with the folding, you don't want to damage the brake hose. You want to fold it over just enough to be able to remove the axle.

The speed sensor wire is attached to the routing tube and held in place via small press fit rubber clamps molded into the bottom of the routing tube. Unclip the speed sensor wire from the clamps. Push excess brake hose from the rear caliper towards the routing tube in order to add slack in the brake hose at the routing tube. Pull up on the routing tube and out of it's mounting holes in the frame. Fold the routing tube slightly over and out of the way. Unthread the axle and remove it.

5. After removing the axle, you will see a split bushing located on the left (Non-Drive) side of the swing arm where the axle is inserted into the triangle. Remove the bushing.

6. With the axle removed, you can now lower or raise the rear triangle out of the way enough to inspect the lower pivot bearings. If the bearings spin easily and smoothly, you need only wipe the surface of the bearings to remove dirt and grime and place a small dab of grease on the inner part of the bearing where the axle will contact it.

If the bearings are rough or hard to spin, remove the rubber seal and clean the bearings. If after cleaning the bearings they still spin roughly or are hard to spin, you should replace the bearing(s). If the bearings spin freely after cleaning, repack the bearings with grease and reinstall the rubber seal with the correct side facing the ball bearings. Wipe excess grease from the bearing and bike frame using a towel.

5. Clean the lower pivot axle, all hardware, the triangle where the axle is threaded and where the bushing is inserted.

Lower pivot assembly installation

1. Apply a small dab of grease to the inside of the lower pivot bearings races mounted in the frame.

2. Apply a light film grease to the inside of the split bushing. Insert the bushing into it's housing on the left side of the rear triangle.

3. Apply a small amount of grease to the the threaded end of the axle and the shoulders of the axle where the axle will ride on the frame pivot bearings.

4. Lift or lower the rear triangle into position so it lines up with the bearings. Fold the brake hose guide tube out of the way and Insert the lower pivot axle into the bushing and through the bearings. Thread the axle into the right, drive side rear triangle insert using an 8mm hex driver, torque the axle to 20 N.m.

5. Insert the black rubber routing hose back into the holes in the frame and reattach the speed sensor wire to the guide tube clamps. Pull the brake hose back out of the rear triangle and to it's original position at the rear caliper.

6. Insert the collet wedge into the axle. Apply a film of grease on the collet wedge bolt and thread into place. Tighten the collet bolt to 5 N.m. Orbea does not specify thread locker for the axle or collect wedge bolt.

7. Rotate the rear triangle up and down and insure it moves freely and smoothly and without any side to side play.

8. Cheers.....you've completed the lower pivot axle linkage.

Rear Seat Stay Bearings:

Two Enduro 6803LLU Max, black oxide pivot bearings are located at the end of the chain and seat stay triangle. The pivot bearings facilitate a slight pivot movement between the chain and seat stays at the rear triangle. They do not see a lot of movement, but are important in maintaining rear triangle stability.

They will occasionally need to be examined for play or lack of function, and lubricated.

View attachment 81014
@Rod B. Do you think it's worth doing on a new frame before it gets ridden or just wait until it needs done?

Frame sat in garage awaiting final parts, or am I just wasting my time?
 

Rod B.

Well-known member
Aug 18, 2021
530
924
USA, Orange County Ca.
@Rod B. Do you think it's worth doing on a new frame before it gets ridden or just wait until it needs done?

Frame sat in garage awaiting final parts, or am I just wasting my time?
Blinkie,

Is this for the new 2023 Rise or the older 2020 to 2022 version? I ask this because the new 2023 Rise has a new upper linkage design and I am not familiar with it yet. If your Rise is a brand new 2020 to 2022 Rise model, then I would apply a cylindrical retaining compound such as Loctite 638 to the upper axle splines.

My thought behind this is that if you push your new Rise fairly hard, the upper linkage will slowly begin to open up. This in turn will cause wear to the splines on your upper axle. Fix it before any axle wear can begin.

I want to be clear here...Use only a drop or so of the Loctite 638 and spread it around the splines with your fingertip. It doesn't take much, go very light with the stuff. If you go heavy with the stuff (Which I did on my first go around), you'll have to really work hard at getting the arms back off.

The issue of the linkage arms opening up is not something that happens immediately. It took about two months worth of rides for it to happen on my Rise. Once the linkage arms opened up, then the creaking would began. Each time this happened, I would clean the suspension, re-grease everything, set pre-load and it would be pure, quiet time bliss for a month or so. Then it would begin again. As time progressed, the linkage arms opening up would happen within a shorter time span between each suspension service and pre-load reset. This was because the splines on the right side of the upper pivot axle and the splined inlet on the right side linkage arm, were wearing more and more with each opening up, removal and pre-load reset.

I like to give credit where credit is due. I believe it was Rich who pointed out to me about the use of a cylindrical retaining compound on the upper axle. Prior to this, I was greasing the splines on the upper axle to prevent wear (Don't do this). Once I used the Loctite 638, I never had another issue with the linkage arms opening up.

When I refer to "Opening Up", I am referring to the linkage arms shifting/loosening on the upper axle. Orbea specifies a very specific pre-load adjustment width which is obtained using the pre-load tool provided with the bike. When the linkage arm(s) loosen and shift on the axle, this causes the pre-load to open up, i.e. the width between the linkage arms becomes wider and this introduces play/slop into the rear triangle.

It's been my experience that the right, drive side linkage arm will be the one to loosen up. The left non-drive side linkage arm has never loosened up on my Rise. I believe this is because the majority of wear occurs with the splined inlet on the right linkage arm and the ride side axle splines. I've always made it a practice to never separate the left linkage arm from the axle. There's no reason to separate the two items. To do so causes needless wear to the splines. The right side linkage arm however, is removed during servicing and it's the arm which has to be shifted back and forth on the axle splines during pre-load setting. All of this causes wear to the right side axle splines.

I would apply a very sparing amount of Loctite 638 to both sides of the upper axle splines on your new bike (2020-2022 Rise). Once applied, I would never again remove the left side linkage arm from the axle unless required. Using Loctite 638 or an equivalent, you will not have an issue with the linkage arms opening up. You will however, need to service the upper and lower axle pivot bearings, So go sparingly with the stuff.

For those following this thread. I switched several months back to a Levo after selling my Rise. There's so many great bikes out there, I want to ride them all. I just got back from a four day trip to Hurricane and Saint George Utah. The riding there is exceptional. For those interested, here are some pictures from the trip.

Day One: Zen and Barrel Trails:

My buddy Dan (Tan jacket) and I on Zen. I'm the handsome but decrepitly old dude in green.
IMG_2678.JPG


It's funny how photos will flatten out a trail. here's the top of a rock section on Zen.
IMG_2689.JPG


Here's the same trail section looking up from the bottom. I love this trail.
IMG_2690.JPG


Here's a picture of the waterfall section on Barrel. The photo doesn't do this 400 yard segment justice. It's long, extremely rocky and very steep. My buddy John in the photo. No shame in walking....

IMG_2694.JPG


Riding between the rocks on Zen
IMG_2681 (2).JPG


IMG_2683.JPG


Day Two: Suicidal Tendencies - Precipice - Side Winder - Barrel Roll Trails

My Levo at the Cove Wash Trailhead. 170mm ZEB Ultimate, Fox X2, Industry Nine Enduro S alloy wheels, and new SRAM H2 220mm rotors. I'm running a 2.6 x 29" Butcher up front and a 2.6 Eliminator on the 27.5 rear wheel. I'm digging the mullet. You can really snap the rear wheel around in the turns.
IMG_2697 (2).JPG


Suicidal Tendencies and Side Winder never disappoint.
IMG_2711 (3).JPG


This section always scares me. It's narrow, ledgy and it's a long fall if you screw the pooch.
IMG_2713.JPG


My buddy Dan pointing out another trail out in the distance
IMG_2718 (2).JPG


My buddy John on Precipice
IMG_2703.JPG


Here's another classic case of a photo flattening out a trail. Here I am dropping into a rock section of Barrel Roll. It doesn't look like much.
IMG_0837.JPG


Here is the same segment with my buddy Dan coming down it.
IMG_2723 (2).JPG


Day Three: Gooseberry Mesa - South Rim - North Rim - Yellow - Hidden Valley - Bowls & Ledges - Windmill

I love the Goose. It's a type of riding that you either love or hate. Do yourself a favor and give it a try. I ride in Hurricane Utah frequently. If you are interested in doing a ride there, send me a message and we can set something up for when I'm next there.

IMG_2734.JPG


I'm kneeling down not to look cool. Secretly I'm pissing down my pants being that close to the edge and I didn't want to fall off due to a gust of wind. My buddy Dan kept telling me to get closer. Jackass....
IMG_5271 (3).JPG


Out on the rocks, the trail is marked with white dots which you follow
IMG_0927.JPG


IMG_0909.JPG


IMG_2744.JPG


Day Four: IMBA Epic - Hurricane Rim Trail

IMG_2773 (2).JPG


IMG_2763 (2).JPG


IMG_0872 (2).JPG
 
Last edited:

neilo

Member
Jan 25, 2022
50
21
Australia
@Rod B. It's a 2022, I'll just put put a blob of 638 on thanks
Just a short note to add to Rod's excellent advice. When he says that the "left" (non drive side) linkage arm can be left permanently attached, this depends on which way the pivot axle was installed in the factory.

One side of the pivot axle is threaded (for the purple pre-load tool) - this is supposed to be the right side according to the official guide, but on my bike, and some others, the axle was installed the other way around in the factory. It can be installed either way with no ill effects. Whichever side does not have the thread for the pre-load tool can be left attached permanently (after you've added the 638).
 

Rod B.

Well-known member
Aug 18, 2021
530
924
USA, Orange County Ca.
@Rod B. It's a 2022, I'll just put put a blob of 638 on tha

Just a short note to add to Rod's excellent advice. When he says that the "left" (non drive side) linkage arm can be left permanently attached, this depends on which way the pivot axle was installed in the factory.

One side of the pivot axle is threaded (for the purple pre-load tool) - this is supposed to be the right side according to the official guide, but on my bike, and some others, the axle was installed the other way around in the factory. It can be installed either way with no ill effects. Whichever side does not have the thread for the pre-load tool can be left attached permanently (after you've added the 638).
Neilo, thank you for making an excellent point. My Rise came with the threaded portion on the upper axle facing the left, non drive side. For whatever reason, the Rise blue paper says to have the threaded portion on the threaded axle facing the drive side. I later flipped my axle so that the threaded portion faced the right, drive side.

Like you, I don't think it means anything, other than the person who wrote paper had one pint too many the evening before they wrote the paper.

We should re-word my statement to state that whichever linkage arm is on the non-thread side of the upper axle, never take it off. This avoids unwanted wear to the splines. Wahoo!

For those curious, attached below is the Rise Blue Paper section on the upper pivot axle and advisement that the threaded portion of the upper axle should face to the right.

Cheers,
Rod

Screenshot 2023-03-30 17.54.05.jpg
 

Tony4wd

Active member
Subscriber
Aug 3, 2022
260
225
Australia
Rod B., fabulous terrain in those photos. With Australia being older geologically we miss out on a lot of the varied geography you have in the USA.
 

Rod B.

Well-known member
Aug 18, 2021
530
924
USA, Orange County Ca.
Rod B., fabulous terrain in those photos. With Australia being older geologically we miss out on a lot of the varied geography you have in the USA.
Tony,

Utah is just around the corner from Australia. If you find you want to visit and do some rides, hit me up and I can help arrange things from my end to get you some guided ride time. For those interested, the best bet would be to fly in to Las Vegas International where you can rent an eBike. Vegas has excellent mountain biking trails. Both Saint George and Hurricane Utah are about an hour and a half drive from Las Vegas.

Cheers,
Rod
 

proneman

Member
Apr 20, 2023
4
2
Deutschland
Hi Guys,

I´m new here in the forum. I read a lot about the bearing change procedures. Thanks a lot @Rod B.

On my Rise H15 2022 which I ride since December 2022 I did a deep inspection of the bearings during the fork and the shock were disassembled for servicing.

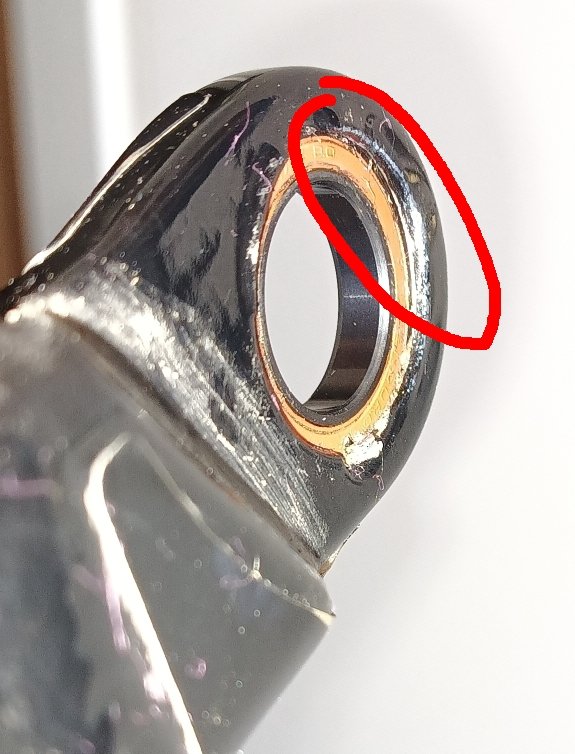
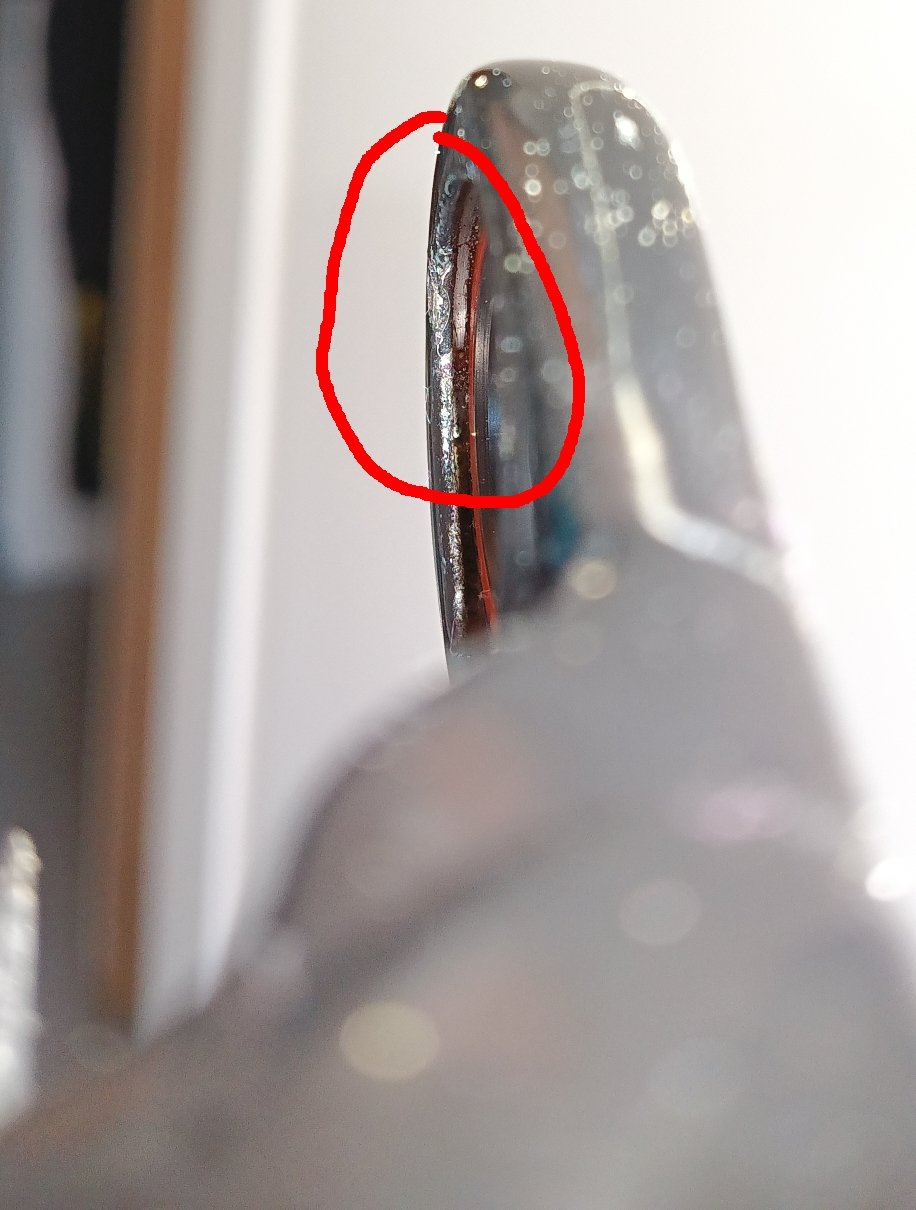
I found out, that both bearings in the split pivot are obliquely. The one on the drive side still has some rust inside.

Further I had issues with the axle of the main pivot. The axle sticked so hard on the bearings, that when I used a soft hammer to remove it one bearing of the main pivot came out of the frame.

When I tried to fit a new bearing on the axle I couldn´t push the bearing on the axle by hand. Also, when I tried to push the axle through the remaining bearing in the frame it is not possible by hand.

Today I will take my bike to my dealer for further investigation.

Regarding the inspection of the bearings at the lower main pivot I dissembled the axle. But I couldn´t move the swingarm so that I have easy access to the bearing. The cable of the speed sensor shows a lot of tension, when I want to flip the swingarm.

I´m already thinking about how a bearing change would work here. Does someone of you have further experience here?

Regards
Oliver

Picuters sticking axle
IMG_20230419_111449_264.jpg IMG_20230419_111458_720.jpg IMG_20230419_111538_220.jpg IMG_20230419_111656_831.jpg IMG_20230419_111747_540.jpg

Pictures Split Pivot
IMG_20230419_162730_993.jpg IMG_20230419_170653_652.jpg
 

Rod B.

Well-known member
Aug 18, 2021
530
924
USA, Orange County Ca.
Hi Guys,

I´m new here in the forum. I read a lot about the bearing change procedures. Thanks a lot @Rod B.

On my Rise H15 2022 which I ride since December 2022 I did a deep inspection of the bearings during the fork and the shock were disassembled for servicing.

I found out, that both bearings in the split pivot are obliquely. The one on the drive side still has some rust inside.

Further I had issues with the axle of the main pivot. The axle sticked so hard on the bearings, that when I used a soft hammer to remove it one bearing of the main pivot came out of the frame.

When I tried to fit a new bearing on the axle I couldn´t push the bearing on the axle by hand. Also, when I tried to push the axle through the remaining bearing in the frame it is not possible by hand.

Today I will take my bike to my dealer for further investigation.

Regarding the inspection of the bearings at the lower main pivot I dissembled the axle. But I couldn´t move the swingarm so that I have easy access to the bearing. The cable of the speed sensor shows a lot of tension, when I want to flip the swingarm.

I´m already thinking about how a bearing change would work here. Does someone of you have further experience here?

Regards
Oliver

Picuters sticking axle
View attachment 112572 View attachment 112573 View attachment 112574 View attachment 112575 View attachment 112576

Pictures Split Pivot
View attachment 112577 View attachment 112578
Proneman,

I’m sorry that I didn’t respond sooner. I’m in the process of remodeling my garage workshop and I haven’t had a lot of spare time to answer questions.

I’m going to post your response in red font and reply to your questions and observations in black font.

I found out, that both bearings in the split pivot are obliquely. The one on the drive side still has some rust inside.

Water can and will work it’s way past any bearing and axle interface or bearing that is placed into a bore or blind hole. Rust will form on the inner side of any bearing‘s steel face, especially if there is not a lot of air circulation to dry things out. I‘ve never had an issue with the rust and it doesn’t have much of an impact on the bearing‘s performance as long as the bearing is maintained, lubed and cleaned of grit contaminants.

I’ve found that any bearing whether a bottom bracket bearing, or pivot linkage bearing which is subjected to moisture will rust, this includes some stainless steel bearings which use a combination of steel and stainless alloys.. This goes for just about every manufacturer, i.e Yeti, Santa Cruz, Pivot etc.

In regards to the Rise’s rear chain stay and seat tube axle bearing. Even brand new, the bearings do not spin well. I think this may be attributed to the very thin width of the bearing race and the close tolerance fit of the bearing bore which the bearing is pressed into. When the bearing is pressed into the bore, this compresses the bearing race and warps it. The warpage causes the bearings not to spin freely.

The main purpose of the rear axle chain stay and seat stay bearing is to support the rear wheel axle in the drop outs. I don’t believe the bearing’s ability to spin freely has any impact on the linkage, nor does it impact the rear axle.


Further I had issues with the axle of the main pivot. The axle sticked so hard on the bearings, that when I used a soft hammer to remove it one bearing of the main pivot came out of the frame.

The fit between the upper pivot axle bearings (Frame bearings) and the shoulder of the upper axle where it rides on the bearings is a very close tolerance fit.

It’s not unusual to encounter a situation where you may encounter difficulty driving the upper axle out of the bearings. I highly suggest pre-soaking the axle and bearing interface prior to attempting removal of the axle. I’ve used penetrant type lubricants such as WD-40, PB Blaster, Kroil, etc., with grest success.

If it should happen that an upper axle pivot bearing comes out of the bore during removal of the axle, simply press it back into the bore. The fact that it came out of the bore during the axle removal process does not damage the bearing. Be sure to clean the bearing bore and apply a light lubricant to the bearing race before re-inserting the bearing back into the bore. Additionally, be EXTREMELY careful to insure the bearing is positioned straight and true to the bearing bore when pressing the bearing back into the bore. If the bearing is inserted off-angle, it will damage and gall the bore hole.


When I tried to fit a new bearing on the axle I couldn´t push the bearing on the axle by hand. Also, when I tried to push the axle through the remaining bearing in the frame it is not possible by hand.

One of the issues that will impact the interface between the aluminum upper pivot axle and the steel race axle bearings is electrolysis. Electrolysis occurs when to disimilar metals contact each other and moisture is introduced. Without going into great detail, when electrolysis occurs, one metal will take material from the other metal. This can cause corrosion and a welding together of the metals. A penetrate lubrication assists in dissolving the corrosion and will help free up the axle.

Note, the axle is made of an aluminum alloy. If you pound hard on the axle when driving it out of the bearings, you can warp, i.e. mushroom the axle and warp it. If this occurs, the axle should be replaced. Attempting to install a warped axle can damage the upper axle pivot bearings due to the force needed to drive the warped axle through the bearings.

If you suspect the axle is not warped, but it does have a slight bit of corrosion or build up on the axle’s shoulders, I’ve used “0000” steel wool to polish the shoulders and remove corrosion or build up. 0000 steel wool is a fine grade steel wool used in wood refinishing. It’s a soft steel wool and will buff and polish the axle shoulders. Do not use it aggressively as it can remove material from the axle shoulders.


Today I will take my bike to my dealer for further investigation.

As Clint Eastwood said in the movie Dirty Harry, “A man’s got to know his limitations.” Getting help or asking for advice is never a bad thing.

Regarding the inspection of the bearings at the lower main pivot I dissembled the axle. But I couldn´t move the swingarm so that I have easy access to the bearing. The cable of the speed sensor shows a lot of tension, when I want to flip the swingarm.

When working on the lower pivot axle assemble. You should first remove the rear wheel. This takes weight off the assembly. You can leave the upper linkage assembled. To swing the lower chain stay out of the way of the bearings, you will need to unclip the “Speed Sensor“ wire and separate it from the black rubber brake hose guide that comes out of the chain stay and into the top of the frame’s motor shell. After separating the speed sensor wire, pull some slack in the rear brake hose and remove the black rubber hose guide from the chain stay and motor shell. This will give you just enough slack to remove the lower pivot axle and slide the chain stay back and out of the way of the bearings. Note, if you cannot pull enough slack in the brake hose, you make have to unbolt the rear brake caliper to gain slack.

I´m already thinking about how a bearing change would work here. Does someone of you have further experience here?

I’ve got a shit ton of experience. Having owned a lot of bicycles, it’s been my experience tha the Rise is a needy bike that requires a lot of maintenance to keep the pivot linkage working properly. It’s a really good bike, just a bit needy…..If you haven’t done so, read my tech articles on servicing the upper and lower pivot axles and linkage.


If you have questions about modifying or servicing your Rise brakes you can find useful information in these tech articles I’ve written.


https://www.emtbforums.com/threads/part-2-shimano-brake-system-–-orbea-rise-brake-system-modification.29158/


I hope you find this information useful.

Be safe,
Rod
 

proneman

Member
Apr 20, 2023
4
2
Deutschland
Hi Rod,

thanks for your detailed response.

I´m working as a mechanical engineer, so I can follow your explanations. The theory with the electrolysis sounds interesting.

To prevent corrosion the new bearings I´ve bought are stainless ones. I know that this type of steel is less hard than the 100CrV6 from the standard ones but I want to give it a try.

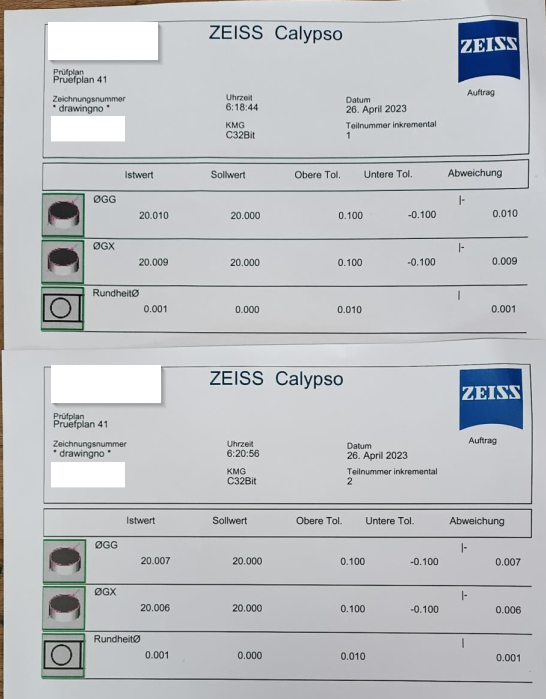
I had the axle measured on our coordinate measuring machine in my company. The result is that the diameters are 20,007mm and 20,010mm. The bearings usually are between 19,990mm and 20,000mm. So, I have an oversize that definitely would not fit easy.
1683224872339.png

I also visited my dealer. They told me, that everything is fine and they would assemble it with a hammer. As you mentioned above if they would do this the new frame bearing would be damaged.
My dealer is not highly interested in such a deep technical discussion.

So I took the bike home with me and ordered a new axle. The new one should be delivered next week. I will try if that one fits better. My other option is to take the old axle with me in our sample shop and sand it down till I have a proper fit with the bearings.

I also tried to cool the axle down. This only reduces the diameter a little µm. It will also be hard to assemble. I still have no chance to preload the bearings as mentioned from Orbea when the axle has such a tight fit.

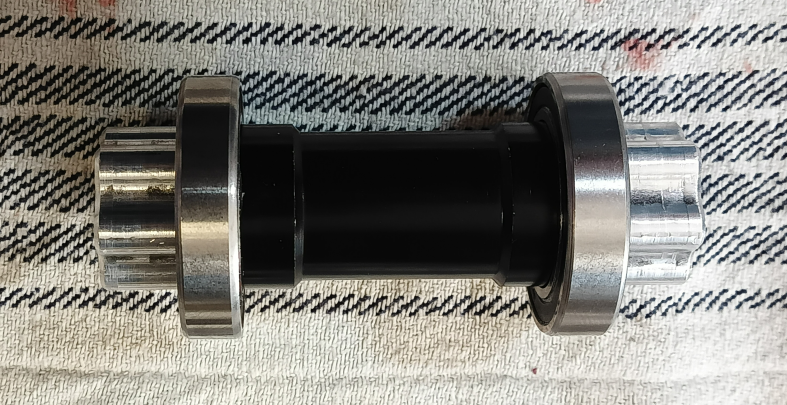
Here you can see how far I´m able to put the bearings on the old axle.
1683225032939.png

I´ve done some bearing changes in the past so it should work out. At the moment I have no bearings in the frame because I first want to try the new axle or fit the old one to the bearings.

After the bearings will slip to the axle I´m going to press the bearings in the frame and put everything together.

I´m hoping that I will solve all problems in the next one or two weeks. Then I will have another talk with the shop owner from my bike dealer about that topic.

Regards
Oliver
 

Rod B.

Well-known member
Aug 18, 2021
530
924
USA, Orange County Ca.
Hi Rod,

thanks for your detailed response.

I´m working as a mechanical engineer, so I can follow your explanations. The theory with the electrolysis sounds interesting.

To prevent corrosion the new bearings I´ve bought are stainless ones. I know that this type of steel is less hard than the 100CrV6 from the standard ones but I want to give it a try.

I had the axle measured on our coordinate measuring machine in my company. The result is that the diameters are 20,007mm and 20,010mm. The bearings usually are between 19,990mm and 20,000mm. So, I have an oversize that definitely would not fit easy.
View attachment 113565

I also visited my dealer. They told me, that everything is fine and they would assemble it with a hammer. As you mentioned above if they would do this the new frame bearing would be damaged.
My dealer is not highly interested in such a deep technical discussion.

So I took the bike home with me and ordered a new axle. The new one should be delivered next week. I will try if that one fits better. My other option is to take the old axle with me in our sample shop and sand it down till I have a proper fit with the bearings.

I also tried to cool the axle down. This only reduces the diameter a little µm. It will also be hard to assemble. I still have no chance to preload the bearings as mentioned from Orbea when the axle has such a tight fit.

Here you can see how far I´m able to put the bearings on the old axle.
View attachment 113567

I´ve done some bearing changes in the past so it should work out. At the moment I have no bearings in the frame because I first want to try the new axle or fit the old one to the bearings.

After the bearings will slip to the axle I´m going to press the bearings in the frame and put everything together.

I´m hoping that I will solve all problems in the next one or two weeks. Then I will have another talk with the shop owner from my bike dealer about that topic.

Regards
Oliver
Oliver,

Awesome response.

In my younger days, I worked as a heavy equipment mechanic for Caterpillar. I used to pack outer bearing races and bushings in dry ice to cool and shrink the items before attempting assembly. The dry ice worked extremely well. I'm not sure how dry ice would work with an aluminum alloy and it's expansion and contraction properties? I liked to also place bearings on an unprotected 150 watt light bulb to heat the bearing up. This would safely heat the bearing without damaging the seal or overheating and altering the bearings metal hardness.

I'm with you in regards to the bike shop. Finesse is usually not a factor when it comes to hammering a bearing into place. Pounding a square peg into a round hole comes to mind. I think it much better that you do the delicate work yourself.

It's been my experience that the upper pivot axle will easily slide into place with just a slight touch of nudging from a soft rubber mallet. The fit is a close tolerance fit, but not to the point your have to use a lot of force.

There have been a few users on the Orbea forum who have also encountered difficulties with their upper axles sticking or being difficult to remove. As you've noted, it only takes a few hundredths off on the milling or possibly an over application of the black anodizing to oversize the axle. I think it's highly possible your upper axle may be oversized in this manner. I do believe you will have much better success with the new axle.

If you have not done so, keep an eye on your black rubber chain stay protector. The chain will wear a grove in the guard near the area where it meets the chain ring. If it's not caught in time, the chain will wear through the guard and into the chain stay itself. The guide arms on the head of the chain guide are also prone to quickly wearing. It's not an issue until you drop a chain while in Boost mode and the chain quickly turns into a chain saw on your frame. I mention this because the parts are not expensive, but Orbea shipping costs are. Maybe order the parts for future replacement, along with your axle?

Once again, awesome post.

Cheers,
Rod
 

proneman

Member
Apr 20, 2023
4
2
Deutschland
Hi together,

since 3 weeks I have my problem solved.

As mentioned I ordered a new axle in the orbea online store. In the meantime I had some calls with orbea in spain. Here I got no direct help but they gave me the option to escalate the topic with my dealer with the help of the area sales manager.
Before I used this option I had a call with the shop owner. First I thought he would also do nothing but a day after my call I received an mail in which he told me that I will get a complete new linkage hardware.

The hardware surprisingly arrived before the axle I ordered days before.

As expected the new axle fits well and I was able to reassemble the bike. Since that I enjoy riding my bike with a freshly serviced and tuned suspension setup.

After the other axle arrived I did a test with the new bearings which I have for further replacement. The axle goes harder than the other one I assembled.

I think as rob mentioned the fit is very tight and sensitive for tolerance fluctuations.

What I not did was using Loctite 638 or similar on the interlock of the axle. I have some thoughts that I would have problem to loosen the right arm for bearing change.

Maybe I will try this in future with the Loctite 641, which is a little weaker than the 638.

Next work on the bike is to get the brake and dropper post hosing rattle free. Here I have some issues since a while, which I want to get fixed.

Oliver
 

Rod B.

Well-known member
Aug 18, 2021
530
924
USA, Orange County Ca.
Hi together,

since 3 weeks I have my problem solved.

As mentioned I ordered a new axle in the orbea online store. In the meantime I had some calls with orbea in spain. Here I got no direct help but they gave me the option to escalate the topic with my dealer with the help of the area sales manager.
Before I used this option I had a call with the shop owner. First I thought he would also do nothing but a day after my call I received an mail in which he told me that I will get a complete new linkage hardware.

The hardware surprisingly arrived before the axle I ordered days before.

As expected the new axle fits well and I was able to reassemble the bike. Since that I enjoy riding my bike with a freshly serviced and tuned suspension setup.

After the other axle arrived I did a test with the new bearings which I have for further replacement. The axle goes harder than the other one I assembled.

I think as rob mentioned the fit is very tight and sensitive for tolerance fluctuations.

What I not did was using Loctite 638 or similar on the interlock of the axle. I have some thoughts that I would have problem to loosen the right arm for bearing change.

Maybe I will try this in future with the Loctite 641, which is a little weaker than the 638.

Next work on the bike is to get the brake and dropper post hosing rattle free. Here I have some issues since a while, which I want to get fixed.

Oliver
Oliver, that's great news on the new linkage. I do find it interesting that the dealer got his parts much faster than you. It takes me three weeks to get parts here in the USA.

In regards to the bearing retainer compound. I do suggest using some form of retaining compound on your upper axle and linkage arm interface. If the retaining compound is not used, the interface will eventually loosen a slight micro amount over time. When this happens, the parts will begin to work against each and cause wear and material loss. This leads to noise related creaking issues and eventually linkage arm slippage and chronic loss of pre-load. Best to take care of it before anything can happen.

As you know, Loctite make various strengths of cylindrical retaining compound. Below are two charts which I'm attaching for those interested and following this thread.

The first chart depicts cylindrical retaining compounds of various strengths. Orbea recommends the use of Loctite 638. I know of several other Rise owners on this forum who have used 641, which a weaker strength retaining compound. They reported that product worked initially, but with time, the weaker product eventually failed on them.

The second chart depicts bearing retention products. Ideally these bearing retaining compounds would be used for issues related to creaking bottom bracket press fit bearing cups or possibly a pivot bearing which has loosened significantly in it's mounting bore hole.

Be safe,
Rod

Screenshot 2023-06-02 06.13.41.jpg


Screenshot 2023-06-02 06.14.48.jpg
 

b33k34

Member
Apr 15, 2021
270
99
UK
Thanks again for this guide. I've just done the main pivot on our two Rises. Mine had had an occasional squeak for a while and last weekend I'd noticed for the first time that there was actually some movement in the lower pivot.

My bike - first time I've looked at the main pivot. 3950km. Drive side was seized, non drive was notchy. Replaced both. The drive side had worn the black coating off the axle but I figure most of the load is compression and theres no movement now it's back together so should be fine.
SWMBO's, just under 3k. Slightly better condition on both (no wear to axle), but both still needed doing. Unfortunately noticed cracked motor axle while doing the work :-(

So - additions to your guide.

"Remove Collet Wedge". I couldn't work out how to do this for a while but it's got an 6mm Allen bolt socket - insert an Allen key to dislodge it.
"Remove axle" this needs an 8mm Allen key (quite a long one) and was really tight (it's 20nm) so I needed a long bar to start it.

The O ring on both bikes had been caught by the bushing and wasn't reusable. Worth getting a few of these in before you do the work - I measured it at 12mm ID, 1.6d BUT I bought a 125pce assortment of o rings from Euro car parts (about £4) and it was the 16x2mm that fitted best.
 

N16BS

Member
May 15, 2021
37
23
Poland
Not sure if this was mentioned before, but Hydro '23 frame has a different axle. It's just a regular bolt with a nut on the non-drive side.

This means that the axle is removed towards the drive side, which could not be done without removing the chain ring. All of this makes this part of maintenance a chore.

1711661478907.png
 

LeeS69

Member
Aug 27, 2022
96
107
Yorkshire
Not sure if this was mentioned before, but Hydro '23 frame has a different axle. It's just a regular bolt with a nut on the non-drive side.

This means that the axle is removed towards the drive side, which could not be done without removing the chain ring. All of this makes this part of maintenance a chore.

View attachment 137148
Yep, just cost me 30 quid to get the shimano tool for the chainring (I'll probably need it at some point though), also a bit baffled (apart from space) why they have used such small bearings for the main pivot, they could at least have put 4 in!
Yet to do this part of the job so no idea how much of a pest it's going to be. Mine is a 2022 but is this setup too... Do you need to move the chainstays or is it just as it looks above without needing to move them?
 

N16BS

Member
May 15, 2021
37
23
Poland
Yep, just cost me 30 quid to get the shimano tool for the chainring (I'll probably need it at some point though), also a bit baffled (apart from space) why they have used such small bearings for the main pivot, they could at least have put 4 in!
Yet to do this part of the job so no idea how much of a pest it's going to be. Mine is a 2022 but is this setup too... Do you need to move the chainstays or is it just as it looks above without needing to move them?
I bailed out after discovered chainring must be removed, so can't help with the next steps. Will wait until the bearings are cooked and then just replace them. Seems like less hassle this way.
 

EMTB Forums

Since 2018

The World's largest electric mountain bike community.

556K
Messages
28,081
Members
Join Our Community

Latest articles


Top