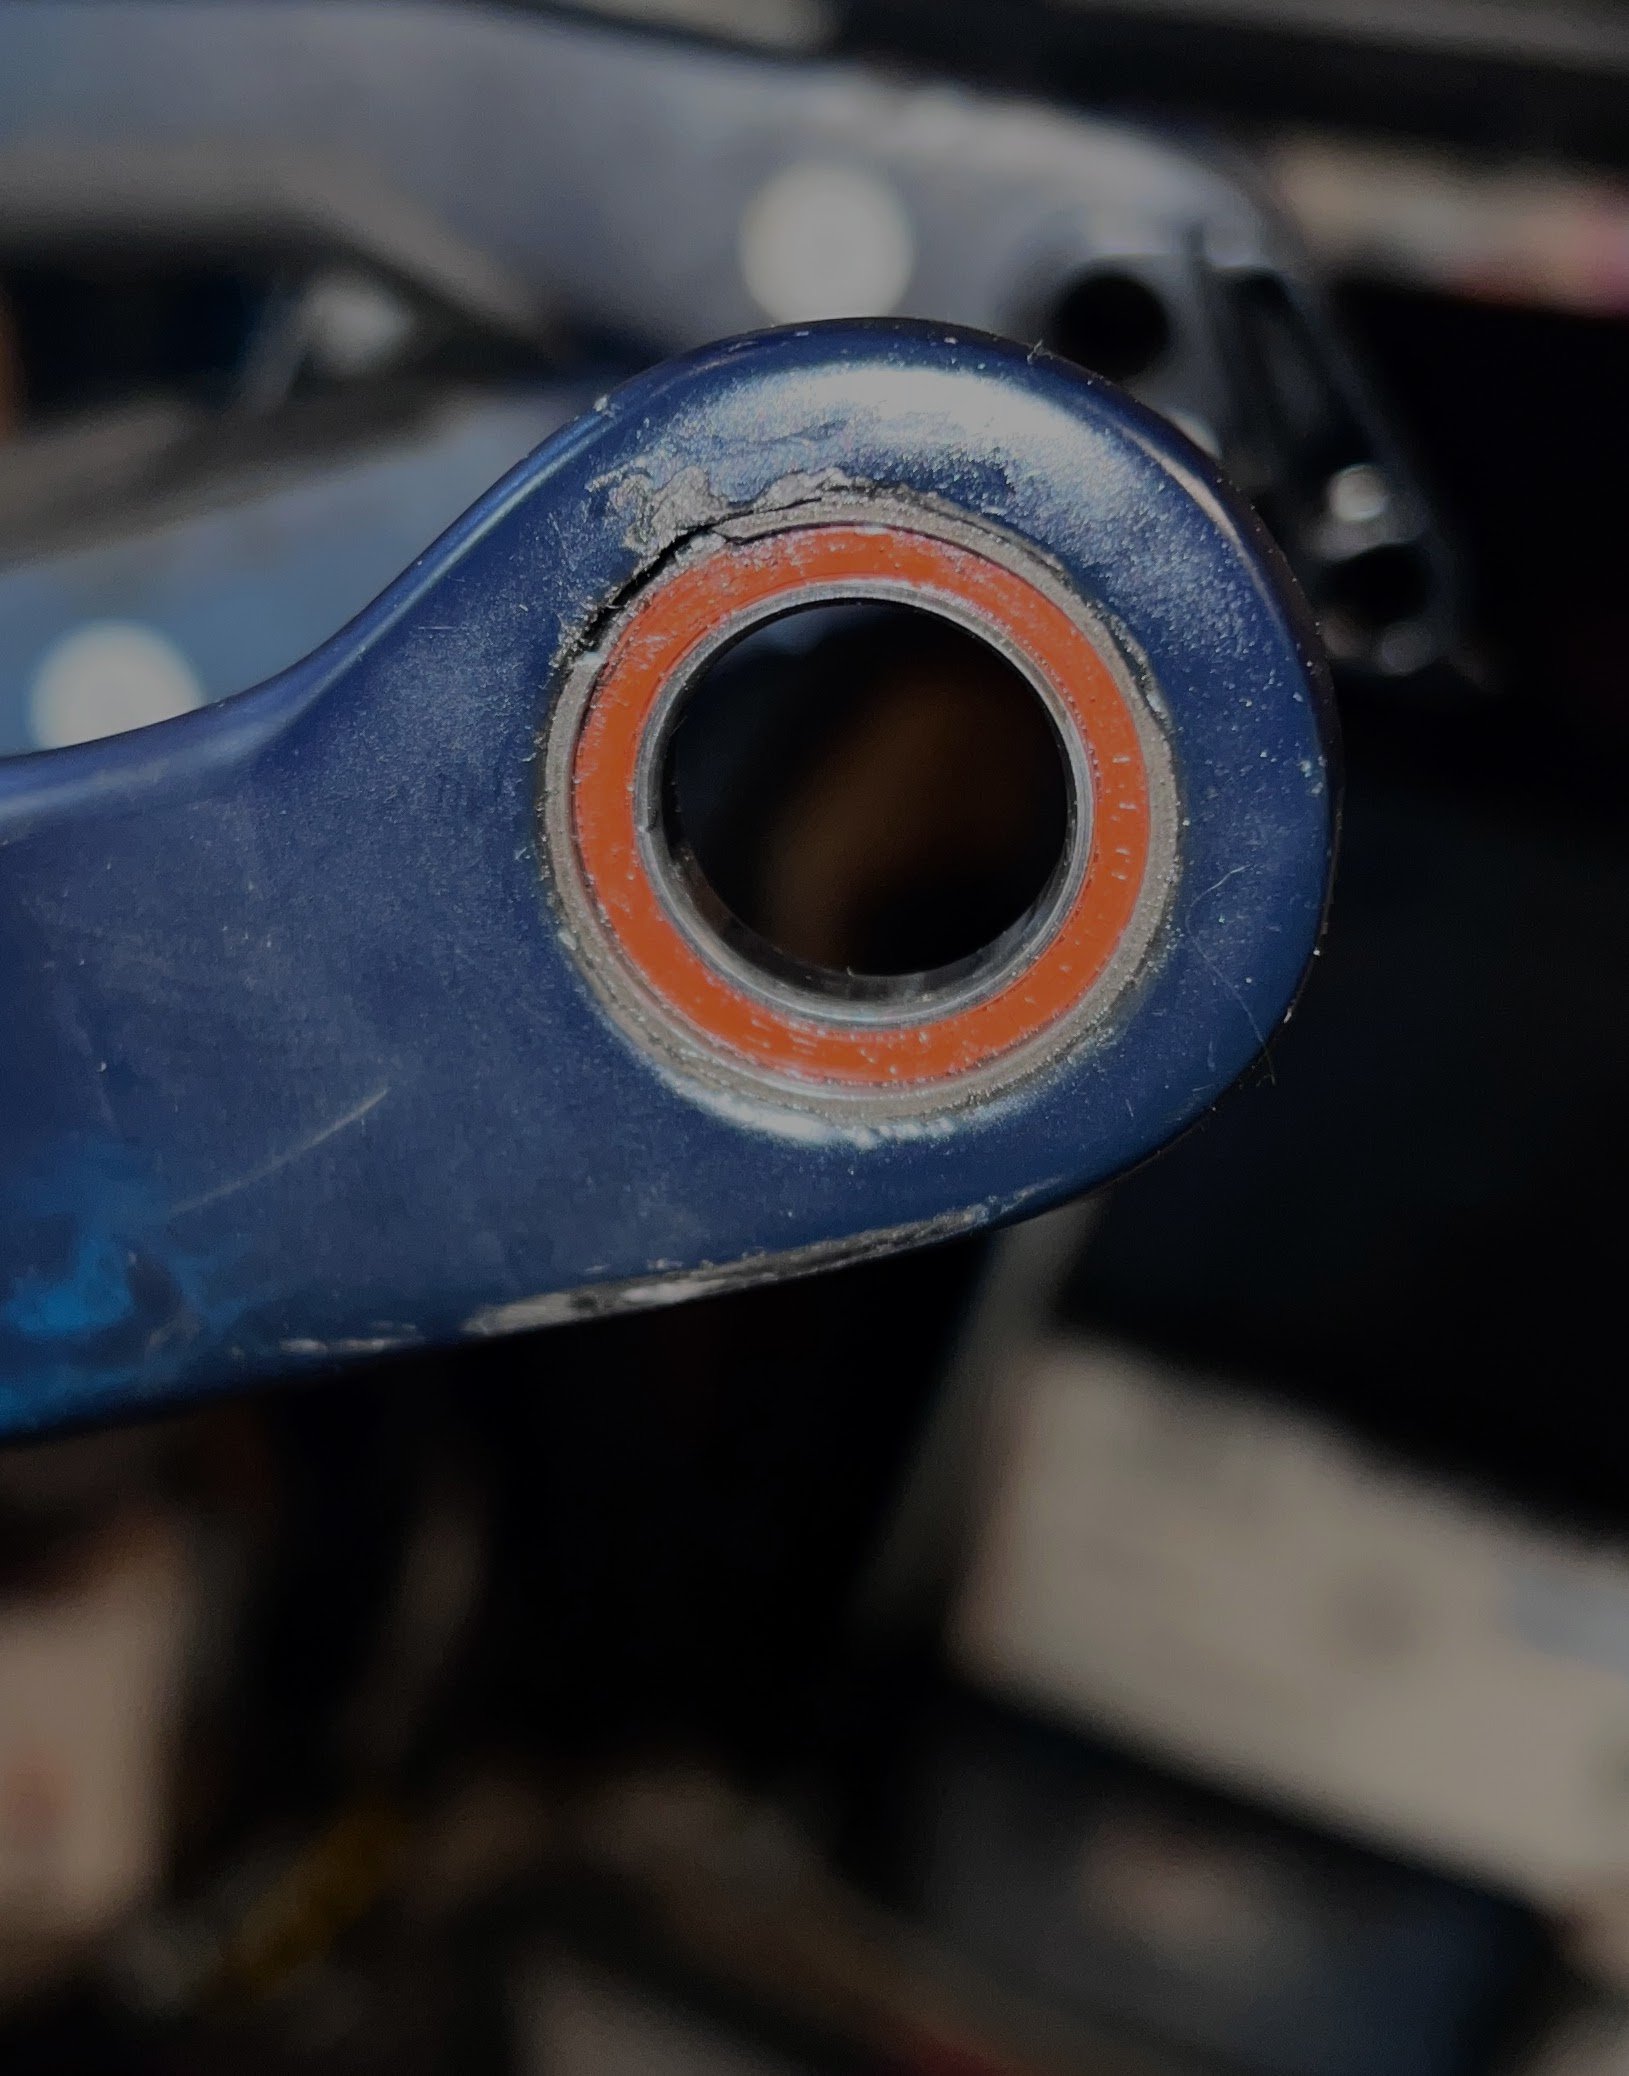
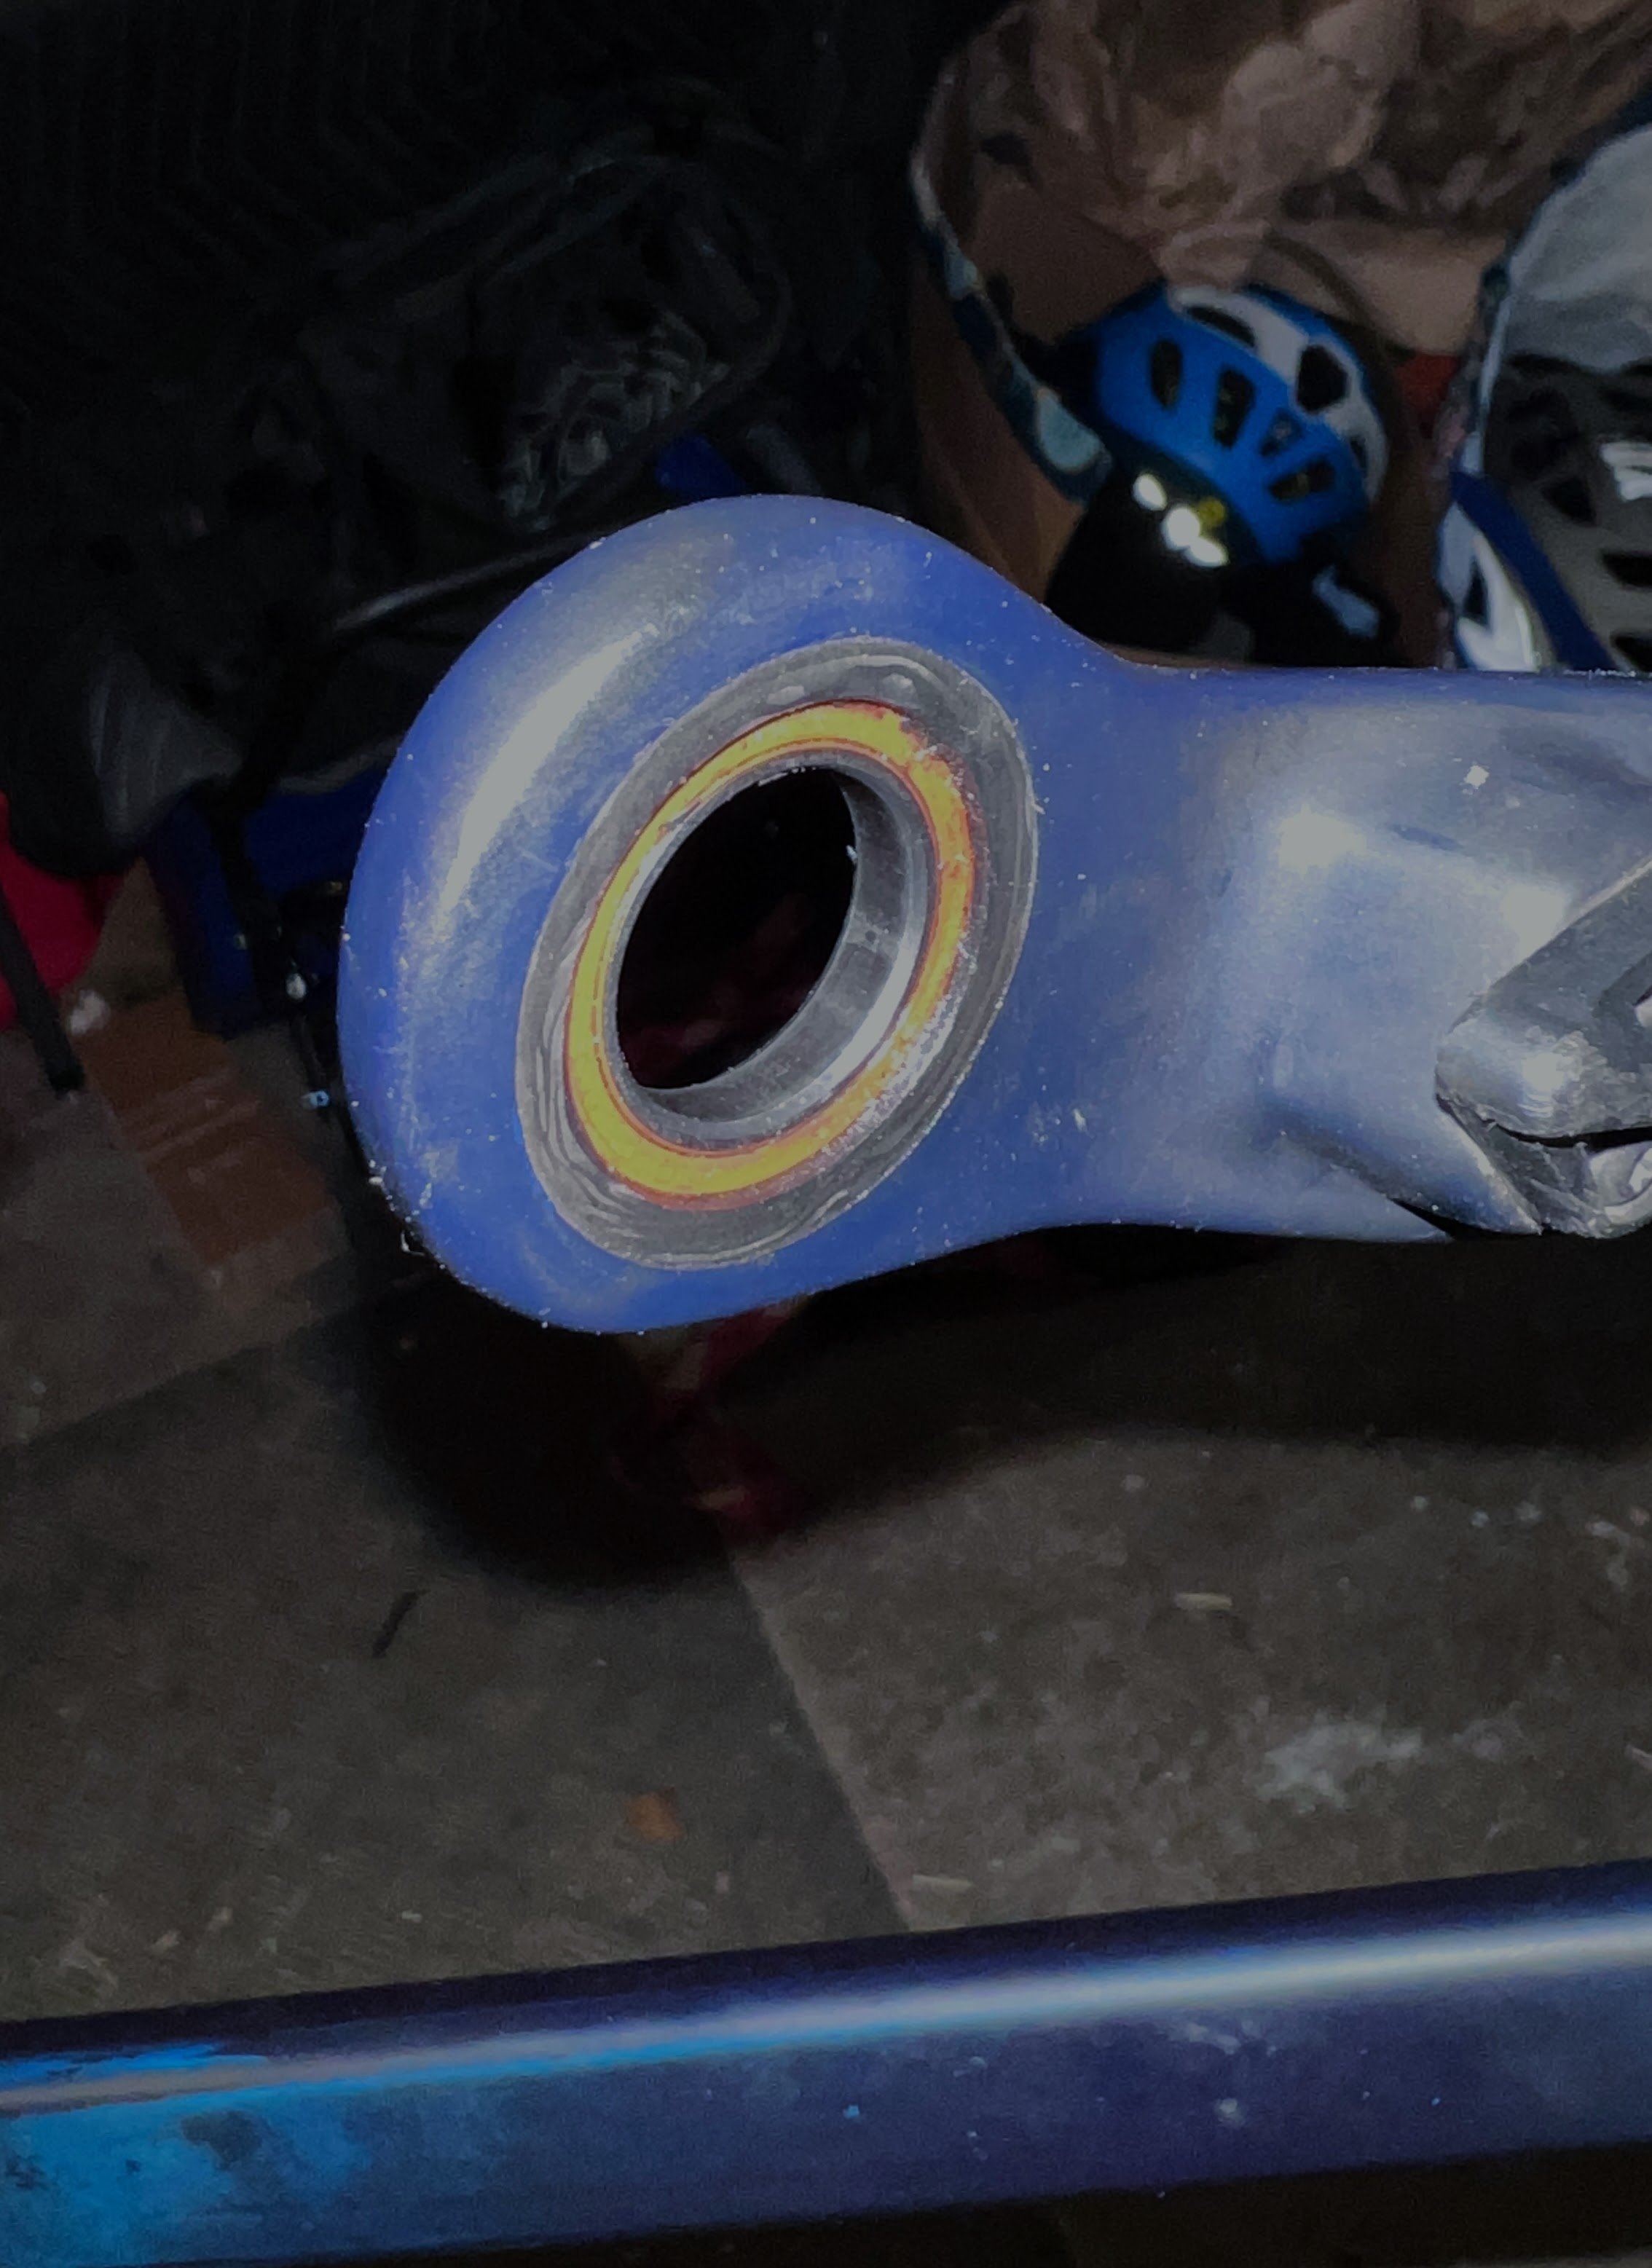
PART # 2: ORBEA RISE - LOWER MAIN LINKAGE AXLE AND BEARING SERVICE

Rod B.

Well-known member
Aug 18, 2021
530
924
USA, Orange County Ca.
sgtcurry,
I agree with Rich, I would grease the lower pivot axle just to eliminate it from the noise isolation process.

What you are describing sounds like a rear hub bearing or possibly a cassette freehub bearing may be going bad. The drive side hub bearing and the cassette freehub bearings tend to take a serious beating from the torque that an electric motor produces. My I9 Hydra hubs had only 1,200 miles on them when the drive side rear hub bearing went bad.

What type of rear hub do you have? Does the noise only occur while pedaling? When a rear hub bearing starts going bad, it will make a can full of gravel noise while pedaling. When a freehub/driver goes bad, it will start making a noise while pedaling under a serious load, i.e. steep and punchy climb. Most rear hub bearing noises typically occur only while pedaling and will get gradually worse/louder, the longer you ride on the worn out bearing.

1) Check your rear hub bearings: Take the rear wheel off and insert the rear axle back into the hub. Hold the rear wheel at port arms by gripping the axle and end caps on each side of the hub solidly. With a finger, flick a spoke and slowly spin the rear wheel. Do you feel any vibration or a bumpy notchy feeling? The wheel should spin smoothly with absolutely no vibration/bumpy feeling. If you do feel vibration, you have a rear hub bearing going bad. Manually check each bearing with your finger to see which one needs to be replaced.

Note: The only caveat to this is if you have a Shimano rear hub and it has cup/cone ball bearings, i.e. Deore hubs on the Rise M20. Shimano hubs with cup and cone bearings will feel rough. If your rear hub has cartridge bearings, it should spin very smoothly, no vibration.

To check rear hub's freehub or driver bearings, place the rear wheel upright on a bench. Grip the cassette and firmly place a load on it with your hands while turning it. Do you feel any play, rocking, grinding, etc. The cassette should spin easily and solidly. There should be no grinding or play. Another way to check a freehub or driver is to remove cassette. Remove the freehub/driver and manually check the bearings with your finger to see if they have a rough notchy feeling when you spin them. I've yet to rebuild a Shimano Micro-spline freehub so I'm not familiar with the bearing setup. If it's a SRAM XD freehub driver, it will have an inner and outer bearing.

Secondary checks:

2) Check the cassette:
Slowly rotate the cassette. Examine the teeth on the cogs. Are any missing? If you have a SRAM cassette, pay particular attention to the teeth directly above each shift ramp on the largest cog. They are the weakest and will tend to break off if you miss a shift, especially in boost mode. Lastly, with the bike in a repair stand, turn the cranks and watch the cassette as it turns. Do the cassette cogs all spin straight and true? Are any of the cogs bent and out of alignment?

3) Check the chain for a bent chain link: To do this place the bike on a repair stand. With your hand slowly spin the rear wheel backwards. Watch the chain as it slowly travels over the upper pulley. If you have a bent chain link, it will jump a bit as it travels over the smaller upper pulley. This is due to the bent chain link binding and not being able to fully bend over the smaller upper pulley.

4) Check your rear derailleur upper and lower pulleys: On eBikes, the nylon upper pulley will tend to wear out quicker than the lower pulley.. Make sure nothing out of the ordinary is going on with the pulleys, i.e. missing teeth or a cracked pulley. Next, shift the bike to the smallest cassette cog. Pull the derailleur arm forward to unweight the chain. Pull the chain away from the upper pulley and spin it. Does it spin freely? Do the same with the lower pulley, does it spin freely? If they don't, the pulley bearings need to be cleaned and greased.

Let me know how you make out.

Be safe,
Rod
 

sgtcurry

Member
Apr 27, 2021
37
19
Houston, Tx
sgtcurry,
I agree with Rich, I would grease the lower pivot axle just to eliminate it from the noise isolation process.

What you are describing sounds like a rear hub bearing or possibly a cassette freehub bearing may be going bad. The drive side hub bearing and the cassette freehub bearings tend to take a serious beating from the torque that an electric motor produces. My I9 Hydra hubs had only 1,200 miles on them when the drive side rear hub bearing went bad.

What type of rear hub do you have? Does the noise only occur while pedaling? When a rear hub bearing starts going bad, it will make a can full of gravel noise while pedaling. When a freehub/driver goes bad, it will start making a noise while pedaling under a serious load, i.e. steep and punchy climb. Most rear hub bearing noises typically occur only while pedaling and will get gradually worse/louder, the longer you ride on the worn out bearing.

1) Check your rear hub bearings: Take the rear wheel off and insert the rear axle back into the hub. Hold the rear wheel at port arms by gripping the axle and end caps on each side of the hub solidly. With a finger, flick a spoke and slowly spin the rear wheel. Do you feel any vibration or a bumpy notchy feeling? The wheel should spin smoothly with absolutely no vibration/bumpy feeling. If you do feel vibration, you have a rear hub bearing going bad. Manually check each bearing with your finger to see which one needs to be replaced.

Note: The only caveat to this is if you have a Shimano rear hub and it has cup/cone ball bearings, i.e. Deore hubs on the Rise M20. Shimano hubs with cup and cone bearings will feel rough. If your rear hub has cartridge bearings, it should spin very smoothly, no vibration.

To check rear hub's freehub or driver bearings, place the rear wheel upright on a bench. Grip the cassette and firmly place a load on it with your hands while turning it. Do you feel any play, rocking, grinding, etc. The cassette should spin easily and solidly. There should be no grinding or play. Another way to check a freehub or driver is to remove cassette. Remove the freehub/driver and manually check the bearings with your finger to see if they have a rough notchy feeling when you spin them. I've yet to rebuild a Shimano Micro-spline freehub so I'm not familiar with the bearing setup. If it's a SRAM XD freehub driver, it will have an inner and outer bearing.

Secondary checks:

2) Check the cassette:
Slowly rotate the cassette. Examine the teeth on the cogs. Are any missing? If you have a SRAM cassette, pay particular attention to the teeth directly above each shift ramp on the largest cog. They are the weakest and will tend to break off if you miss a shift, especially in boost mode. Lastly, with the bike in a repair stand, turn the cranks and watch the cassette as it turns. Do the cassette cogs all spin straight and true? Are any of the cogs bent and out of alignment?

3) Check the chain for a bent chain link: To do this place the bike on a repair stand. With your hand slowly spin the rear wheel backwards. Watch the chain as it slowly travels over the upper pulley. If you have a bent chain link, it will jump a bit as it travels over the smaller upper pulley. This is due to the bent chain link binding and not being able to fully bend over the smaller upper pulley.

4) Check your rear derailleur upper and lower pulleys: On eBikes, the nylon upper pulley will tend to wear out quicker than the lower pulley.. Make sure nothing out of the ordinary is going on with the pulleys, i.e. missing teeth or a cracked pulley. Next, shift the bike to the smallest cassette cog. Pull the derailleur arm forward to unweight the chain. Pull the chain away from the upper pulley and spin it. Does it spin freely? Do the same with the lower pulley, does it spin freely? If they don't, the pulley bearings need to be cleaned and greased.

Let me know how you make out.

Be safe,
Rod

I have the vault hubs on it that came with the M10. Its on the microspline driver. I will change the rear wheel just to check. I did replace the cassette for a brand new one yesterday and it did not help. My bike shop did tell me they took apart the hub to service and didn't find anything but I will see.

Update: I swapped out the wheel. Seems to be the hub, the dt swiss 370s on the wheel I swapped it with makes the sound disappear. I will go ahead and service the lower pivot anyways.

Update 2: I serviced the bottom pivot and put back on the vault wheels that came with the rise. Noise came back, swapped to my spare and noise is gone. Seems like I nailed the creak down now. I am wondering if the hub can be warrantied or serviced.

On another note, the upper pivot spindle for my rise had the thread on the non drive side from the factory. Servicing both pivots did make the suspension a bit smoother. The bearings in the pivots had a bunch of dirt in them but didnt seem to have any issues otherwise.

Thanks for all the help.
 
Last edited:

Rod B.

Well-known member
Aug 18, 2021
530
924
USA, Orange County Ca.
I have the vault hubs on it that came with the M10. Its on the microspline driver. I will change the rear wheel just to check. I did replace the cassette for a brand new one yesterday and it did not help. My bike shop did tell me they took apart the hub to service and didn't find anything but I will see.

Update: I swapped out the wheel. Seems to be the hub, the dt swiss 370s on the wheel I swapped it with makes the sound disappear. I will go ahead and service the lower pivot anyways.

Update 2: I serviced the bottom pivot and put back on the vault wheels that came with the rise. Noise came back, swapped to my spare and noise is gone. Seems like I nailed the creak down now. I am wondering if the hub can be warrantied or serviced.

On another note, the upper pivot spindle for my rise had the thread on the non drive side from the factory. Servicing both pivots did make the suspension a bit smoother. The bearings in the pivots had a bunch of dirt in them but didnt seem to have any issues otherwise.

Thanks for all the help.
That's awesome news, I'm glad you identified the problem. I have a set of Nox Teocalli wheels with DT Swiss 350 hubs. They have about 7,000 miles on them and they are still going strong on my brother's bike. Just bullet proof hubs.

There have been several posts from people who were breaking spokes on their Raceface R30 Turbine wheels with straight pull spokes. How do the spokes feel on the wheel? I wonder if a few have loosened up or maybe broke, which can cause a creaking noise.


If your Rise is new I'd ask for warranty or a fix. It sounds like the bike shop took the hub apart to grease the hub drive, but I wonder if they legitimately checked the bearings for play or roughness and checked spoke tension? Your rear Vault hub uses two 6902 2RS (Rubber Seal) which are readily available bearings. It looks like Raceface sells the Shimano Microspline drive as a whole unit. They don't list the a bearing number for the Microspline. You can always pull the drive off and get a number. Here is a parts breakdown for the Turbine R30 wheels with Vault hubs.


sgtcurry

Member
Apr 27, 2021
37
19
Houston, Tx
That's awesome news, I'm glad you identified the problem. I have a set of Nox Teocalli wheels with DT Swiss 350 hubs. They have about 7,000 miles on them and they are still going strong on my brother's bike. Just bullet proof hubs.

There have been several posts from people who were breaking spokes on their Raceface R30 Turbine wheels with straight pull spokes. How do the spokes feel on the wheel? I wonder if a few have loosened up or maybe broke, which can cause a creaking noise.


If your Rise is new I'd ask for warranty or a fix. It sounds like the bike shop took the hub apart to grease the hub drive, but I wonder if they legitimately checked the bearings for play or roughness and checked spoke tension? Your rear Vault hub uses two 6902 2RS (Rubber Seal) which are readily available bearings. It looks like Raceface sells the Shimano Microspline drive as a whole unit. They don't list the a bearing number for the Microspline. You can always pull the drive off and get a number. Here is a parts breakdown for the Turbine R30 wheels with Vault hubs.


My bike shop is putting in a warranty request. Meanwhile I am debating on which old rear wheel I want to use. Spokes felt fine. I really like the Hydras I got on my Nobl TR32 recently for my exie.
 

Rod B.

Well-known member
Aug 18, 2021
530
924
USA, Orange County Ca.
My bike shop is putting in a warranty request. Meanwhile I am debating on which old rear wheel I want to use. Spokes felt fine. I really like the Hydras I got on my Nobl TR32 recently for my exie.
I have the Nobl TR37 with Hydras on my Rise. Noble makes a good wheel. The Hydras have worked out nicely. Just know you'll have to replace the bearings around the 1,200 -1,500 mile mark. I weigh 195 lbs., so maybe that has something to do with it. It's a simple process to replace the bearings and takes about 20 minutes.

One of the things I like about the Hydra is the instant engagement. I have my Boost mode set to instant full power. When I'm working a rock garden or a rocky step up, I avoid doing a full 360 degree turn of the cranks and potentially pedal striking. With the motor set to instant, full power in boost, I can do rapid 1/4 turn pumps of the cranks and the bike will power through the sections. The Hydra instant engagement works out nicely when doing this.

Good luck with your bike
 

ruibtt

Member
May 5, 2022
6
3
porto
Hello, on my M20 every 2 or 3 rides the rear wheel gains some loose play, I always have to retighten the rear axle, I use the recommended torque of 10Nm,

I think it's not normal, any solution to solve it?
20220618_151304.jpg
 

Richridesmtb

Member
Jan 23, 2022
207
96
Australia
M20 with full kashima? Nice!

I'd probably put a dab of low or medium strength loctite on the rear axle. Seems very usual though. Any damage to any of the threads?
 

Rod B.

Well-known member
Aug 18, 2021
530
924
USA, Orange County Ca.
Hello, on my M20 every 2 or 3 rides the rear wheel gains some loose play, I always have to retighten the rear axle, I use the recommended torque of 10Nm,

I think it's not normal, any solution to solve it? View attachment 96127
Hello, on my M20 every 2 or 3 rides the rear wheel gains some loose play, I always have to retighten the rear axle, I use the recommended torque of 10Nm,

I think it's not normal, any solution to solve it? View attachment 96127
Ruibtt,

My M20 came with Raceface Arc 30 rims with Shimano Deore HB-MT410-B (Boost) hubs. I'm assuming your bike has the same hubs. Your rear wheel should not be loosening up. There are several things that can cause the rear axle to loosen. When a rear hub bearing starts going bad, it can cause play in the rear wheel end caps and thus cause the axle to eventually loosen. On the other hand, It could also just simply be you need to tighten the rear axle a bit tighter than 10Nm.

One of the issues I've discovered with electric mountain bikes is that torque from the motor tends to be really hard on the rear wheel hub bearings. I have Industry Nine Hydra hubs on my Rise and have replaced the rear hub bearings twice in 1,800 miles of riding. I can tell when one of my rear hub bearings is starting to go bad, if I hear the brake rotor rubbing on the caliper during hard cornering. The bad bearing allows the rear hub to move on the rear axle and thus the rotor rubbing.

As a side note, the Shimano Deore MT-410 rear hub on your M20 uses four cartridge bearings. Two bearings are for the hub and the other two are for the Microspline driver.

Here is a YouTube video which depicts rebuilding the Shimano MT-410-B hub. (B=Boost)

Check the rear wheel hub bearings:

1) Torque your rear axle to specification. Place your bike in a repair stand or if you do not have a repair stand, turn your bike over and place it upside down. Hold a chain stay in one hand and grab the rear wheel with the other. Push and pull the rear wheel. Do you feel any flex or movement? If you do, this indicates you have a rear hub bearing going bad.

2) Take your rear wheel off the bike and hold it by the end caps in each of your hands. With a finger, spin the rear wheel. As the wheel spins, feel for roughness and listen for bearing noise. The wheel should spin buttery smooth. There should be absolutely no roughness or bearing noise as the wheel spins. If you feel roughness, the cartridge bearings in the hub are going bad and developing play. The play is allowing the rear axle to loosen up.

3) Place the bike in a repair stand or turn over upside down. Remove the rear wheel. You need to check the rear axle bearings mounted at the end of each chain stay on the bike. If you have a rear axle bearing going bad or the drop out mounted incorrectly, this may be introducing play in the rear chain stay/seat stay area and causing the axle to loosen at the drop outs.

Screenshot 2022-08-28 16.59.18.jpg

To remove the drive side (Right) drop out/derailleur hanger, you must pull outwards and at the same time turn, the plastic castellated nut identified as "3.4" in the diagram. This will allow you to remove the derailleur hanger. After doing so, lift the seat stay up and inspect the rear axle bearing which will be mounted in the right chain stay. There should be no play in the right axle bearing.

Note: Some Rise's are coming from the factory with the chain stay bearings being difficult to turn. This is due to the hole in the chain stay being milled too small. When the axle bearing is pressed into the hole (Which is too small), it places pressure on the circumference of the bearing and it makes the bearing hard to turn.

To inspect the left, non-drive side axle bearing, hold the chain stay in one hand and hit the seat stay with the palm of your other hand. This will cause the chain stay and seat stay to separate. Lift the seat stay up and inspect the axle bearing which will be mounted in the chain stay.

Note: The only thing holding the left chain and seat stays together is an O ring "3.2" mounted on the drop out, identified as "3.1" in the diagram. The left drop out has a notch/ridge on it which corresponds with an indent/notch in the chain stay. The drop out must be re-assembled with the drop out notch and chain stay indent aligned together.

I hope this helps...cheers
Rod
 

ruibtt

Member
May 5, 2022
6
3
porto
Ruibtt,

My M20 came with Raceface Arc 30 rims with Shimano Deore HB-MT410-B (Boost) hubs. I'm assuming your bike has the same hubs. Your rear wheel should not be loosening up. There are several things that can cause the rear axle to loosen. When a rear hub bearing starts going bad, it can cause play in the rear wheel end caps and thus cause the axle to eventually loosen. On the other hand, It could also just simply be you need to tighten the rear axle a bit tighter than 10Nm.

One of the issues I've discovered with electric mountain bikes is that torque from the motor tends to be really hard on the rear wheel hub bearings. I have Industry Nine Hydra hubs on my Rise and have replaced the rear hub bearings twice in 1,800 miles of riding. I can tell when one of my rear hub bearings is starting to go bad, if I hear the brake rotor rubbing on the caliper during hard cornering. The bad bearing allows the rear hub to move on the rear axle and thus the rotor rubbing.

As a side note, the Shimano Deore MT-410 rear hub on your M20 uses four cartridge bearings. Two bearings are for the hub and the other two are for the Microspline driver.

Here is a YouTube video which depicts rebuilding the Shimano MT-410-B hub. (B=Boost)

Check the rear wheel hub bearings:

1) Torque your rear axle to specification. Place your bike in a repair stand or if you do not have a repair stand, turn your bike over and place it upside down. Hold a chain stay in one hand and grab the rear wheel with the other. Push and pull the rear wheel. Do you feel any flex or movement? If you do, this indicates you have a rear hub bearing going bad.

2) Take your rear wheel off the bike and hold it by the end caps in each of your hands. With a finger, spin the rear wheel. As the wheel spins, feel for roughness and listen for bearing noise. The wheel should spin buttery smooth. There should be absolutely no roughness or bearing noise as the wheel spins. If you feel roughness, the cartridge bearings in the hub are going bad and developing play. The play is allowing the rear axle to loosen up.

3) Place the bike in a repair stand or turn over upside down. Remove the rear wheel. You need to check the rear axle bearings mounted at the end of each chain stay on the bike. If you have a rear axle bearing going bad or the drop out mounted incorrectly, this may be introducing play in the rear chain stay/seat stay area and causing the axle to loosen at the drop outs.

View attachment 96148
To remove the drive side (Right) drop out/derailleur hanger, you must pull outwards and at the same time turn, the plastic castellated nut identified as "3.4" in the diagram. This will allow you to remove the derailleur hanger. After doing so, lift the seat stay up and inspect the rear axle bearing which will be mounted in the right chain stay. There should be no play in the right axle bearing.

Note: Some Rise's are coming from the factory with the chain stay bearings being difficult to turn. This is due to the hole in the chain stay being milled too small. When the axle bearing is pressed into the hole (Which is too small), it places pressure on the circumference of the bearing and it makes the bearing hard to turn.

To inspect the left, non-drive side axle bearing, hold the chain stay in one hand and hit the seat stay with the palm of your other hand. This will cause the chain stay and seat stay to separate. Lift the seat stay up and inspect the axle bearing which will be mounted in the chain stay.

Note: The only thing holding the left chain and seat stays together is an O ring "3.2" mounted on the drop out, identified as "3.1" in the diagram. The left drop out has a notch/ridge on it which corresponds with an indent/notch in the chain stay. The drop out must be re-assembled with the drop out notch and chain stay indent aligned together.

I hope this helps...cheers
Rod
thanks Rod B., as always you have a thorough and extremely helpful explanation, in the next few weeks when I have time I will check
 

jbn_84

New Member
Jan 14, 2023
1
0
Uk
FYI the Rise Hydro has a different pivot axle. It does not have the expanding wedge set up. It is basically a bolt and nut arrangement, the nut is on left side which allows the pivot axle to be removed on the drive side. No fussing with the cables.
I have a Rise Hydro and have been trying to take apart the main pivot (with the different design to the carbon version).

Can anyone confirm if this pivot axle is reverse threaded on the Hydro series? I was told elsewhere this was the case, but want to be certain before giving it too much persuasion, as it's not coming apart easily.

Cheers
 

b33k34

Member
Apr 15, 2021
267
99
UK
SgtCurry,

When I checked the tech article, it was displaying all of the pictures and YouTube videos. Are you talking about the Part # 1 Upper Linkage or Part # 2 Lower Linkage article? Can you identify counting down from the top which pictures are missing, i.e. picture 5, picture 6? I also posted several YouTube videos with the tech article. Sometimes the YouTube links will go bad. Are the YouTube videos present?

Isolating a noise on a bike can be an absolute bitch. I've never experienced a creaking noise caused by a loose motor mount bolt, rear axle or lower motor guard. One think to note, it's been my experience that using the correct torque settings on the Rise is critical. Some bikes you can get away with using the "I'll turn it until my elbow pops method." With the Rise carbon frame, correct torque settings are essential, otherwise linkage arms become loose, crank arms fall off, etc. A good quality torque wrench is important, don't go cheap.

More than likely if you are experiencing a creaking noise on your Rise while riding, it'll be either the upper or lower pivot axle. Most likely, it will be the upper pivot axle. The pivot axles on the Rise are not sealed nor do they have O rings to keep dust or water from working into the area where the alloy axle rides upon the frame's steel pivot bearings. The axles will eventually go dry from lack of lubrication and cause a creaking noise as they shift with micro movements on the frame's steel pivot bearings. It's been my experience the noise occurs only while riding and will not occur when just sitting on the bike and bouncing up and down. The upper pivot axle tends to need lubrication more frequently than the lower pivot axle.

View attachment 89872


If you are experiencing an issue with the linkage arms loosing their grip on the axle splines, then it's best to buy a bottle of Loctite 638 cylindrical retaining compound. Apply it to the upper axle splines and splined opening on the linkage arm. Set the correct preload using the purple Orbea pre-load tool. Make sure the pinch bolt has a dab of blue Loctite and tighten the pinch bolt to the correct torque setting. Refer to Part # 1: Upper Pivot Linkage Service for details.

I saw another reference to Loctite 638 in these guides (I think saying 'its' not in the Rise blue paper but is in the Rallon')

From another forum I've got an Occam user reporting having huge difficulty removing the linkages from the splines (I didn't have any trouble on my Rise) and

This is one of the strongest retainers Loctite produce. 100% Genuine product direct from Henkel.
Maximum strength, high-temperature resistance retainer, used widely in industry for metal bonding including passive substrates (e.g. stainless steel). Tolerates minor contaminants, including industrial oils
Best resistance to dynamic, axial and radial loads. Service temperature range: -55°C to +150°C. Prevents loosening and leakage from shock and vibration


and something on another forum with a bike shop saying 'that's got to be a mistake - loctite 638 is basically permanent and needs heating to remove.

has anyone used it, removed it again to report back? Any suggestions for a weaker replacement?
 

Rod B.

Well-known member
Aug 18, 2021
530
924
USA, Orange County Ca.
I saw another reference to Loctite 638 in these guides (I think saying 'its' not in the Rise blue paper but is in the Rallon')

From another forum I've got an Occam user reporting having huge difficulty removing the linkages from the splines (I didn't have any trouble on my Rise) and

This is one of the strongest retainers Loctite produce. 100% Genuine product direct from Henkel.
Maximum strength, high-temperature resistance retainer, used widely in industry for metal bonding including passive substrates (e.g. stainless steel). Tolerates minor contaminants, including industrial oils
Best resistance to dynamic, axial and radial loads. Service temperature range: -55°C to +150°C. Prevents loosening and leakage from shock and vibration


and something on another forum with a bike shop saying 'that's got to be a mistake - loctite 638 is basically permanent and needs heating to remove.

has anyone used it, removed it again to report back? Any suggestions for a weaker replacement?
B33K34,

I am not familiar with the newer 2023 model of Carbon Rise or 2022/2023 Rise Hydro linkage and therefore have no experience with these models. I can comment on the 2020/2022 Carbon M series Rise which I have much experience with. The Orbea 2020/2022 Rise carbon M series is based off of the Orbea Rallon platform. A short time after Orbea rolled out the Rise, riders such as myself began to experience issues with the rear end creaking and developing play.

There are several issues with the upper linkage on the 2020/2022 Rise which require annual maintenance. The upper linkage axle is not sealed and dirt can work into the interface between the upper axle and the bearings the axle rides upon and cause squeaking. The biggest issue is a loosening of the linkage arm on the upper axle. The splined linkage arm is held in place on the splined upper axle by a single pinch bolt and friction fit. When new it's not an issue. If the bike isn't rode hard, i.e. chunky trail, it's not an issue. But, if you ride the bike hard, then play will begin to develop in the splined interface. As for my Rise, I was resetting the pre-load and re-tightening the drive side linkage arm about once a month. It eventually got so bad, I bought a new upper axle which worked for a while and then it too began to develop wear on the splines. Using a single pinch bolt to retain the linkage arm upon the axle is a poor design. Are you listening Orbea?

I originally thought the noise issue was a lack of grease. Later I began to suspect that a loosening of the linkage arm was the main contributor to the noise issue. Another eMTB forum user, I believe it was Rich, brought it to my attention about the use of a retaining compound on the splines. When I checked the 2020-2021 Rise Blue Paper, it mentions the use of a cylindrical retaining compound on the splines, but doesn't identify which type of retaining compound to use.

Screenshot 2023-01-19 07.03.40.jpg


The Rallon shares the same linkage design as the Rise. I checked the 2020-2021 Rallon Blue Paper which states to use LocTite 638.

Screenshot 2023-01-19 05.07.40.jpg

Once I began using the LocTite 638, I no longer had an issue with the linkage arm(s) loosening up or creaking noise. The upper axle and bearings still need an occasional application of grease to prevent squeaking or corrosion occurring if you ride in a very wet area.

LocTite 638 has a consistency very similar to Loctite red thread locker. It's not an adhesive and acts more as a gap filler to remove any play where two components interface. It's made to prevent things loosening up and It does it's job well. The trick when applying the compound is to use it sparingly, do not use a large amount of the retaining compound on the splines. You want to use it sparingly. If you go heavy on application, you will have a really tough time breaking the bond between the linkage arm and axle splines. Ask me how I know. Even with a light application, you will still need to put a little effort into loosening the linkage arm up to remove it from the splines. You have the option of using no compound and re-setting your pre-load every few rides or use a cylindrical retaining compound and deal with some difficulty in removing the linkage arm.

My preferred method is to remove the pinch bolt from the drive side linkage arm. Keep in mind, to service the upper axle, you need only remove one of the linkage arms from the axle in order to remove the axle and inspect/service/grease the bearings. Once I've removed the linkage arm pinch bolt, I place a metal chisel (The more tapered the better) of appropriate thickness in the slot on the linkage arm where the pinch bolt formerly was. I then begin taping the chisel into the gap with a hammer, while also striking the end of the linkage arm with a rubber mallet. Do not smash the chisel into the linkage arm's gap or hammer roughly, you don't want to mar or damage the linkage arm. The object is to expand the linkage arm enough to break the bond and walk the linkage arm off of the axle.

I would advise against using heat. Aluminum tends to lose tensile strength with exposure to heat. I'm not a metals specialist so I don't know how much. I'd also be worried about damaging the carbon frame. I'd suggest maybe applying some heat from a blow dryer. The heat is low enough to not damage anything and can possibly still loosen the bond.

IMG_1467.JPG


If you are concerned about using LocTite 638, you may want to use a lesser grade of LocTite retaining compound. Loctite makes many levels of cylindrical retaining compound. The trick here is to find/use one that will keep your linkage arm tight on the axle, while also allowing ease of assembly. Experiment, maybe start with a mid grade and see how that works. The worse thing that can happen is the linkage arm will loosen up.

Here's a chart listing LocTite retaining compounds.

Screenshot 2023-01-19 07.22.52.jpg


The upper linkage assembly on the 2020-2022 Orbea Rise M series has issues which I've explained. Orbea recommends LocTite 638 for a reason. It appears Orbea has addressed these issues with a new upper linkage design on the new 2023 Rise models.

I hope this helps.

Be safe,
Rod
 

b33k34

Member
Apr 15, 2021
267
99
UK
Thanks for that. there doesn’t seem to be a lower strength direct equivalent on that chart. I’m thinking apply to one dide and then maybe very very sparing on the other. (perhaps if needed. We’ve had creaking come and go but clearly there are a lot of different parts of the system it could be coming from).
 

Rod B.

Well-known member
Aug 18, 2021
530
924
USA, Orange County Ca.
Thanks for that. there doesn’t seem to be a lower strength direct equivalent on that chart. I’m thinking apply to one dide and then maybe very very sparing on the other. (perhaps if needed. We’ve had creaking come and go but clearly there are a lot of different parts of the system it could be coming from).
I think that's a good solution regarding application of the compound. Sparingly on the splines.

You are right about noise. Sound travels and can make locating the noise difficult. When I sold my Rise to my brother it had 3,200 miles on it. I currently own a Levo just to try something different. I got pretty good at identifying noises on the Rise. If the linkage arm has shifted and play has opened up, it allows the upper axle to slide slightly across the upper pivot bearings. The noise will sound exactly like a creaking saddle or seat post as you pedal. You'll swear it's the saddle, but it's not, it's the upper linkage.

The EP8 motor puts out a lot of torque. This tends to cause a more rapid wear in the rear hub bearings (Drive side) and especially the freehub bearings. The creaking will occur as you pedal and it'll sound like it's coming from the motor or pedals. Pull the rear wheel and cassette off. Spin the bearings with your fingers and see if you get a notchy feeling. The bearings should be silky smooth, if not replace them. As a side note, I had Industry Nine Hydra hubs on my Rise with Nobl TR37 rims. I was eating rear hub bearings (Drive side) and freehub bearings about every 800 - 1,000 miles.

The lower axle will on rare occasion creak if not greased every once in a while (You're from the UK, make sure to use a good waterproof grease). The lower axle design can't shift like the upper linkage can do. However, the lower axle where it makes contact with the two lower pivot bearings will occasionally run dry of grease. If this occurs, the lower axle will emit a creaking sound similar in tone to the sound of a creaking upper axle however, the tone will have a deeper lower sounding creak to it.

Lastly, the headset. The Acros headset isn't of the highest standard. If it's exposed to a lot of moisture it'll start to fail and creak. I eventually went with a used Chris King Dropset 2 headset which came off of a Yeti SB130. No more creaking from the headset and you get a lifetime warranty. I've got 6,500 miles/10,460Km on the CK Dropset 2 headset.

Cheers,
Rod
 
Last edited:

cookie70

Active member
Mar 23, 2022
204
152
Central Coast, Australia
Any thoughts on fabricating or butchering the preload tool (remove the wingnut) and leaving the preload cap permanently in? Bit like many brands of cranks do with caps. Seems to me only the drive side ever gets loose.
 

Rod B.

Well-known member
Aug 18, 2021
530
924
USA, Orange County Ca.
Any thoughts on fabricating or butchering the preload tool (remove the wingnut) and leaving the preload cap permanently in? Bit like many brands of cranks do with caps. Seems to me only the drive side ever gets loose.

Any thoughts on fabricating or butchering the preload tool (remove the wingnut) and leaving the preload cap permanently in? Bit like many brands of cranks do with caps. Seems to me only the drive side ever gets loose.
Cookie, what's the haps?

It was my experience also that the drive side linkage arm was the arm that would always loosen up. At one point I actually considered doing exactly what you suggest. Once I started using the LocTite 638, I no longer had an issue with the linkage arm loosening up and never pursued it further.

I think the idea has merit and would alleviate the need for the Loctite retaining compound. I believe if you were only to secure the drive side linkage arm, then the non-drive side arm would eventually begin to slip. If you pursue the concept further, mill two plugs. Leave one plug threaded. Remove the threads from the other plug so it will slip into the non-drive side of the axle. After setting preload, use the connecting bolt and nylon locking nut to connect the two plugs and set tension. The soft preload washer would likely need to be replaced with a suitable thickness steel washer. I have to believe Orbea probably experimented with this concept and it didn't work out for some reason? Who knows, maybe not.

If you or somebody else attempts this, I'd be curious to know how it worked out.


Screenshot 2023-01-24 06.30.33.jpg
 
Last edited:

Philippe M

New Member
Feb 26, 2023
9
1
California
Thanks Rob & everyone for their individual contributions. Very informative and well done. Thank god there's still guys like you that are willing to take the time to inform the rest of us as to what to expect.(y)(y)
 

Rod B.

Well-known member
Aug 18, 2021
530
924
USA, Orange County Ca.
Thanks Rob & everyone for their individual contributions. Very informative and well done. Thank god there's still guys like you that are willing to take the time to inform the rest of us as to what to expect.(y)(y)
Thank you very much for the kind replay, it was much appreciated.
 

MikeL_mtb

Member
Feb 15, 2022
62
12
New York
I'm having real trouble getting the C clip out of the chainstay, someone else's pic had a little notch to help get it removed, but my '21 M doesn't. I've tried a few picks, a few screw drivers, and even ground down a small screw driver head to try and get above and behind the clip to get it to pop out. It's not moving down more than 1mm, and I've already chipped a little carbon trying to force it out. I'm ready to dremel the damn thing and get a new one, but since it takes orbea like 2 weeks to get me small parts, I haven't yet. Anyone look for a snap ring style clip to replace it? it would be a 2 min job with snap ring pliers. I can rotate the clip in the hole, so it's not completely seized.
 

Rod B.

Well-known member
Aug 18, 2021
530
924
USA, Orange County Ca.
I'm having real trouble getting the C clip out of the chainstay, someone else's pic had a little notch to help get it removed, but my '21 M doesn't. I've tried a few picks, a few screw drivers, and even ground down a small screw driver head to try and get above and behind the clip to get it to pop out. It's not moving down more than 1mm, and I've already chipped a little carbon trying to force it out. I'm ready to dremel the damn thing and get a new one, but since it takes orbea like 2 weeks to get me small parts, I haven't yet. Anyone look for a snap ring style clip to replace it? it would be a 2 min job with snap ring pliers. I can rotate the clip in the hole, so it's not completely seized.
MikeL,

Confirm you are talking about the left side chain stay and circlip? Attached is a picture of my Rise M20 left, non-drive side chain stay. Does your Rise left chain stay not have this notch?

IMG_2665.jpg


I'm going to assume you want to remove the rear chain stay axle bearings, Enduro 6803, and replace them. To remove the left, non-drive side chain stay bearing, you need to remove the C clip.

Occasionally, bearings will shift in their bores a small amount. It's very likely this has happened with your chain stay. The bearing is now putting pressure on the C clip and pinching it in it's groove. You will need to relieve the bearing pressure in order to remove the C clip. To do this, you will need a bearing press. A bearing press will allow you to press and fully seat the bearing back into it's bore. Additionally, you can use the press to install the new bearing.

NOTE: The chain stay is thin and can be easily fractured at the rear axle bearing bore. Use much care when removing and installing bearings. Do not place the chain stay against something, i.e. block of wood and then hammer on the axle bearing to remove from or install it into the chain stay rear axle bearing bore. If you do hammer, you stand very good chance of cracking the chain stay. Use a bearing press.

There are two ways to press the bearing. There's the janky way and the proper way. The proper way entails buying a professional bearing press. There are multiple companies such as Park Tool, Bearingprotools.com, Rapid Racer Products (RRP), etc. that make excellent purpose built bearing presses. You can also buy a "General Purpose" bicycle bearing press kit on Amazon at a reasonable price.

Here's an example of a bearing press sold buy "BearingProTools.com". You buy the press and then buy individual drifts which match a specific bearing size.

Screenshot 2023-02-27 09.59.05.jpg


Screenshot 2023-02-27 10.00.41.jpg


You can also purpose a general purpose bearing press on Amazon.
Screenshot 2023-02-27 09.56.40.jpg


There are also companies such as Rapid Racer Products and BearingProTools.com which make "Cup" and "Die" bearing presses made for specific bearing sizes. In my opinion, this type of bearing installer/remover is the best as it minimizes frame or paint damage.

Screenshot 2023-02-27 10.23.56.jpg


If you do not have the funds to buy a proper bearing press, there is the DIY janky way. This involves making your own bearing press by taking a trip to Home Depot and buying a piece of 3/8 inch all thread, 3/8 inch nuts, and several large washers. You also use a 3/8 inch drive socket which matches the outer circumference of the bearing to press the bearing.

Note: You never want to press on the inner race of a bearing. This will absolutely damage the ball bearings and put flat spots in them. You always want to press on the outer edge of a bearing. In your case, the C clip is blocking the outer race of the bearing. Because you are going to replace the bearing and are not worrying about damaging it, go ahead and press on the inner bearing race.

After removing the C clip, you can now use the bearing press to remove the old bearing. Use care when doing this. You do not want to apply a huge amount of pressure using the press.

After bearing removal, take a tooth brush and some spray cleaner to scrub out the bore and the C clip groove. When installing the new bearing back into the bore, coat the carbon fiber bore with some grease which will help press the bearing into the bore.

I hope this answers your questions.

Be safe,
Rod
Screenshot 2023-02-27 09.10.08.jpg
 

MikeL_mtb

Member
Feb 15, 2022
62
12
New York
Correct, I do not have that notch, yes it the non drive side bearing, I already swapped the drive side without any drama. I do have the BearingPro tools and did attempt to press the bearing away from the clip, but didn't feel it shift honestly, you can see from the backside there is no gap from the bearing to the carbon on the inside. I'll grab a picture tonight.
 

Rod B.

Well-known member
Aug 18, 2021
530
924
USA, Orange County Ca.
Correct, I do not have that notch, yes it the non drive side bearing, I already swapped the drive side without any drama. I do have the BearingPro tools and did attempt to press the bearing away from the clip, but didn't feel it shift honestly, you can see from the backside there is no gap from the bearing to the carbon on the inside. I'll grab a picture tonight.
Well, that sucks….

I’ve seen several Rise chain stays where the milling on the bearing bore has been for shit. This is the first time I’ve heard of the notch missing.

It seems like you have several options. The Rise has a two year warranty. It’s clearly a defect not having the notch. You can contact your bike shop where you bought the bike and submit for a warranty chain stay replacement. More than likely Orbea will tell the bike shop to take an Dremel with small bit and router a notch out. The trick here is that if the bike shop screws the pooch on the job it’s on Orbea.

If your outside warranty then do the job yourself with a dremel.

As a side note, I have a Rise rear chain stay (Frame size Large). You can see the color in the picture. It’s in good condition other than a lot of paint chips. It’s yours for free if you’d like it. Just pay for shipping. I kept it as a spare and no longer need it now that I’m riding a Levo.

Cheers,
Rod
 

MikeL_mtb

Member
Feb 15, 2022
62
12
New York
I'll email orbea and see what they say, probably goto a shop, the closest one is an hour away unfortunately, I got this one from across the country when they were hard to find. Thanks for the offer, mine's a medium, I imagine they are different than the large.

IMG_3210.JPG IMG_3211.JPG
 

Rod B.

Well-known member
Aug 18, 2021
530
924
USA, Orange County Ca.
I'll email orbea and see what they say, probably goto a shop, the closest one is an hour away unfortunately, I got this one from across the country when they were hard to find. Thanks for the offer, mine's a medium, I imagine they are different than the large.

View attachment 108015 View attachment 108016

I would first email Orbea USA and see what they say, i.e. will they honor and remedy the defect. I'd hate to drive an hour each way and get the run around from a bike shop with no results. Maybe see what Orbea says before you even make the long drive.

Orbea USA
Phone number
: 888-466-7232
Email address: [email protected]

Orbea most likely will tell you to take the bike back to the shop where you purchased the bike at for warranty service. Orbea will allow you to take the bike to a different bike shop for warranty work if it's too burdensome to take the bike back to the original purchase point. Most bike shops will charge a labor fee for warranty work on bikes not purchased from that bike shop.

If you ultimately end up notching the chain stay yourself, it will remove some paint during the process. If you contact Orbea USA, they will provide you with the correct Pantone paint code for your bike. There are several online vendors who can custom mix touch up paint to match a Pantone color code.

I'm wondering if it's possible to buy a set of jeweler's drill bits on Amazon. Drill a small hole in the "C" clip so that you can use the tip of a pick tool to get a purchase on and pry the clip out. It's just a thought, but might be worth a try.
 

MikeL_mtb

Member
Feb 15, 2022
62
12
New York
Orbea responded that the notch is part of the painting process, and not required. They sent me a video showing them using a flat head and a pick to pry it out. I'll give it a go later on.
 

neilo

Member
Jan 25, 2022
50
21
Australia
My bike shop is putting in a warranty request. Meanwhile I am debating on which old rear wheel I want to use. Spokes felt fine. I really like the Hydras I got on my Nobl TR32 recently for my exie.
Hi sgtcurry. I was wondering what happened with your warranty request on the M10 Race Face Turbine wheel / Vault hub? Did you get it repaired or replaced? I am in the same position right now with a creaking rear wheel, my bike shop has just sent my wheel back to RF.
 

Richridesmtb

Member
Jan 23, 2022
207
96
Australia
Hi sgtcurry. I was wondering what happened with your warranty request on the M10 Race Face Turbine wheel / Vault hub? Did you get it repaired or replaced? I am in the same position right now with a creaking rear wheel, my bike shop has just sent my wheel back to RF.
I've got the wheel creak happening. Was planning on spraying ptfe on the spokes at the hub which seems to be a popular fix. Interested to hear what happened under warranty.
 

neilo

Member
Jan 25, 2022
50
21
Australia
I've got the wheel creak happening. Was planning on spraying ptfe on the spokes at the hub which seems to be a popular fix. Interested to hear what happened under warranty.
I tried the PTFE fix, but no joy for me. If you do try it, make sure it doesn’t get anywhere near your brake rotor. I removed mine.

I will update here once I hear what RF say.
 

Livo

Member
Mar 10, 2023
9
2
Nottingham
I’ve had the same issues (Orbea Rise M10). Started with a cracking sound. I thought it was the rear chain/seatstay bearings. However located it to rear hub a RF vault. Cleaned, pawls and ratchet. No change but actually got worse the next ride. Could hear it just rocking bike with rear brake on. Took to LBS (JE James who have been brilliant). Said they’d had a few of issues with this hub. Returned to Silverfish, RF distributed in UK. Sent out a new hub. Got it today. 👍 They said it wasn’t the actual drive mechanism but the hub itself. Not exactly sure what. Apparently some of the hubs had a bonded body which worked loose. I only got 760miles out of it. Temped to sell on and get a DTSwiss 350.
 

EMTB Forums

Since 2018

The World's largest electric mountain bike community.

555K
Messages
28,047
Members
Join Our Community

Latest articles


Top