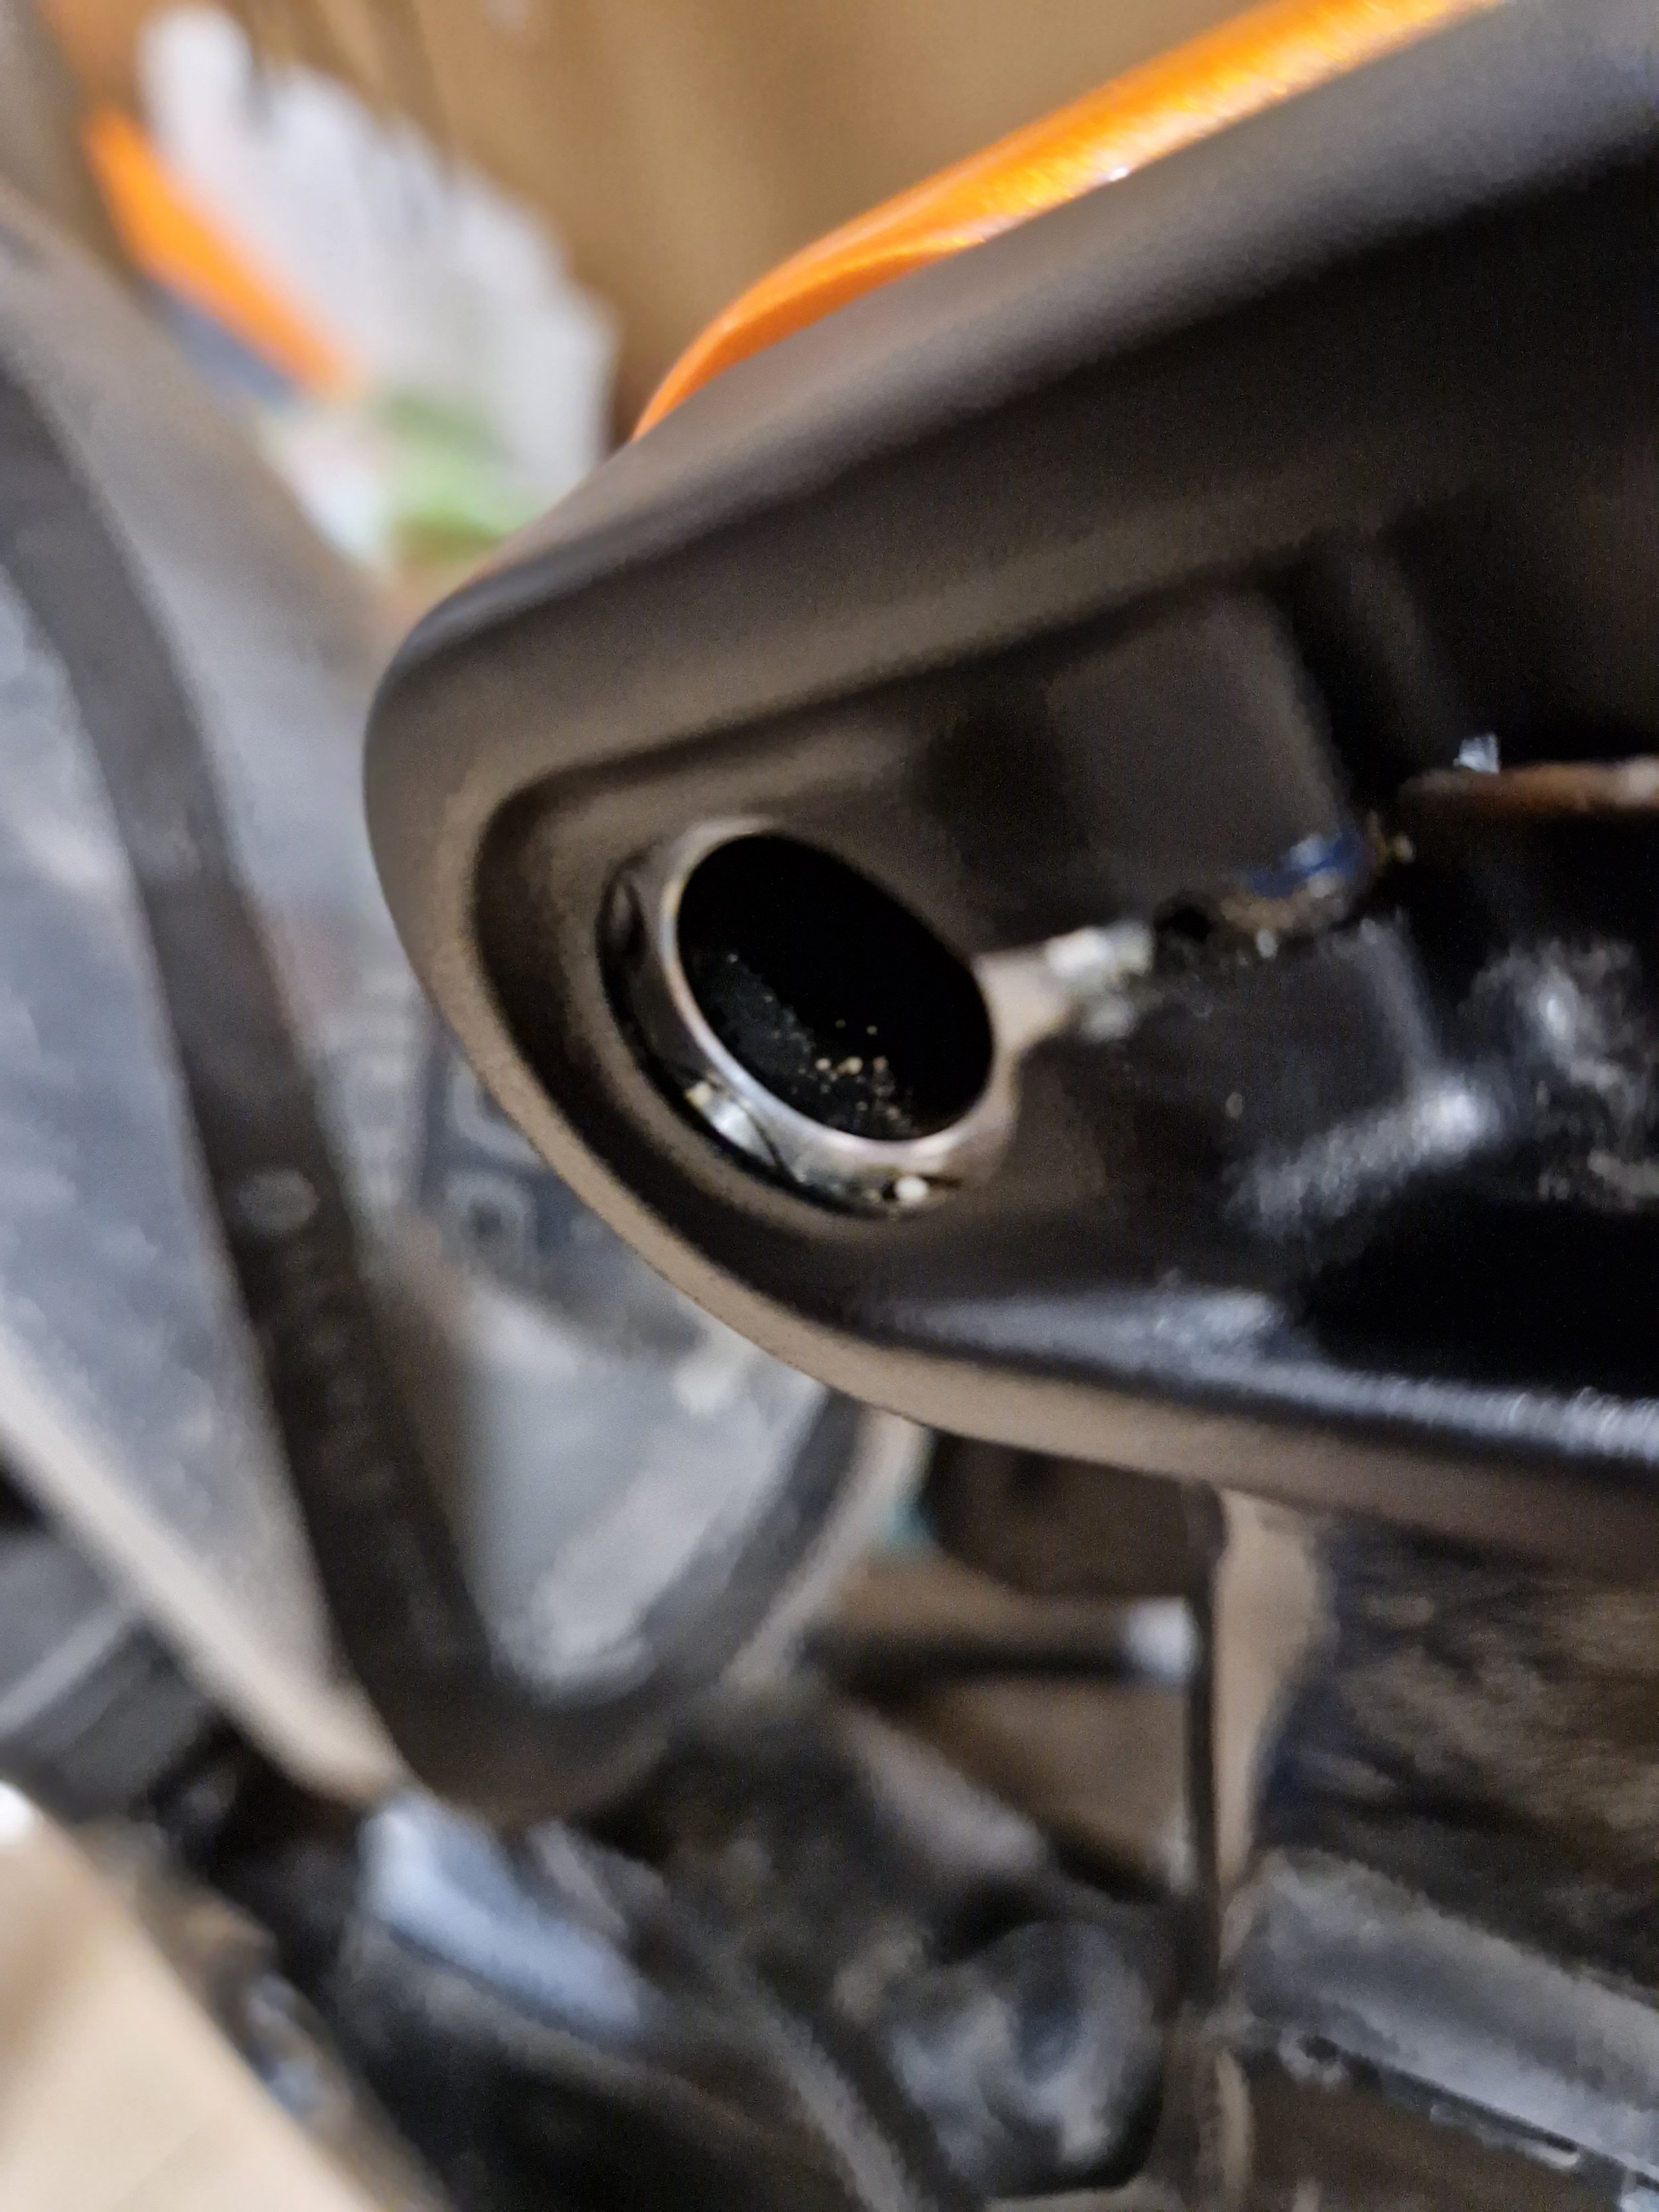
Part # 1: Orbea Rise - Upper Linkage Axle and Bearing Service

Erjabato

Member
May 28, 2022
41
33
The great Spain
Erjabato,
I'm happy you found the post useful. My experience with the paint damage around the upper and lower pivot axles was similar to your Rise. Orbea never sealed these areas or protected them. Because of this, small pebbles, dirt and sand can work into the these areas and damage the paint. I used to have a Yeti SB130 and it had a similar issue. Some manufacturers do a better job than others at providing frame protection.

I had not heard of Enduro, solid lube bearings, thank you for letting me know about them. I think they are an excellent suggestion, especially for those riding areas where a lot of moisture or a lot of dust exists. I owned my Rise for 18 months and it had 3,200 miles on it when I sold it to my brother. Before selling it, I replaced the linkage arm bearings for the first time. On the other hand, I replaced the two lower and two upper pivot axle bearings three times in 18 months of riding. I would definitely use Enduro Solid Lube bearings for the axle bearings.

Regarding the seal rings offered for use on the 2023 Rise. I have looked into their use on 2020/2022 Rises. I have not had the opportunity to look at a 2023 Rise out on the trails. If I can find one, I'll be able to know if it'll work.

Here's the issue I'm concerned about. The pivot axle diameter is the same on older Rises and the new 2023 Rise. This means the seal would slip over the older style pivot axle. What I'm concerned about is the clearance between the linkage arm and frame on the older models. As you've noted, the paint around the areas where the pivot bearings mount gets pretty chewed up. If we were to wedge a pivot axle seal between the linkage arm and frame, I would be worried this could cause paint damage from the seal rubbing on the frame and eventually lead to carbon fiber damage. I don't know this would actually happen, however it's a concern.

If somebody reading this has the new 2023 Rise. Please take some detailed pictures of the linkage arm assembly and upper pivot axle area and post them to this thread. I would appreciate it.

Cheers,
Rod
Hello again colleagues,

Thanks for taking the time to write such quality answers Rod!

Regarging enduro bearings, I am not able to find the 6804 LLU MAX BO SL (solid lube) in my country yet.

On the seal ring kit, I decided to order the 2023 carbon kit. I will report back if it fits 2022 hydro model next time I inspect and clean my linkage-frame axle!
20230421_100456.jpg

So far I have positive expectations since outer diameter is 30mm (hence it won't damage the paint in the frame, since it is just barely covering the bearing outer diameter, 32mm) and it seems quite thin (1mm maybe?, on each side of the axle).
In my view it will protect the red rubber bearing seal (precisely what I have seen to be one of the weak points in my bike).

Small pebbles and sand would eventually still be trapped between frame and linkage arm as without the new seals (hence still eroding the paint work). But bearings might have one additional extra layer of protection avoiding red rubber seal becoming damaged so easily.

I hope to confirm feasibility for 22 hydros of this initiative later!
 
Last edited:
Richridesmtb

Member
Jan 23, 2022
207
96
Australia
Hello again colleagues,

Thanks for taking the time to write such quality answers Rod!

Regarging enduro bearings, I am not able to find the 6804 LLU MAX BO SL (solid lube) in my country yet.

On the seal ring kit, I decided to order the 2023 carbon kit. I will report back if it fits 2022 hydro model next time I inspect and clean my linkage-frame axle!
View attachment 112508
So far I have positive expectations since outer diameter is 30mm (hence it won't damage the paint in the frame, since it is just barely covering the bearing outer diameter, 32mm) and it seems quite thin (1mm maybe?, on each side of the axle).
In my view it will protect the red rubber bearing seal (precisely what I have seen to be one of the weak points in my bike).

Small pebbles and sand would eventually still be trapped between frame and linkage arm as without the new seals (hence still eroding the paint work). But bearings might have one additional extra layer of protection avoiding red rubber seal becoming damaged so easily.

I hope to confirm feasibility for 22 hydros of this initiative later!
I'm interested to hear how this fits. Pay attention to how much contact you get on the axle splines with the linkages. I'm not sure if 1 mm less will make much of a difference, bit it is still less contact. The bearings could do with more axle interface to start with.

I'm still keen to find out if the new linkages and axle fit the older models.
 

Richridesmtb

Member
Jan 23, 2022
207
96
Australia
Hello again colleagues,

Thanks for taking the time to write such quality answers Rod!

Regarging enduro bearings, I am not able to find the 6804 LLU MAX BO SL (solid lube) in my country yet.

On the seal ring kit, I decided to order the 2023 carbon kit. I will report back if it fits 2022 hydro model next time I inspect and clean my linkage-frame axle!
View attachment 112508
So far I have positive expectations since outer diameter is 30mm (hence it won't damage the paint in the frame, since it is just barely covering the bearing outer diameter, 32mm) and it seems quite thin (1mm maybe?, on each side of the axle).
In my view it will protect the red rubber bearing seal (precisely what I have seen to be one of the weak points in my bike).

Small pebbles and sand would eventually still be trapped between frame and linkage arm as without the new seals (hence still eroding the paint work). But bearings might have one additional extra layer of protection avoiding red rubber seal becoming damaged so easily.

I hope to confirm feasibility for 22 hydros of this initiative later!
I've had another thought... how will this work for linkage spacing? The linkages have to connect to the yoke and the seat stays. I'm wondering if the different spacing will make this possible. 🤔
 

theremotejuggernaut

Active member
Aug 2, 2022
385
276
UK
Well I finally received my new axle after a month of waiting and I'm pretty sure the left hand linkage is knackered.

Tried assembling it yesterday and when trying to preload the assembly, the axle was pulling out of the left hand linkage arm.

Balls.

I should have just ordered the linkage arm at the same time but thought I'd chance it as the lead time was showing as July and I didn't want to wait.

Mercifully now, the lead time is May 23rd which still sucks but hey, at least it's not 2 months...
So... I guess my linkage is knackered...

Last ride, had a hell of a rattle develop. Thought shock bushings at first but it was a definite rattle rather than a knocking.

Stripped it all down earlier in the week and found pretty much all the bearings needing either regreasing or replacing. Some of them notchy and some of them have noticeable play after regreasing everything.

Knocked out the upper linkage axle and cleaned everything up. It had been assembled dry (no grease or loctite).

I planned to use a retaining compound to tighten things up a bit but on reassembly, torqued to 15nM, the left hand rocker doesn't grip the axle even slightly. Can't preload anything as the axle just pulls out of the rocker.

Looking on the Orbea website, the estimated delivery date isn't until the end of April for the axle and if I want a left hand rocker, those aren't available until July!

Pretty annoyed at myself for not checking everything sooner.

Still, it's only only covered about 1000 miles in the last 9 months and I'm fairly unimpressed by the state fo the bearings in that time. Not really keen on using OEM bearings again given how little grease remained.

I never heard any creaking or had any noticeable signs that something was wrong with it until the death rattle started last weekend. It's surprised me a little. Although I hadn't checked any of the bearings, I had checked the preload on the axle when I got the bike and had loosened the pinch bolts and checked the preload a couple of times. Nothing ever seemed to be out of place.

Anyway, onto retaining compounds...

I had dismissed the recommendation of Loctite 638 as its stated to be a permanent bond which seems daft when the rockers will need to come off to change the bearings. I had chosen something equivalent to 641 that was available locally. My understanding was that the Loctite is used to prevent rotational movement of the axle in the rocker.

It's not there to stick the 2 together to allow the preloading of the axle is it?

Well, I finally received my new axle after a month of waiting and I'm pretty sure the left hand linkage is knackered.

Although it went together nice and tight with no noticeable play, when trying to preload the assembly the axle was pulling out of the left hand linkage arm.

Balls.

I should have just ordered the linkage arm at the same time but thought I'd chance it as the lead time was showing as July and I didn't want to wait.

Mercifully now, the lead time is May 23rd which still sucks but hey, at least it's not 2 months...

I'll stick a pair of the x98 seals on the order as they're only £5 so if they don't fit, it's not the end of the world.
 

theremotejuggernaut

Active member
Aug 2, 2022
385
276
UK
Has anyone that's been through bearing replacement or maintenance had issues getting the rear end back together?

Screenshot_20230514-194734_Drive.jpg

Embarrassingly, I'm having a real hard time getting bt 11.1 back in.

It almost seems as though the seat stay section is twisted. If I assembly the linkage end first, it goes together easily but I can't get the seat stay/ chain stay aligned.

If I do the drop out end first, the linkage end doesn't seem to align properly. The spacers that sit wither side of the bearing are in the right place.

Is it bent? Or am I inept? Place your bets...
 

Rod B.

Well-known member
Aug 18, 2021
530
924
USA, Orange County Ca.
Has anyone that's been through bearing replacement or maintenance had issues getting the rear end back together?

View attachment 114876
Embarrassingly, I'm having a real hard time getting bt 11.1 back in.

It almost seems as though the seat stay section is twisted. If I assembly the linkage end first, it goes together easily but I can't get the seat stay/ chain stay aligned.

If I do the drop out end first, the linkage end doesn't seem to align properly. The spacers that sit wither side of the bearing are in the right place.

Is it bent? Or am I inept? Place your bets...
It can be a pain in the ass to get everything to line up. I had the same issue with my Rise. It seemed that the linkage on my Rise got a bit harder to line up as I piled miles on the bike. I know of other Rise owners such as Florida Dan who owns a Rise Hydro. Dan had issues with lining the linkage up and threading the hardware into place. Dan may be able to help you out.

Here's what I found:

1) It helps to disconnect the rear shock from the yoke and get the shock completely out of the way. This takes weight off the linkage arms while you try to align and assemble everything.

2) Do not fully tighten a linkage arm hardware bolt until all of the linkage arm bolts have been threaded into place.

3) Leave the lower portion of the seat stay and rear axle assemblies disconnected from each other. This will take pressure off of the upper part of the seat stays and make it easier to align and bolt them to the linkage arms. You want to avoid cross threading the nut built into the seat stay. If you do damage or cross thread the nut built into the top of the carbon fiber seat stay, it's going to cost you more than a few pounds to replace. The lower axle parts are relatively cheap to replace. If your going to damage anything, do it to the axle drop outs and not the upper seat stay.

4) I use a dab of extremely thick and tacky grease, i.e. wheel bearing grease or similar, to hold the linkage arm spacers in place. The thick grease will help keep the spacers in place when lowering the seat stay onto the linkage arm.

5) After lowering the seat stay over the spacers and onto the linkage arm, I use a long tapered punch to help push the spacers into alignment with the bore. I use a bright LED Flashlight which I shine into the bore to make sure everything is aligned. I will only insert the bolt into the bore and attempt to thread into place, after making sure everything is aligned. The goal here is to avoid cross threading and damaging the seat stay.


318qKHXf-jL._AC_UF894,1000_QL80_.jpg


Note: When my Rise was new, I didn't have any alignment issues and everything went together smoothly. However, by the time I reached 3,200 miles - 5,100 Km, it was taking a bit more effort to get everything to align and thread together. My guess is that the seat stays or linkage is developing play, distorting, warping, chose your word, and alignment isn't as precise as when new.

Be safe,
Rod

Screenshot 2023-05-17 06.26.06.jpg
 

FloridaDan

Member
Nov 8, 2019
51
47
Florida
Has anyone that's been through bearing replacement or maintenance had issues getting the rear end back together?

View attachment 114876
Embarrassingly, I'm having a real hard time getting bt 11.1 back in.

It almost seems as though the seat stay section is twisted. If I assembly the linkage end first, it goes together easily but I can't get the seat stay/ chain stay aligned.

If I do the drop out end first, the linkage end doesn't seem to align properly. The spacers that sit wither side of the bearing are in the right place.

Is it bent? Or am I inept? Place your bets...
I really struggled with this. I thought I had stripped the front of the bolt so that I could’t get the thread started. Rod was kind enough to send me a couple of extra bolts he had onhand, and I also ordered the kit from Orbea.

In the end, after literally hours of struggling with it, I found I could just barely get the bolt threaded by bracing the chain stay against my body, and twisting the rear end of the bike by putting opposite pressure on the seat tube.

My issue was the non drive side, so it was body against chain stay, right hand on the top of the seat tube, thread bolt with left hand.

And then I discovered I had left the shock assembly above the linkage arms, so I had to take it all apart again!!! I don’t look forward to having to service these linkages…
 

Richridesmtb

Member
Jan 23, 2022
207
96
Australia
Exact same issue on the non-drive side seat stay on my rise from new. I've found I have to twist the top of the stay inward to get the bolt to align. It frustrated the shit out of me the first time. Now I just treat it as a part of the service.

I used loctite mid-strength retaining compound on my linkage axle. No noise a couple of rides in (nothing I can heat over the rear wheel hub noise). I'll keep you all updated over the longer term and let you know how disassembly goes when it comes time.
 

theremotejuggernaut

Active member
Aug 2, 2022
385
276
UK
I really struggled with this. I thought I had stripped the front of the bolt so that I could’t get the thread started. Rod was kind enough to send me a couple of extra bolts he had onhand, and I also ordered the kit from Orbea.

In the end, after literally hours of struggling with it, I found I could just barely get the bolt threaded by bracing the chain stay against my body, and twisting the rear end of the bike by putting opposite pressure on the seat tube.

My issue was the non drive side, so it was body against chain stay, right hand on the top of the seat tube, thread bolt with left hand.

And then I discovered I had left the shock assembly above the linkage arms, so I had to take it all apart again!!! I don’t look forward to having to service these linkages…
Glad it's not just me then 😂

I managed to get it done last night after Rod also mentioned that it's a bit of a pig to get back together.

I had tried bending and twisting section of the frame but gave yo because it was starting G to damage the threads.

In the end, I took the whole linkage apart and started from scratch.

I fitted the left hand linkage and the linkage axle first. Then got the linkage end of the seat stay bolted up. Then the non drive side of the rear axle assembly (it's a ball ache to get the notch if the threaded insert to align with the lug on the seat stay. I ended up deliberately misaligning it and winding the rear axle in from the outside of the insert) This let me then rotate the insert on the bearing until the seat stay popped on).

Next, I fitted the right hand linkage arm on the pivot axle, set the preload and torqued the pinch bolt.

Next up, bolted up the drive side seat stay to the right hand linkage arm. Followed by the derailleur hanger and axle assembly on the drive side.

Once the rear triangle was loosely together, I bolted up the shock yoke and went over all the bolts for final tightening.

Massive pain in the butt.
 

Ryno

New Member
May 28, 2023
4
1
Halifax
My solution: loosened up the rear axle, shock extender bolts on both sides, and front shock bolt. This gave me enough play in the rear triangle and linkages that applying significant force on the seat stay hex while rotating caused it to align the bolt threads with the threads in the end of the seatstay. What a PITA.
Hi Murphius, I think i'm running into the same issue. I'm trying to disassemble my bike so that I can clean then apply fresh grease to all the bearings, per Rob's 2 part guide. I did this 6 months ago to solve a creaking issue that just returned this week. I was in the process of taking off the Seat Stay, and the bolt on the drive side is stuck spinning. It's completely out of the treaded side of the seat stay but something is preventing me from pulling it out. I suspect one of the washers (SEE picture) dropped down into the threads but no matter what I try I can't seem to get the bolt back in or remove it. I am hoping others have solutions because my nearest dealer is an hours drive from here and this shouldn't be this difficult!

Much appreciated,

Cheers

1685278016661.png


1685277604350.png
 

Rod B.

Well-known member
Aug 18, 2021
530
924
USA, Orange County Ca.
Hi Murphius, I think i'm running into the same issue. I'm trying to disassemble my bike so that I can clean then apply fresh grease to all the bearings, per Rob's 2 part guide. I did this 6 months ago to solve a creaking issue that just returned this week. I was in the process of taking off the Seat Stay, and the bolt on the drive side is stuck spinning. It's completely out of the treaded side of the seat stay but something is preventing me from pulling it out. I suspect one of the washers (SEE picture) dropped down into the threads but no matter what I try I can't seem to get the bolt back in or remove it. I am hoping others have solutions because my nearest dealer is an hours drive from here and this shouldn't be this difficult!

Much appreciated,

Cheers

View attachment 115997

View attachment 115996
Ryno,

I had this happen on several occasions. You are correct, the spacer is catching on the threads. You will need to relieve pressure off of the seat stay in order to remove the bolt. To do this, you will need to do the following:

1) Remove the rear shock from the shock yoke. Wrap the shock in a rag when removing it. This will prevent it from chipping the paint should it drop down and hit the frame.

2) Remove the rear wheel.

3) Remove the rear axle drop out hardware and fully release both the right and left seat stays from the chain stays.

To remove the right, derailleur side, you need to pull out on the black castellated plastic retainer (Number 3.4 in the diagram) and turn it. This will release the derailleur hanger and the seat stay. The black plastic retainer may be stiff to turn. Do not use pliers to turn it. This will scratch and damage the retainer. Instead, hit the retainer with a shot of WD-40 and use a rag to grip the retainer to pull and turn.


IMG_0255 (2).JPG


The left, non-drive side (Number 3.1 in the diagram) is held in place with an "O" Ring located on the shoulder of 3.1. The "O" Ring presses into place and and holds the chain stay and seat stay together. To separate the seat stay from the chain stay, simply hold the chain stay in one hand and smack the seat stay in the opposite direction, with the palm of your hand. This will drive the two apart and the seat stay will separate from the chain stay.

NOTE: The left side bolting hardware (Number 3.1 in the diagram), has a notch on the bolt which insets into a notched indentation on the stay. When you reassemble the left side seat and chain stays, it's important that you align the notch on 3.1 with the notched indentation on the stay. if the notches are not aligned, you will have difficulty joining the two stays together and when you tighten the rear axle, it will cause damage to the stay. The purpose of the notch is to prevent the hardware from turning when you tighten the rear axle.

Doing the above will release all seat stay tension and allow you to manipulate the seat stay so you can remove the bolt.

Cheers,
Rod


Screenshot 2022-08-28 16.59.18.jpg
 
Last edited:

Ryno

New Member
May 28, 2023
4
1
Halifax
Hi Rod,

Thanks for the very detailed response. After I posted my question earlier today with a fresh coffee in me, I tried what you just explained. I removed the rear wheel, the derailleur, the rear axl drop out hardware, and removed the rear shock. I was able to freely move the seat stays hoping this would allow me to relieve the pressure and get the bolt out, or at least back in so I can ride it, unfortunately this is not the case, It will not budge, I can't get it back into the treaded side of the seat stay either. I am thinking these bolts are aluminum and very soft and it's possible when I was trying to remove it the washer/spacer started striping the treads? It's really bizarre how it just freely spins but I can't remove it or put it back in. I also tried some of Florida Dan discribed where he pulled back in the seat post while applying pressure on the seat stay. This really shouldn't be this complicated :)
On a side note, now that I have the shock removed and the only parts of the linkage that is still together is the seat stays and the axl, I can clearly hear the creak is coming from the linkage axl, likely the splines, but unfortunately I can't get the bike apart or together now.

Sigh!!
 

Rod B.

Well-known member
Aug 18, 2021
530
924
USA, Orange County Ca.
Hi Rod,

Thanks for the very detailed response. After I posted my question earlier today with a fresh coffee in me, I tried what you just explained. I removed the rear wheel, the derailleur, the rear axl drop out hardware, and removed the rear shock. I was able to freely move the seat stays hoping this would allow me to relieve the pressure and get the bolt out, or at least back in so I can ride it, unfortunately this is not the case, It will not budge, I can't get it back into the treaded side of the seat stay either. I am thinking these bolts are aluminum and very soft and it's possible when I was trying to remove it the washer/spacer started striping the treads? It's really bizarre how it just freely spins but I can't remove it or put it back in. I also tried some of Florida Dan discribed where he pulled back in the seat post while applying pressure on the seat stay. This really shouldn't be this complicated :)
On a side note, now that I have the shock removed and the only parts of the linkage that is still together is the seat stays and the axl, I can clearly hear the creak is coming from the linkage axl, likely the splines, but unfortunately I can't get the bike apart or together now.

Sigh!!
I heard vile rumors that Canadians are hard on their Orbea’s. I didn’t believe the rumors until now…

Well, I’m at a loss on this one. The linkage hardware bolts are soft aluminum. It really doesn’t take much to jack them up or deform them. Ask me how I know. Fortunately, you can buy a new set from Orbea. The down side is, it’ll take two to three weeks to get the parts. That’s been my experience for shipping to the USA.

I have some spare hardware which I’d be happy to send you, but unfortunately I’m in the process of remodeling my garage. I have all my bike parts buried in boxes at the back of a storage pod and I can’t get to anything right now. Maybe another subscriber reading this thread has a spare bolt and spacer they can send you asap?

I think I would take a small magnet like the small ones mounted on the handle of small screwdrivers. I would see if I could get the magnet attached to the metal spacer and jiggle the spacer around enough to allow the bolt to slide out. If that didn’t work, I would take a long tapered drift punch and place it against the backside of the bolt. I would lightly tap the punch to see if this will free up the bolt enough to drive it out. It’s possible some blue thread locker or maybe a piece of galled up thread is preventing the bolt from extracting.

I would not try to re-thread the bolt back into the seat stay. Bolts are cheap, a stripped out chain stay is not.

Please keep me informed on what you come up with. You won’t be the last person to encounter this problem and it will help somebody else out when it happens to them.

Be safe,
Rod
 

Ryno

New Member
May 28, 2023
4
1
Halifax
I heard vile rumors that Canadians are hard on their Orbea’s. I didn’t believe the rumors until now…

Well, I’m at a loss on this one. The linkage hardware bolts are soft aluminum. It really doesn’t take much to jack them up or deform them. Ask me how I know. Fortunately, you can buy a new set from Orbea. The down side is, it’ll take two to three weeks to get the parts. That’s been my experience for shipping to the USA.

I have some spare hardware which I’d be happy to send you, but unfortunately I’m in the process of remodeling my garage. I have all my bike parts buried in boxes at the back of a storage pod and I can’t get to anything right now. Maybe another subscriber reading this thread has a spare bolt and spacer they can send you asap?

I think I would take a small magnet like the small ones mounted on the handle of small screwdrivers. I would see if I could get the magnet attached to the metal spacer and jiggle the spacer around enough to allow the bolt to slide out. If that didn’t work, I would take a long tapered drift punch and place it against the backside of the bolt. I would lightly tap the punch to see if this will free up the bolt enough to drive it out. It’s possible some blue thread locker or maybe a piece of galled up thread is preventing the bolt from extracting.

I would not try to re-thread the bolt back into the seat stay. Bolts are cheap, a stripped out chain stay is not.

Please keep me informed on what you come up with. You won’t be the last person to encounter this problem and it will help somebody else out when it happens to them.

Be safe,
Rod


Hello Rod, I really appreciate the helpful tips and feedback I think what would be prudent at this point in time for me would be to bring it into my LBS. They are an authorized Orbea dealer this way if the threads are damaged when they try to put it back in orbea may be more willing to help me out also fingers crossed that my LBS has hardware in stock

Am I hard on my bike? No, I take good care of it but I do ride a lot winter and summer. I know the bolts are soft also from experience because I stripped the preload bolt one time I also broke the shock bolt which is a known issue with the occam. Orbea took care of me in both cases but to your point it just takes long to get parts.

Aw well!!
 

Rod B.

Well-known member
Aug 18, 2021
530
924
USA, Orange County Ca.
Hello Rod, I really appreciate the helpful tips and feedback I think what would be prudent at this point in time for me would be to bring it into my LBS. They are an authorized Orbea dealer this way if the threads are damaged when they try to put it back in orbea may be more willing to help me out also fingers crossed that my LBS has hardware in stock

Am I hard on my bike? No, I take good care of it but I do ride a lot winter and summer. I know the bolts are soft also from experience because I stripped the preload bolt one time I also broke the shock bolt which is a known issue with the occam. Orbea took care of me in both cases but to your point it just takes long to get parts.

Aw well!!
Excellent idea taking it to the shop. It should be covered under warranty. There's no reason for you to have to deal with this kind of problem. Hopefully the shop has a spare bolt which you can use and avoid waiting for new parts. Show the shop the thread and explain that others are having similar problems.

Good luck
Rod
 

Murphius

Active member
Jun 19, 2020
104
108
Washington
Not being able to remove the bolt is a new one, I never experienced that. With all load on the joint removed (as I believe you have it), try pushing from the back of the bolt with a tool that fits through the hole in the seatstay while simultaneously unscrewing the bolt with the appropriate Allen key.
 

Ryno

New Member
May 28, 2023
4
1
Halifax
Not being able to remove the bolt is a new one, I never experienced that. With all load on the joint removed (as I believe you have it), try pushing from the back of the bolt with a tool that fits through the hole in the seatstay while simultaneously unscrewing the bolt with the appropriate Allen key.
I tried "EVERYTHING" that I had a tool for, without being "angry hulk" and risk damaging the seat stay. It wouldn't budge so I took it to the LBS, he got it out somehow I will ask him when I pick it up. Sadly as I suspected the bold is stripped and will not go back into the treaded side of the Seat Stay. Unfortunately they also didn't have the hardware kit i needed in stock and now I'm waiting for Orbea Spain :(

I'm currently batting 0 for 2 on this 6 month maintance where I have to take apart my bike for all the area's that have bearing to chase a creak that is messing with my "inner piece" when riding :). The first time I did this maint, the "pre-load" bolt on the linkage arm seemed to be locked in, I suspect too much loctite was put on the bolt in the factory and when I got my first linkage creak 6 months after the purchase of my occam, I found Rod's awesome video and I took apart my bike, when I got to that bolt I got it out one turn and shredded the head of the bolt, I was using next to no-torque I was surprised how easy it was. Anyway I was still able to ride it because it was only the preload bolt and the pinch bolt was in there tight keeping the linkage axl in place, Orbea sent me a new bolt under warranty (took 2 months). The clean and grease tips from Robs video got me riding quiet and creak free until 6 months passed again, then I do the service and this happens, another shredded bolt. I have good tools, I have the Wera hex wrenches, and proper torque wrenches, I have the Orbea blue book right there on my work bench. I love my occam, but I do wish that Orbea would send a full set of replacement hardware to each person that buys a bike. Nobody likes to be on the bench without a bike because of a bolt.

When I talk to my LBS I'll share what trick he used to get the bolt out.
 

Erjabato

Member
May 28, 2022
41
33
The great Spain
Hello Risers:

Last Sat I finally found some time for my second maintenance on the linkage to inspect, regrease and tighten it.
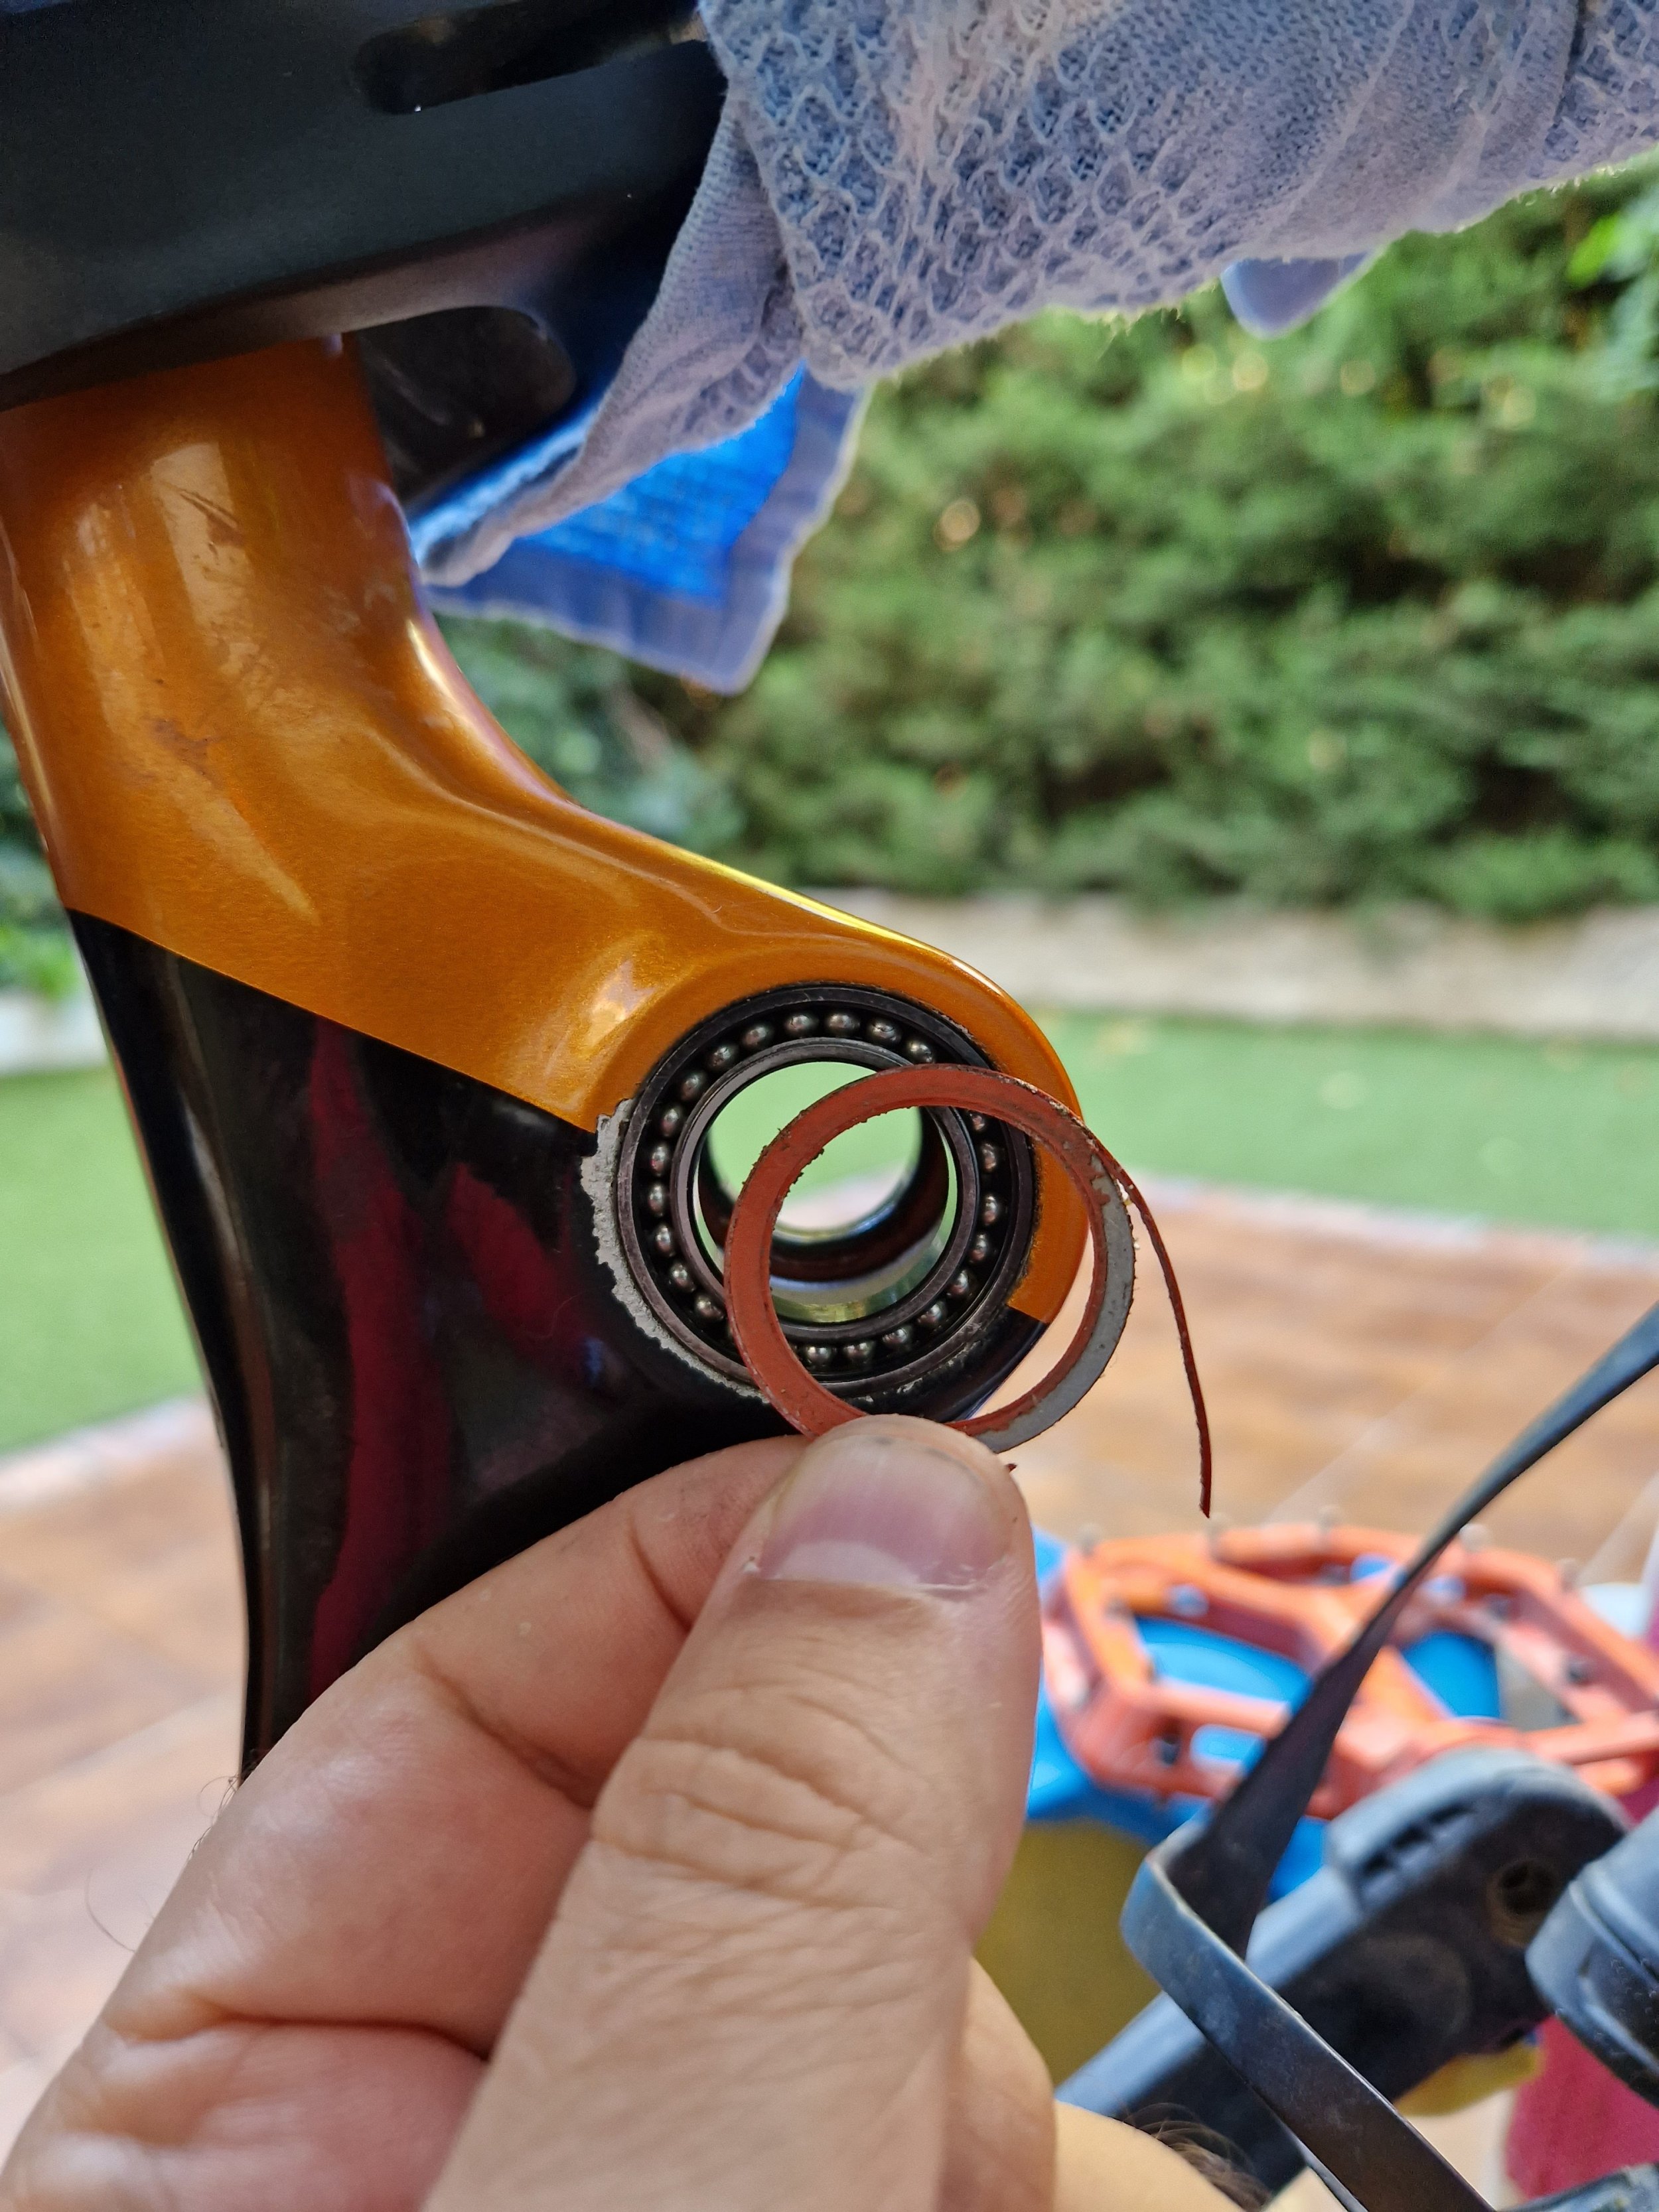
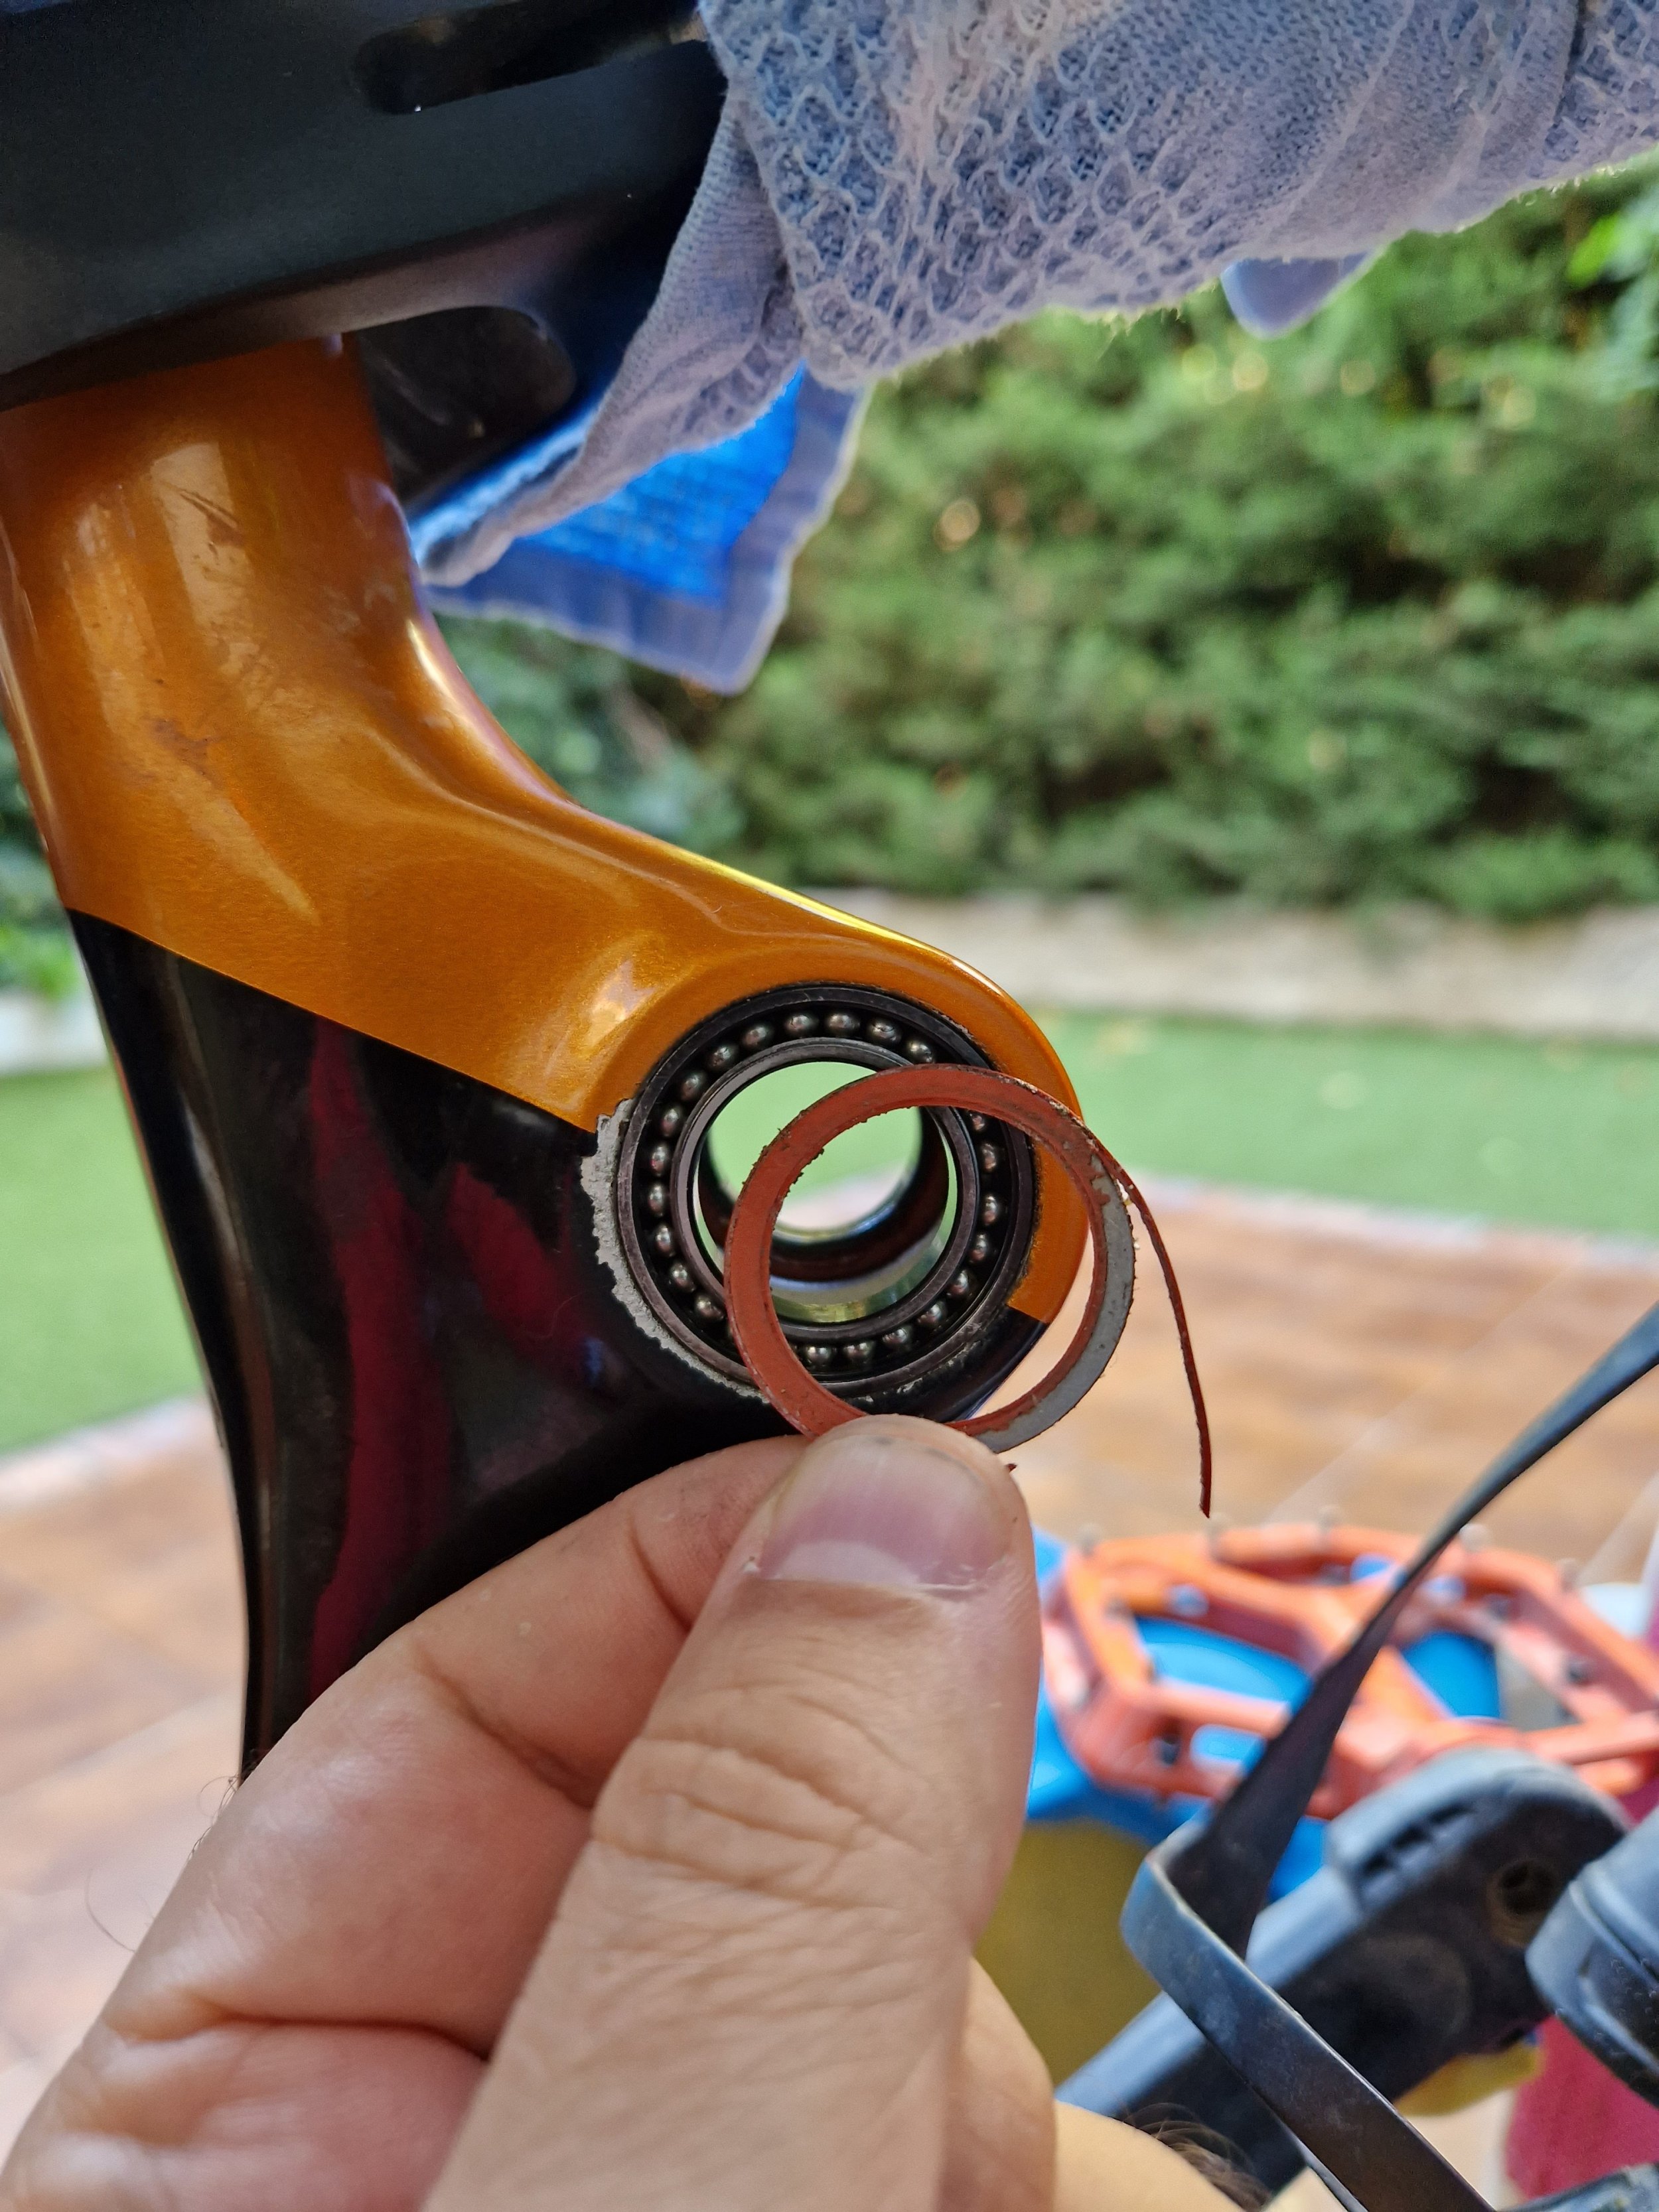
First, let me show what small pebbles did in 3000km:
20231007_155622.jpg
As you can see, paint in the frame is sanded, the bearing seal was ruined, and the bearing was totally dry.
I could only find a non-black oxide version of the bearing, and decided to keep existing one in the frame, but cleaned and regreased balls, replacing seal with a new one.
Finally I decided to mount the Carbon 23 ring seals to protect bearings.
+1mm separation between axle and linkage on each side seemed to work in the first 50km ride on Sunday.
20231009_132938.jpg

I'm interested to hear how this fits. Pay attention to how much contact you get on the axle splines with the linkages. I'm not sure if 1 mm less will make much of a difference, bit it is still less contact. The bearings could do with more axle interface to start with.

I'm still keen to find out if the new linkages and axle fit the older models.

20231007_155622.jpg
 

Richridesmtb

Member
Jan 23, 2022
207
96
Australia
Hello Risers:

Last Sat I finally found some time for my second maintenance on the linkage to inspect, regrease and tighten it.
First, let me show what small pebbles did in 3000km:
View attachment 126378
As you can see, paint in the frame is sanded, the bearing seal was ruined, and the bearing was totally dry.
I could only find a non-black oxide version of the bearing, and decided to keep existing one in the frame, but cleaned and regreased balls, replacing seal with a new one.
Finally I decided to mount the Carbon 23 ring seals to protect bearings.
+1mm separation between axle and linkage on each side seemed to work in the first 50km ride on Sunday.
View attachment 126379

How did you go with the seals? All still going OK?


On another note, I'm due for another linkage maintenance six months on. The 641 retaining compound seems to have worked OK. I might be a bit more generous this time when applying it.


View attachment 126375
 

Weeksy

Well-known member
Subscriber
Dec 13, 2019
504
525
Reading
Finally I decided to mount the Carbon 23 ring seals to protect bearings.

Say what now?

Interesting pic above showing wear on paint/frame
I thought they were supposed to be flush fitting after using the preload tool.
Have I missed something in my reading?
 

N16BS

Member
May 15, 2021
37
23
Poland
What a massive PITA is to thread the seatstay bolt back into the linkage.

I know this was mentioned many times before, and I appreciate all the tips. I just need to vent a bit. JFC.

I wonder how they do it on the assembly line, though. We need someone to go work there for a month to exfiltrate all the dirty secrets!
 

theremotejuggernaut

Active member
Aug 2, 2022
385
276
UK
What a massive PITA is to thread the seatstay bolt back into the linkage.

I know this was mentioned many times before, and I appreciate all the tips. I just need to vent a bit. JFC.

I wonder how they do it on the assembly line, though. We need someone to go work there for a month to exfiltrate all the dirty secrets!
Start at with the seatstay/ linkage bolts, wind them in but leave them loose. Then get the seatstay/ chainstay bolts in and do the linkage/ shock yoke last.

The tricky bit is getting the NDS dropout bolt aligned. I found that winding in the thru axle from the outside let's you rotate the bolt to get the little groove in the bolt to line up with the keyway in the seatstay. Once that's done, it's plain sailing.
 

N16BS

Member
May 15, 2021
37
23
Poland
Disconnecting the chainstay and seatstay at the rear axle helped. They are definitely an issue with holes alignment / general geometry in the seatstay. It could be connected at both ends only with some torque applied. Applying this torque is easier at the chainstay / seatstay joint, so it should go last.

Now I'm a bit worried about the left chainstay / seatstay joint "bolt". There is a gap between the bolt and the chainstay, and the axle does not engage all the threads inside the bolt. I do not remember if that was the case before my intervention there. On the other hand, the axle seems to be seated properly on the right side. And the notch on the bolt is aligned properly with the seatstay.

How does it look on your bikes?

IMG_5051.png
IMG_5049.png
IMG_5048.png
 

theremotejuggernaut

Active member
Aug 2, 2022
385
276
UK
Disconnecting the chainstay and seatstay at the rear axle helped. They are definitely an issue with holes alignment / general geometry in the seatstay. It could be connected at both ends only with some torque applied. Applying this torque is easier at the chainstay / seatstay joint, so it should go last.

Now I'm a bit worried about the left chainstay / seatstay joint "bolt". There is a gap between the bolt and the chainstay, and the axle does not engage all the threads inside the bolt. I do not remember if that was the case before my intervention there. On the other hand, the axle seems to be seated properly on the right side. And the notch on the bolt is aligned properly with the seatstay.

How does it look on your bikes?

View attachment 133758 View attachment 133759 View attachment 133760
I'd love to tell you how line looks but I haven't seen it for weeks while it goes through the warranty process for a new motor.

I'm not convinced that's fully seated though. The little o ring on the bolt makes it a bugger to get in properly. The keyway makes it difficult enough but then just to make it that little bit harder, you've got to get the o ring seated into a groove...

To be fair, mines black so maybe the gap is there and isn't so noticeable but I'm pretty sure mine goes in flush to the seatstay.
 

Rod B.

Well-known member
Aug 18, 2021
530
924
USA, Orange County Ca.
Disconnecting the chainstay and seatstay at the rear axle helped. They are definitely an issue with holes alignment / general geometry in the seatstay. It could be connected at both ends only with some torque applied. Applying this torque is easier at the chainstay / seatstay joint, so it should go last.

Now I'm a bit worried about the left chainstay / seatstay joint "bolt". There is a gap between the bolt and the chainstay, and the axle does not engage all the threads inside the bolt. I do not remember if that was the case before my intervention there. On the other hand, the axle seems to be seated properly on the right side. And the notch on the bolt is aligned properly with the seatstay.

How does it look on your bikes?

View attachment 133758 View attachment 133759 View attachment 133760
N16BS,

The non-drive side (left) rear axle nut has an indentation and a small rubber "O" ring mounted on the shoulder of the axle nut.

Screenshot 2024-02-03 07.51.16.jpg


The rear axle nut must be aligned with a small nub that is machined into the seat stay on alloy and carbon models. It's been a while since I've worked on the rear axle nut area on a Rise, but I believe the nub is on the seat stay. I may be wrong.

The purpose of the indentation on the axle nut and the seat stay nub is to lock the axle nut in place and prevent the axle nut from spinning when you tighten up the axle.

The axle nut indentation and the nub must be in alignment when you tighten up your axle. It's very easy for the two to fall out of alignment. This is especially so when working on the rear linkage and you separate the chain stay from the seat stay.

If the indentation in the axle nut and the nub are not in alignment and you tighten up the rear axle, you are essentially forcing the axle nut into the chain stay and past the nub. This will either buggering up or sheer off the nub. The misalignment will also cause the gap issue which you speak of.

The rubber "O" ring mounted on the axle nut is used to create a friction fit when the axle nut is inserted into the chain stay bearing. The "O" ring holds both the chain and seat stays together due to the friction. The "O" ring also keeps tension on the axle nut and tends to prevent the axle nut from rotating and throwing the indentation out of alignment with the nub.

As a side note, the small thin rubber "O" ring will begin to flatten out with time. This causes a loss of friction and the axle nut will easily pop out of position. This will also allow the chain stay and seat stay to separate. You'll know the "O" ring has begun to flatten out if you find that when you remove the rear axle and wheel, the chain stay and seat stay separate from each other. Yes....it's a mickey mouse set up...nothing against mickey mouse...jus sayin...

P.S. I have yet to disassemble a chain stay and seat stay assembly on a Rise and find the rear axle bearing is spinning smoothly. The rear axle bearings on the Rise are very thin. When the bearing is compressed/inserted into the chain stay bearing bore, it will warp the bearing and cause it to feel notchy and not spin freely. Unless the rear axle bearings are totally rusted out and frozen solid, I won't replace them. It's one of those things you learn to live with on the Rise.

I hope this helps with your situation,

Be safe,
Rod

Screenshot 2024-02-03 07.43.00.jpg
 
Last edited:
  • Like
Reactions: MOG

EMTB Forums

Since 2018

The World's largest electric mountain bike community.

556K
Messages
28,076
Members
Join Our Community

Latest articles


Top