I've had that same thought. I just took for granted the splines don't reach past the the whole width of the inner raceThe splined shaft is running against the inner race of the main bearing so what stops water ingress at that metal to metal gap?
You are using an out of date browser. It may not display this or other websites correctly.
You should upgrade or use an alternative browser.
You should upgrade or use an alternative browser.
Bosch Gen4 Seal Service & Grease up
- Thread starter RustyMTB
- Start date
I think the new bearing seal and the (specific) grease provided helps with any water ingress as well. Over a period of time, or trail conditions, this preventative part will begin to fail. The main crank bearing will become the last line of defence …until it no longer is.The splined shaft is running against the inner race of the main bearing so what stops water ingress at that metal to metal gap?
Regular maintenance or replacement of the bearing seal kit can slow down water ingress thus prolonging the life of the main crank bearing(s). It’s a relatively easy and cheap kit to install for most of us.
Looking at a disassembly video I don't think the splines go past the inside edge of the bearing, though the grease helps to plug those splines in addition to protecting the outer bearing. In any case, the guy who repairs the motors says it's good to regrease the seal, so we regrease the sealThe splined shaft is running against the inner race of the main bearing so what stops water ingress at that metal to metal gap?
Last edited:
Hattori-Hanzo
Well-known member
Going to tackle this over the Christmas break on my Stereo hybrid 160.
Are there any videos for the drive side process? Any tips or things to watch out for?
I have the Parktools crank remover, and hoping the cheap 8 notch castle socket I've got is up to the job.
Are there any videos for the drive side process? Any tips or things to watch out for?
I have the Parktools crank remover, and hoping the cheap 8 notch castle socket I've got is up to the job.
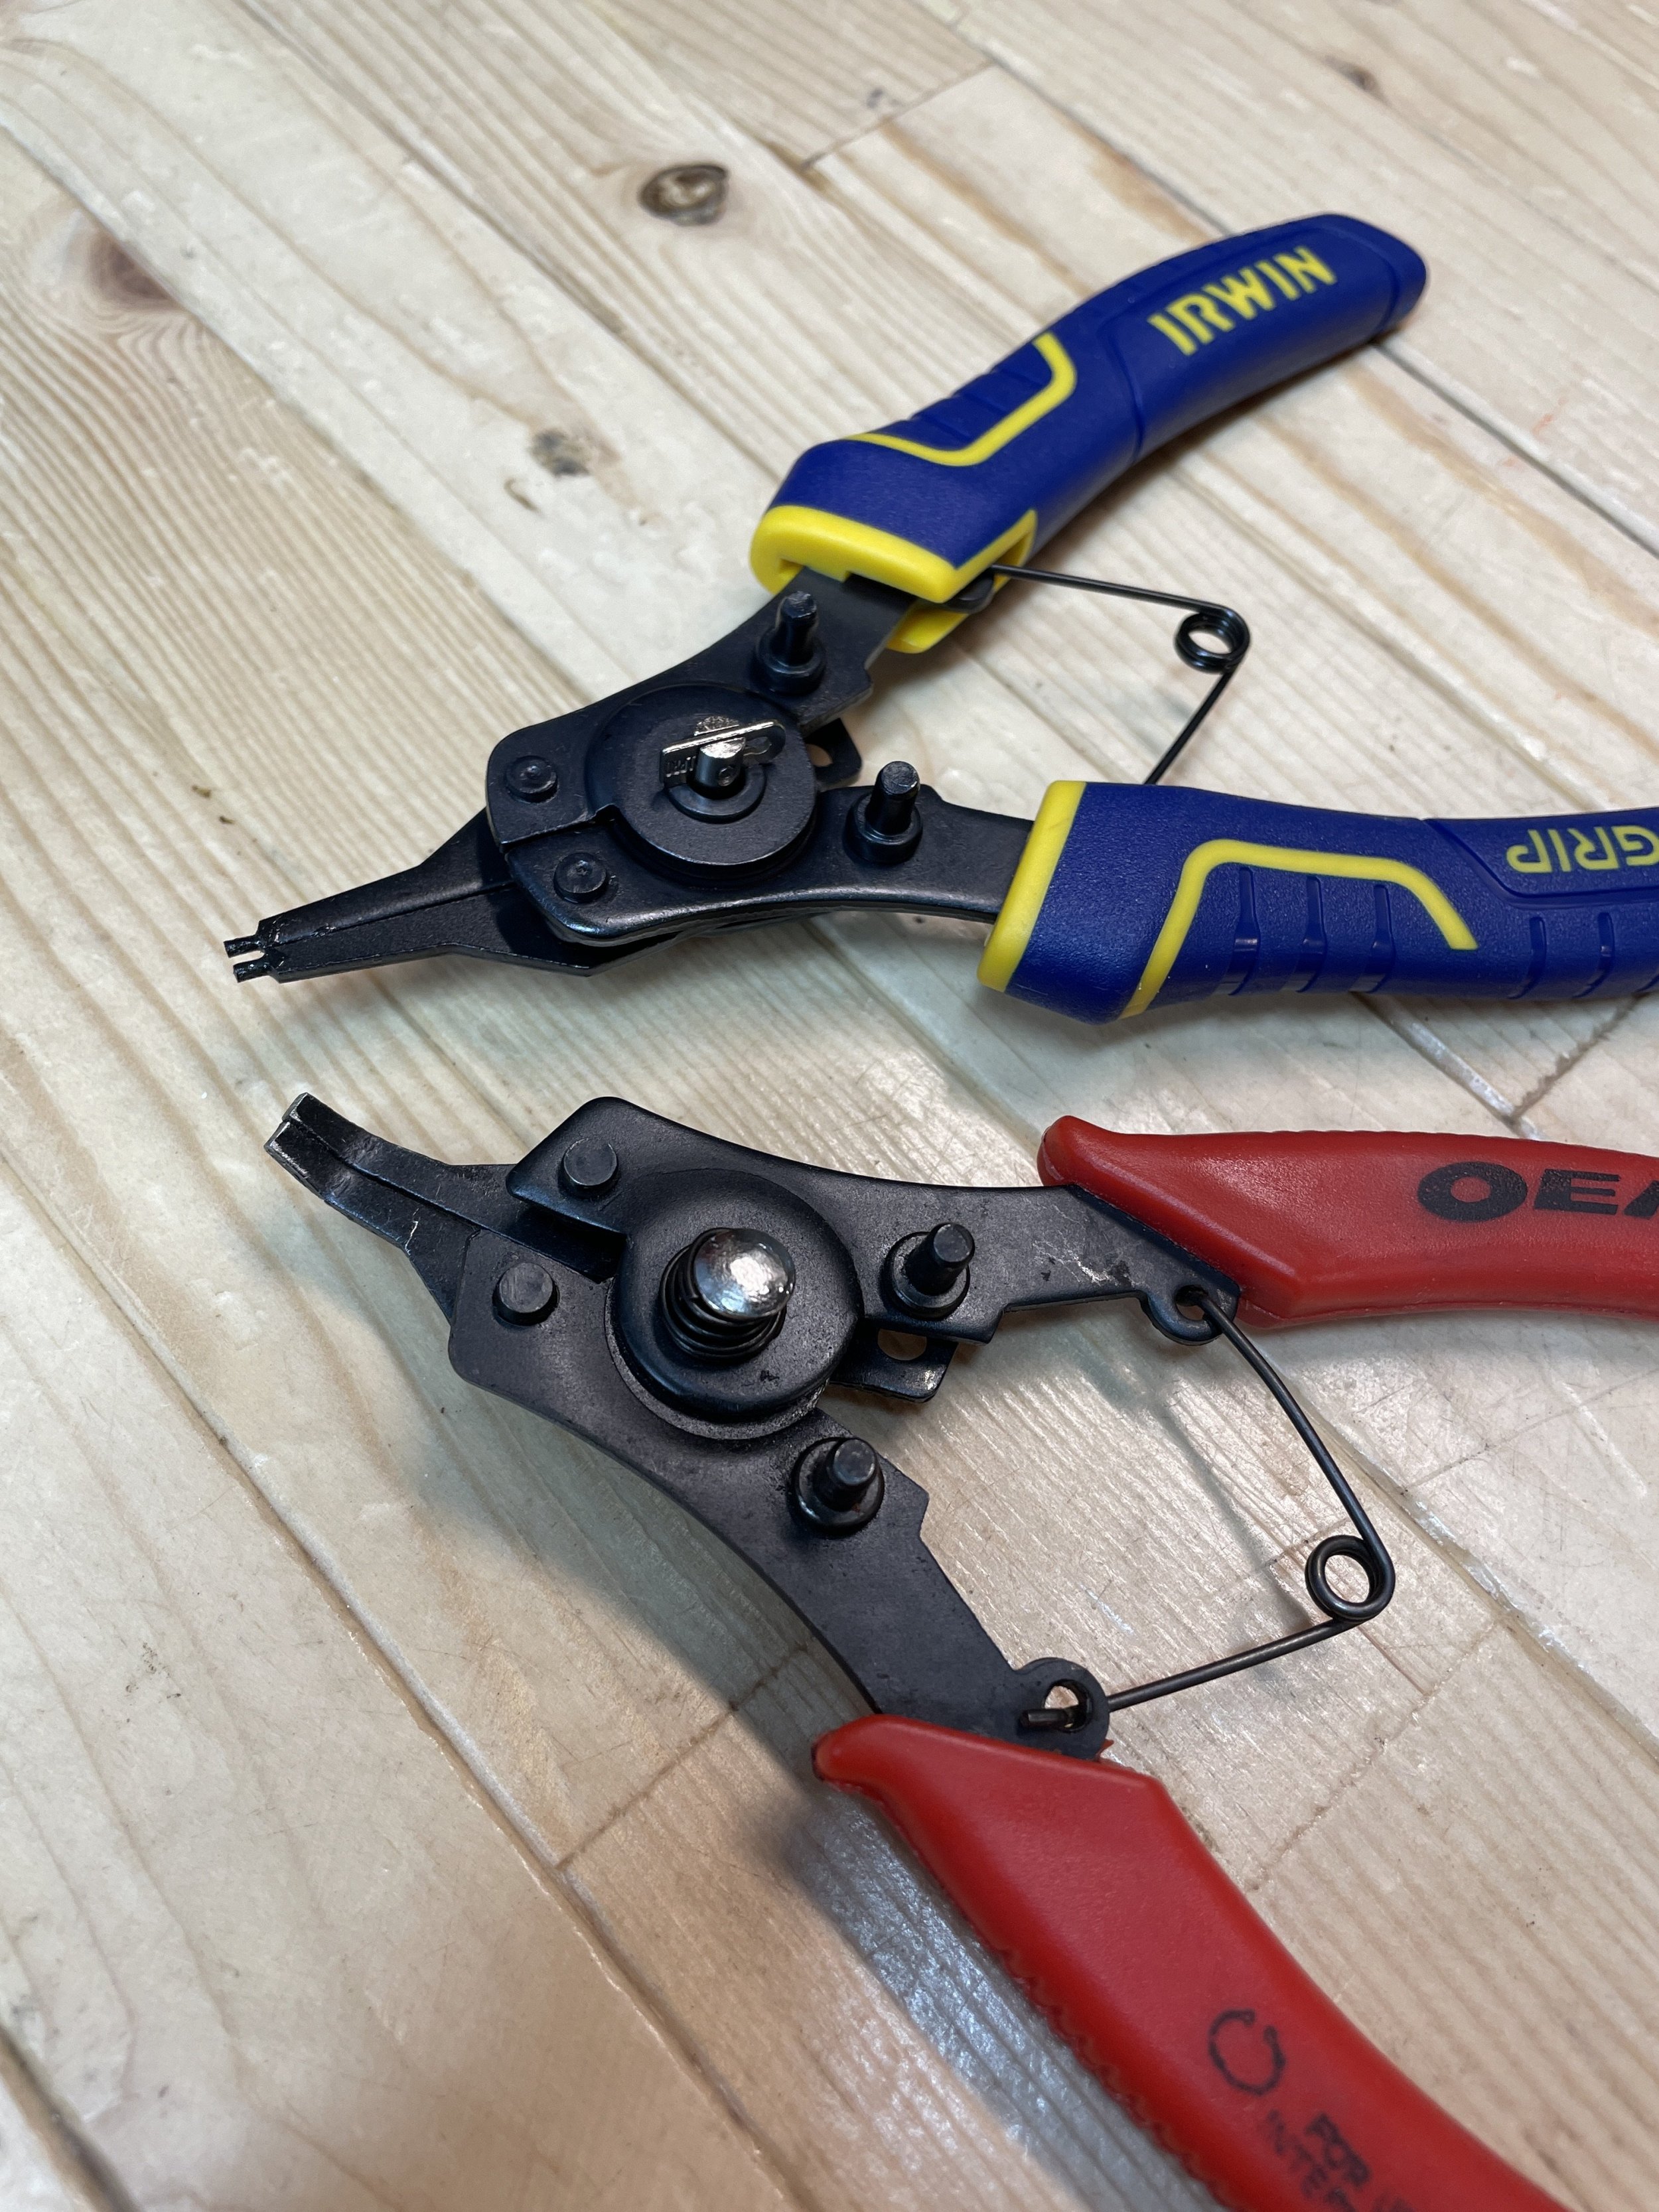
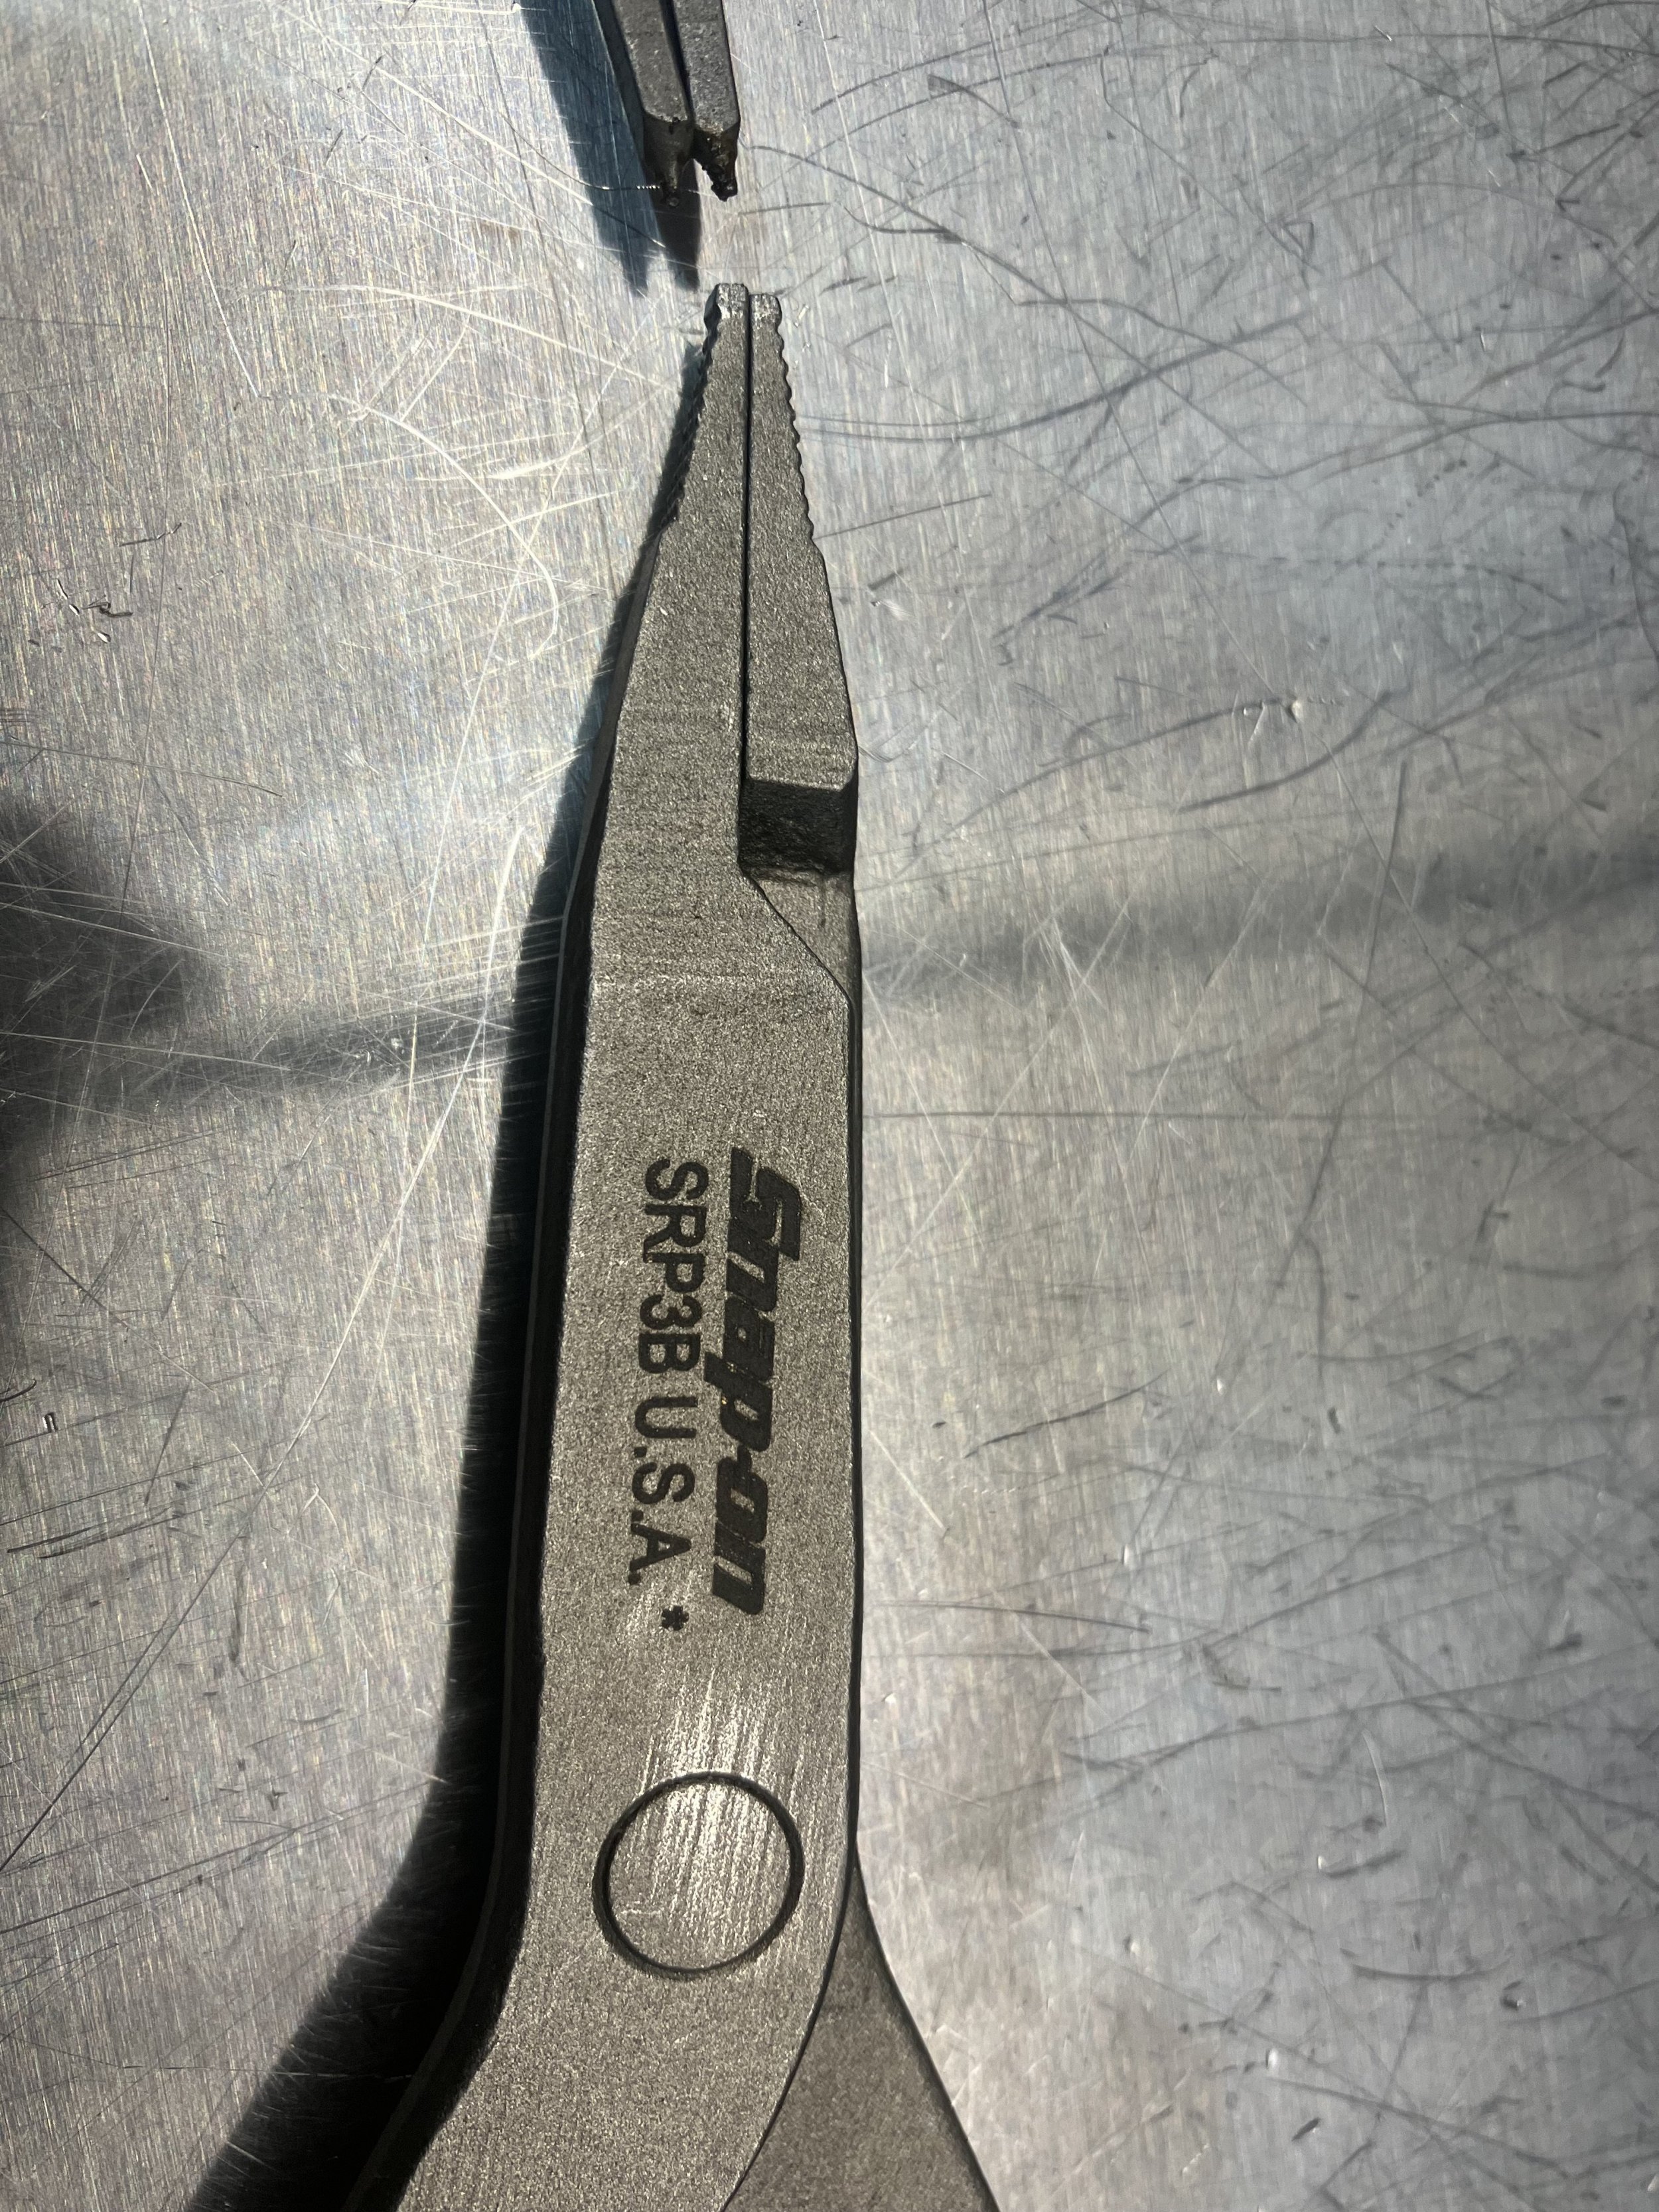
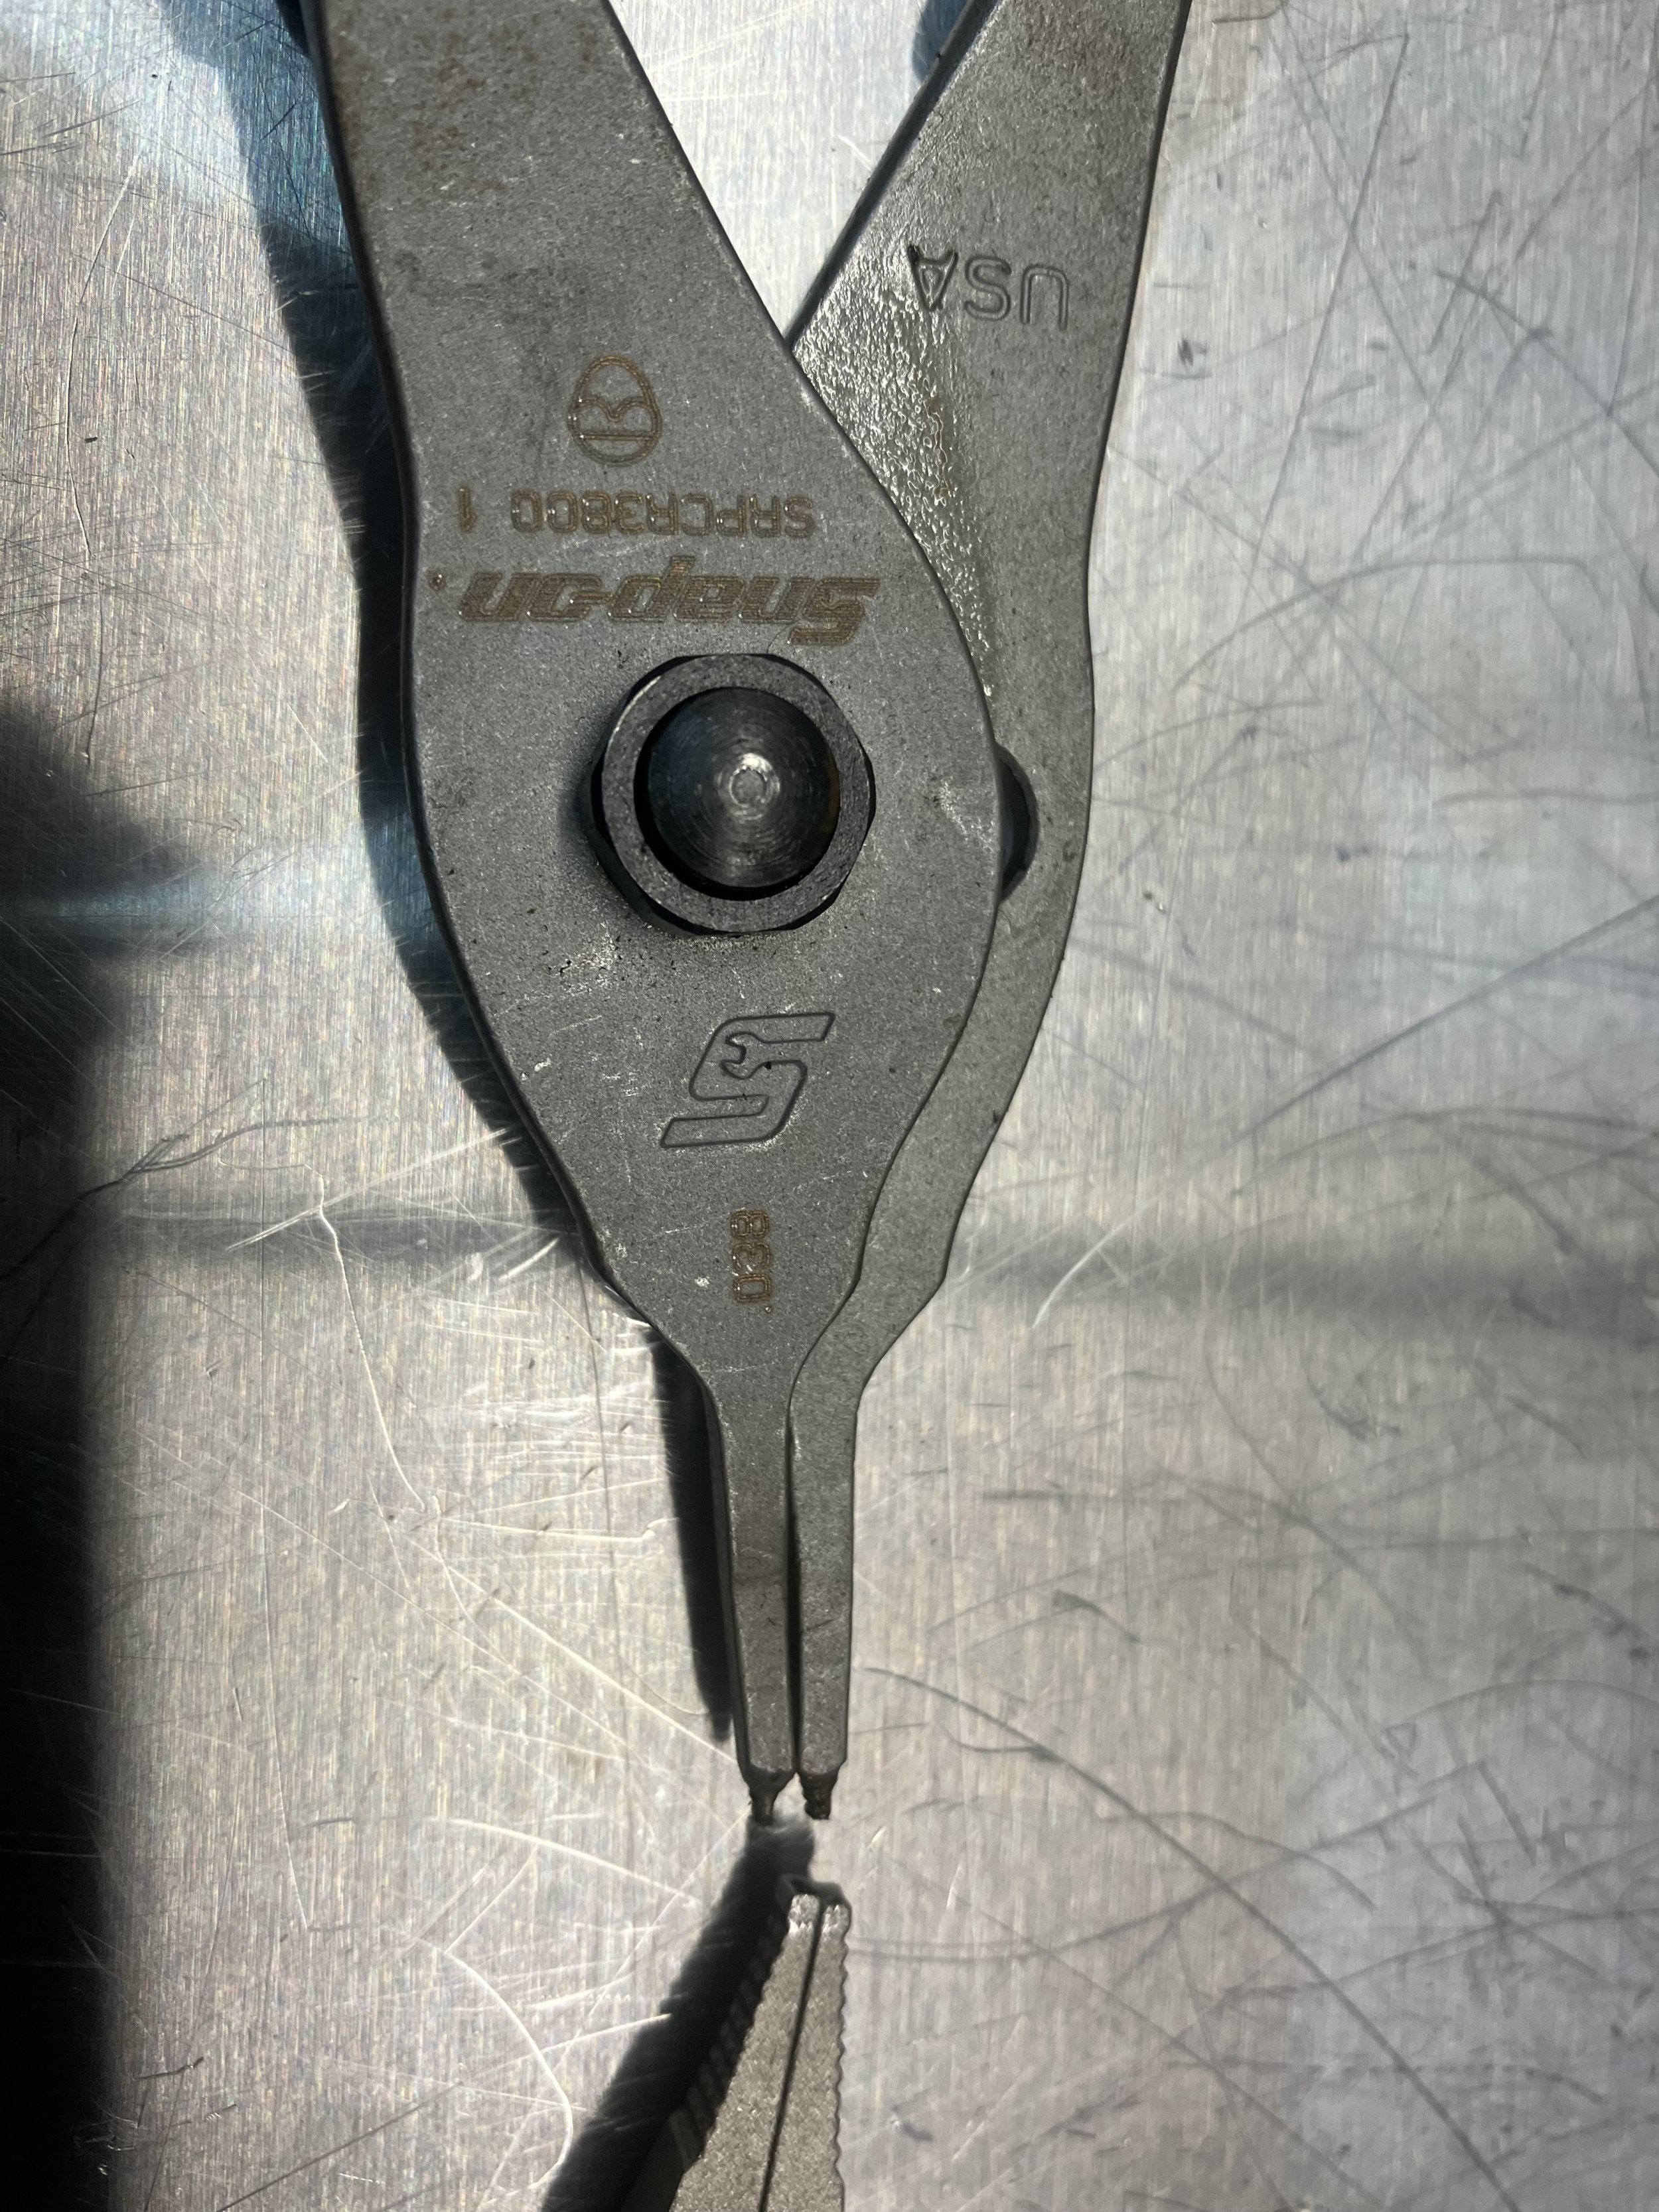
If you’re referring to the bearing seal kit, you’ve got the basic tools for this service. I did however modify a cir-clip tool (see previous pics). This can be done without dropping the motor. I keep a spare bearing seal kit. ($19).Going to tackle this over the Christmas break on my Stereo hybrid 160.
Are there any videos for the drive side process? Any tips or things to watch out for?
I have the Parktools crank remover, and hoping the cheap 8 notch castle socket I've got is up to the job.
I never noticed any difference in preformance but the grease was discoloured and there was very little. Seems like a cheap preventative service that might just extend the life of the motor.
Don’t cross thread the crankshaft, don’t crush the crankshaft threads when removing the cir-clip, steady the bike when using the castle-socket.
It’s a one and a half beer
Good luck.
Or 1 can of Canda Dry Gingerale.
Last edited:
- Thread starter
- #66
Drive side, remember the lock nut is reverse thread, so loosen it to the right & loosen it after taking off the crank but before removing the chain or you won't have any counter force to stop the chainring spinning. Otherwise it's the same process just with a slightly more awkward circlip.
Hattori-Hanzo
Well-known member
Finally got round to this today, not too difficult, took a couple of hours, but I was going slow and fitting new cranks as well.
There was hardly any grease behind the left hand seal.

I used a load of Silkolene Pro RG2, going to evaluate it in a months time to see how it's doing, if I'm not happy I'll switch to the official Bosch grease.

The drive side inner circlip was a pain in the arse to get off! Luckily the seal dislodged as well when I finally got it free.
There must be a certain type of circlip pliers for this kind of clip?
Glad I've done this now as I ride regularly on sandy hills and it gets everywhere!

Greased up, ready to go back together.

I bought these cheap circlip pliers as my even cheaper multi use ones (which are total shit!) weren't up to the job.
These actually worked really well. The internal pliers removed the circlips easily and the external ones worked well to remove the seal like rusty shows in his video.

All in all a simple job which I'm going to add to my regular maintenance
There was hardly any grease behind the left hand seal.
I used a load of Silkolene Pro RG2, going to evaluate it in a months time to see how it's doing, if I'm not happy I'll switch to the official Bosch grease.
The drive side inner circlip was a pain in the arse to get off! Luckily the seal dislodged as well when I finally got it free.
There must be a certain type of circlip pliers for this kind of clip?
Glad I've done this now as I ride regularly on sandy hills and it gets everywhere!
Greased up, ready to go back together.
I bought these cheap circlip pliers as my even cheaper multi use ones (which are total shit!) weren't up to the job.
These actually worked really well. The internal pliers removed the circlips easily and the external ones worked well to remove the seal like rusty shows in his video.
All in all a simple job which I'm going to add to my regular maintenance
Hattori-Hanzo
Well-known member
After a bit more searching, it seems lock ring pliers could be what we are after.
Tool Kingdom Snap Ring Pliers / Lock Ring Pliers | eBay
Tool Kingdom Snap Ring Pliers / Lock Ring Pliers | eBay
Those look good …as long as they can reach or fit into the circular channel.After a bit more searching, it seems lock ring pliers could be what we are after.
Tool Kingdom Snap Ring Pliers / Lock Ring Pliers | eBay
Hattori-Hanzo
Well-known member
Some grinding maybe involved 
The first time I did this I used the same method as Dave. I found the same kind of tool and began removing that clip. Once I lifted and pried the clip out of the circular channel, I dragged it across the fine threads and finally off of the crank. To reinstall the clip I simply reversed the procedure. (If you watch the video carefully, there is an edit at that exact moment).Actually it's not that hard to do.
Anyways, with my first try, It wasn’t fun and it wasn’t pretty to watch. I modified a tool to do the job a little easier. I’ve since used it several times.
The genuine Bosch picture does show standard circlips, but the genuine kit will contain C-clips.I've been inspired by Rusty's video to service my seals, but those advertised on Ebay etc seem to have conventional circlips rather than the snap rings shown in the video.
Is this a sensible upgrade adopted Bosch or am I looking at the wrong part?
I just use a sharpie pen and write Snap-On over the Mastercraft engraving. (Btw, I’m not a pro)Snap on? You're overcharging!
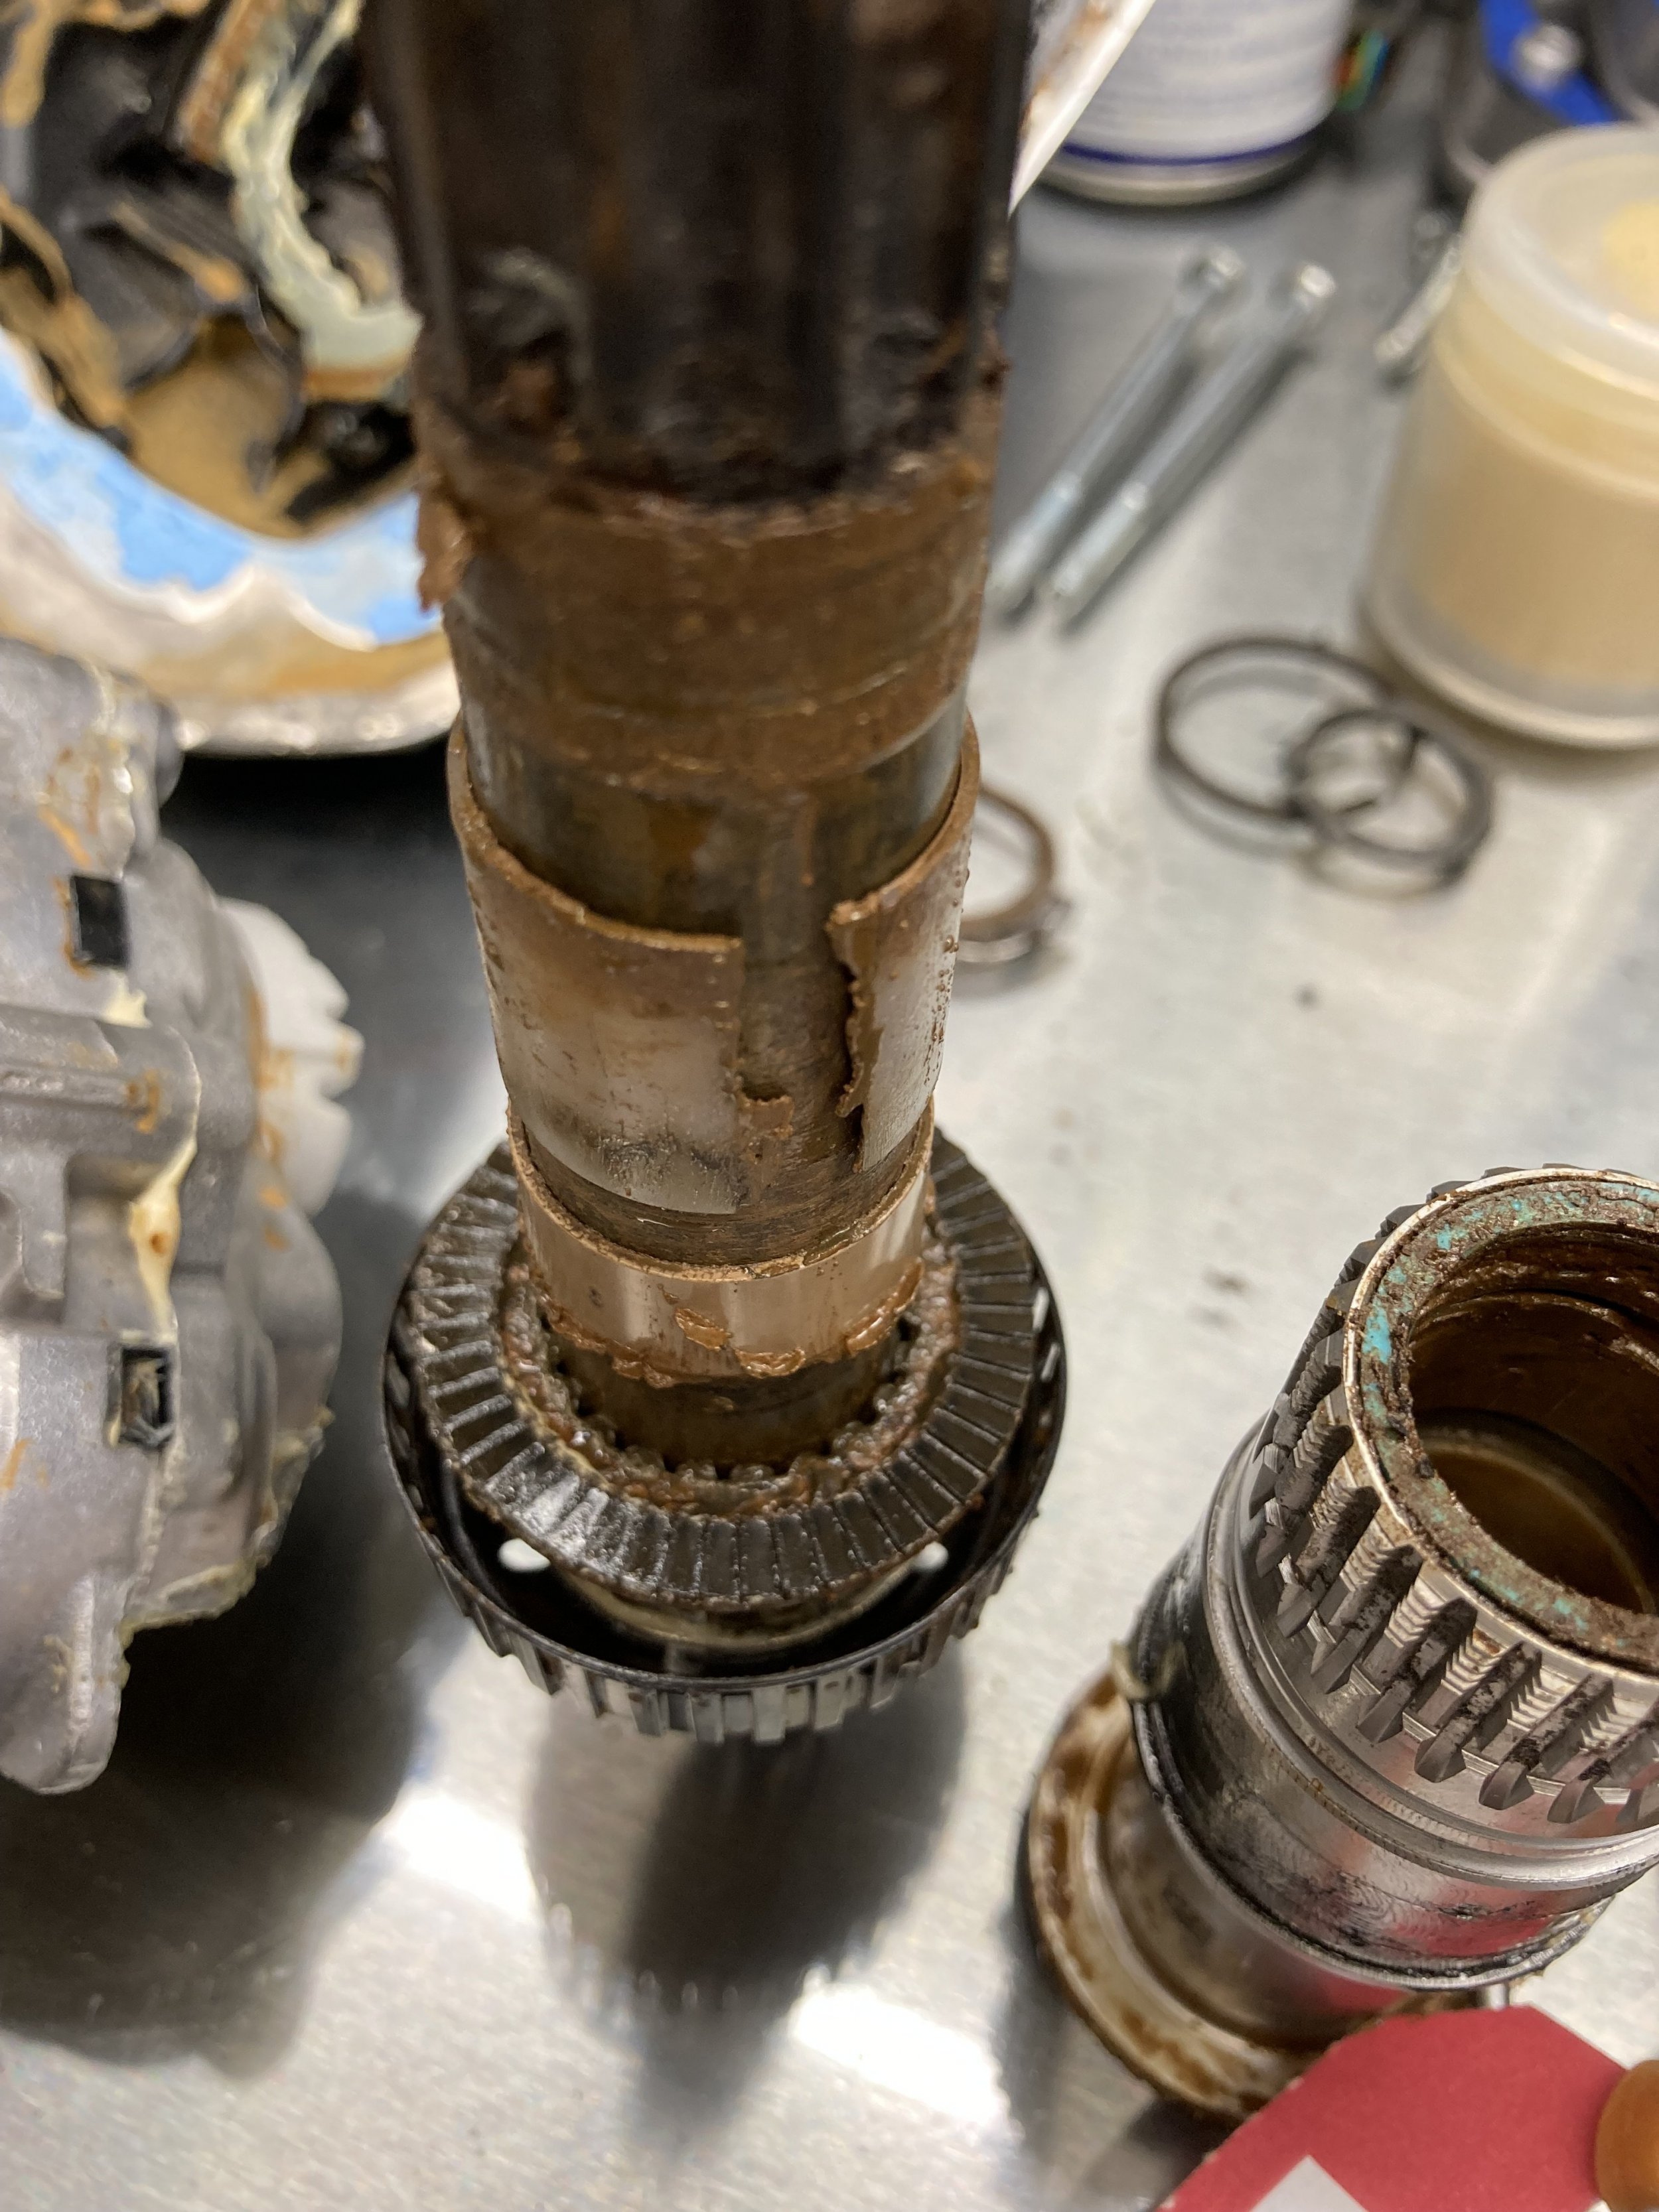
I do have some slightly bad news for you guys though. We have been logging lots of faults with the Gen 4's whilst constantly evaluating the failures we're seeing. We could not workout why the left hand crankshaft bearing keeps failing and the right hand does not (well, not so much anyway).
It turns out, the water is coming past the plastic washer that sits underneath the right hand circlip between the sprocket carrier and crankshaft. Once in this area, the water runs along the crankshaft and into the back of the left hand bearing. The left hand bearing does not have a seal on the factory bearing, just a metal shield. Therefore, not waterproof in the slightest.
This water also rusts the crankshaft, which in turn wears the plastic bushes that support the crankshaft IMG_5804, leading to play, that leads to more water! I will do a full post on this and the solution we have, as soon as time permits.
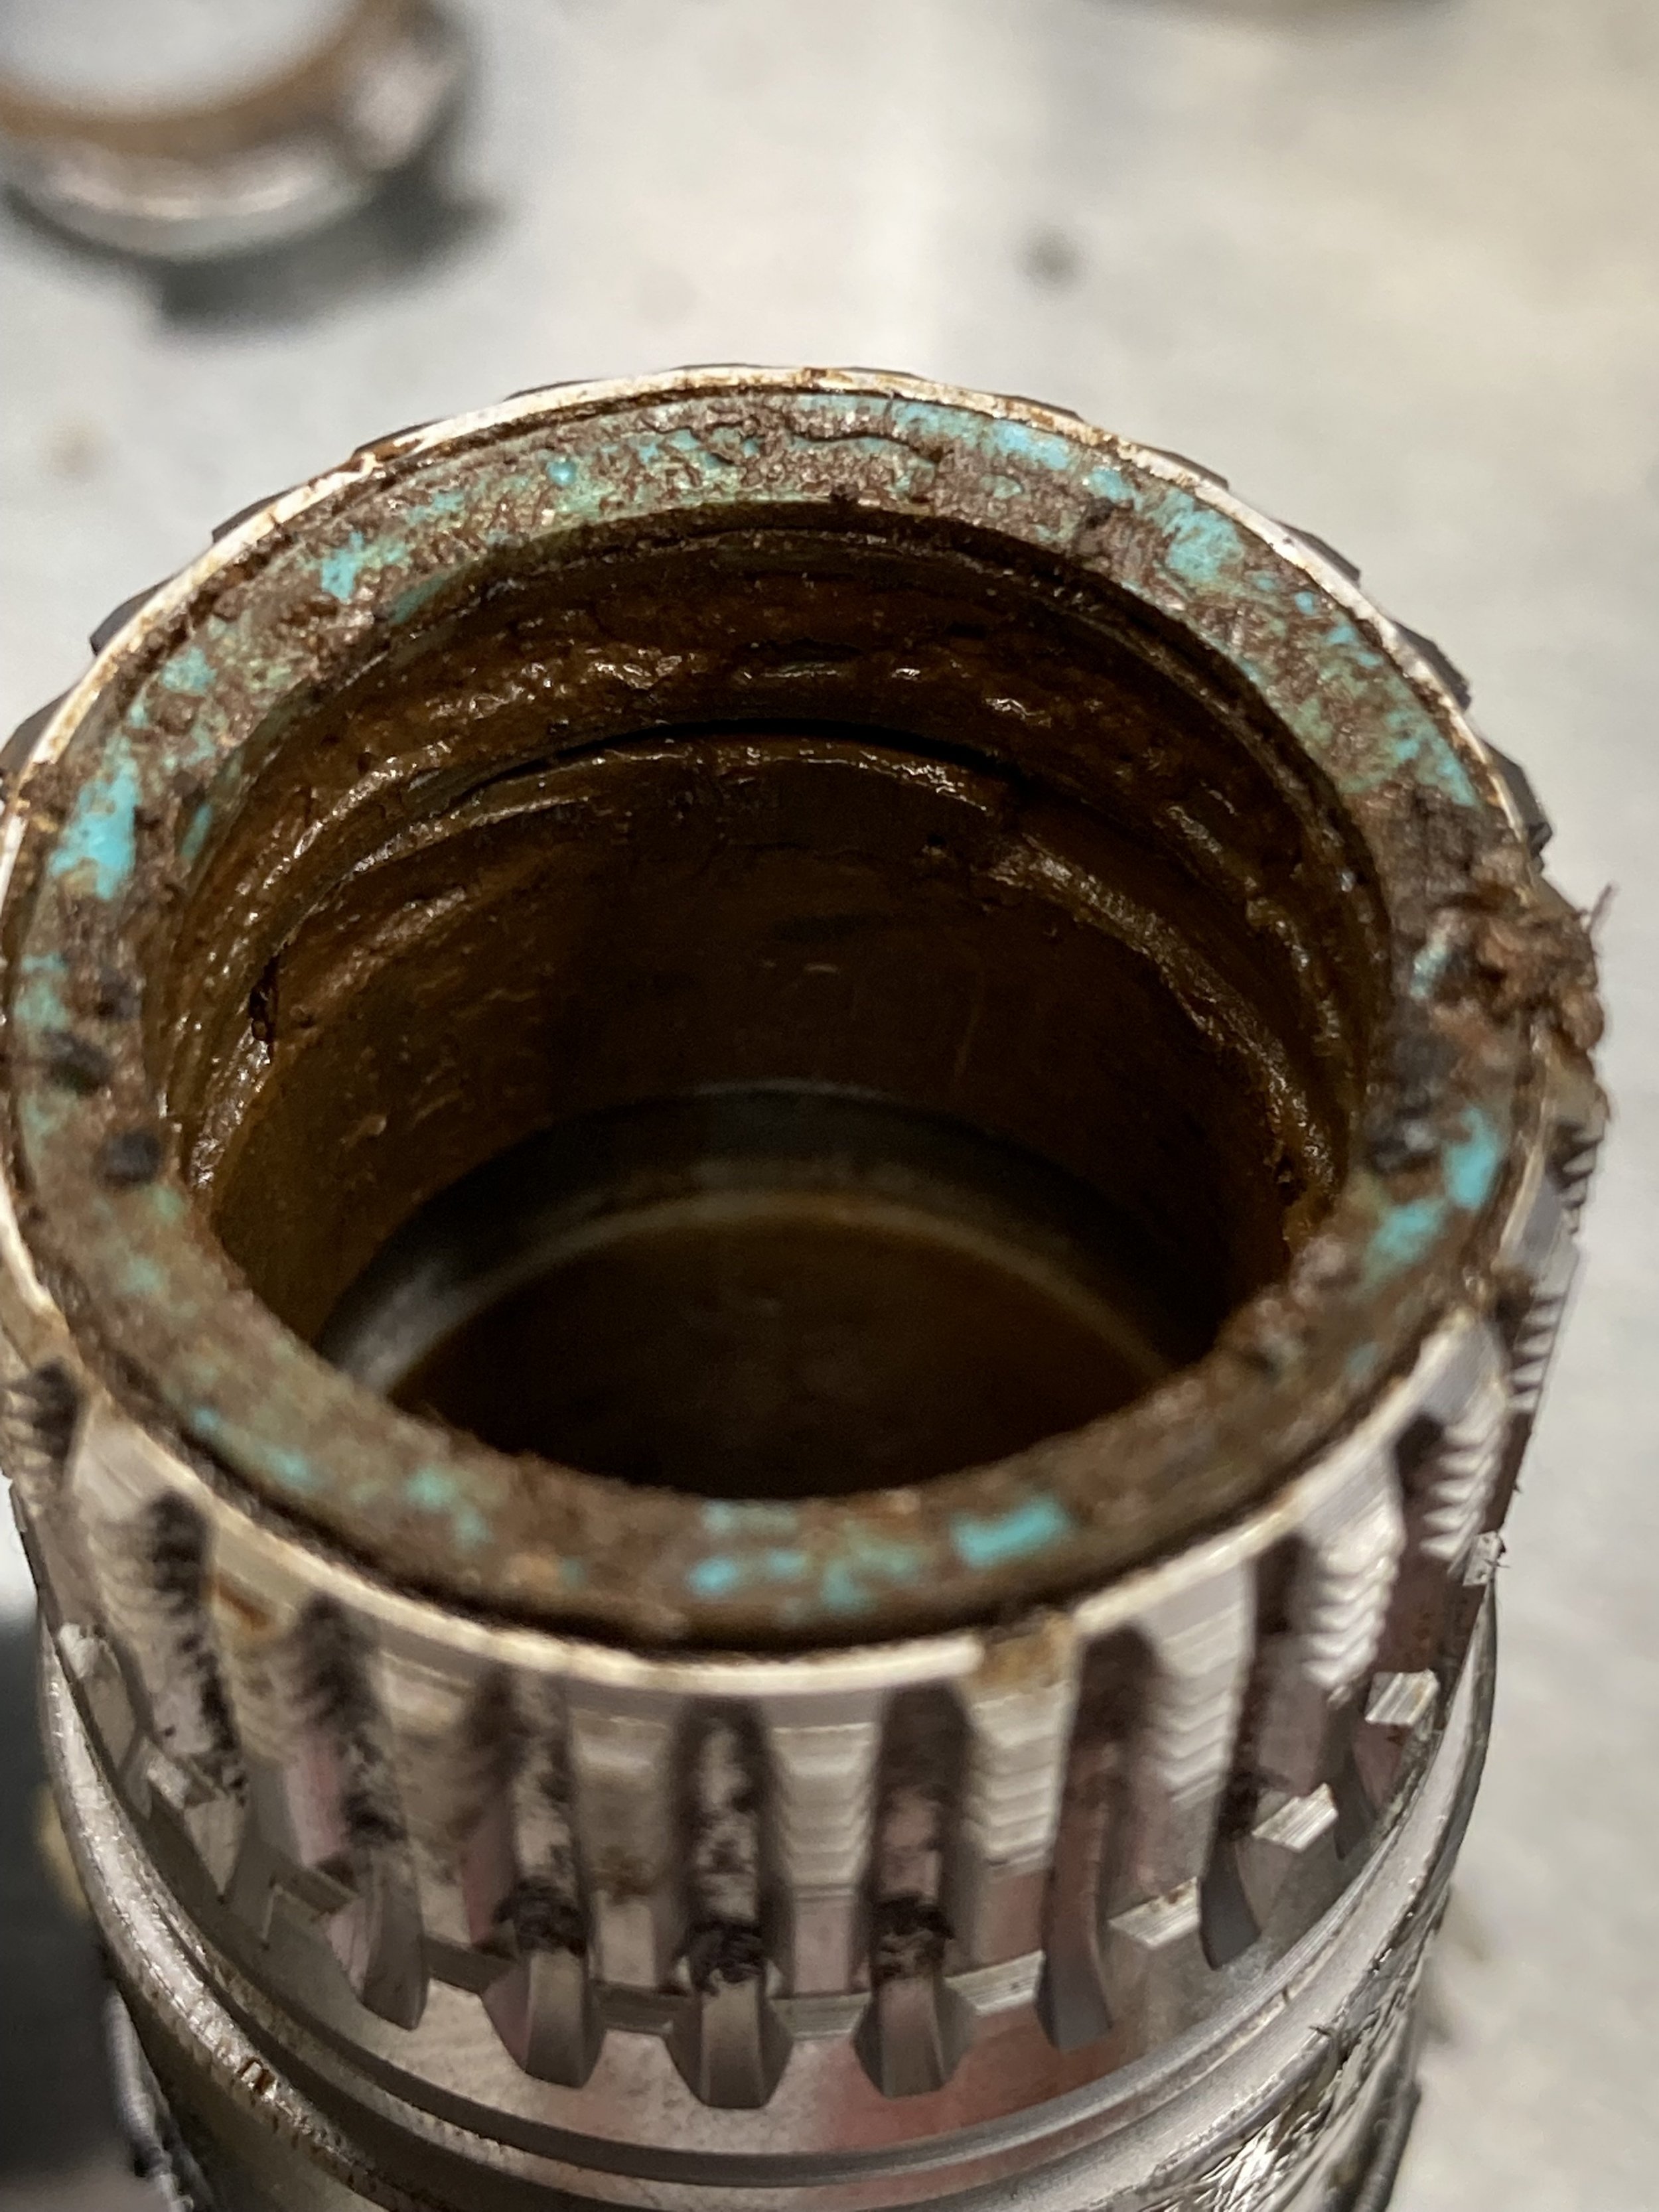
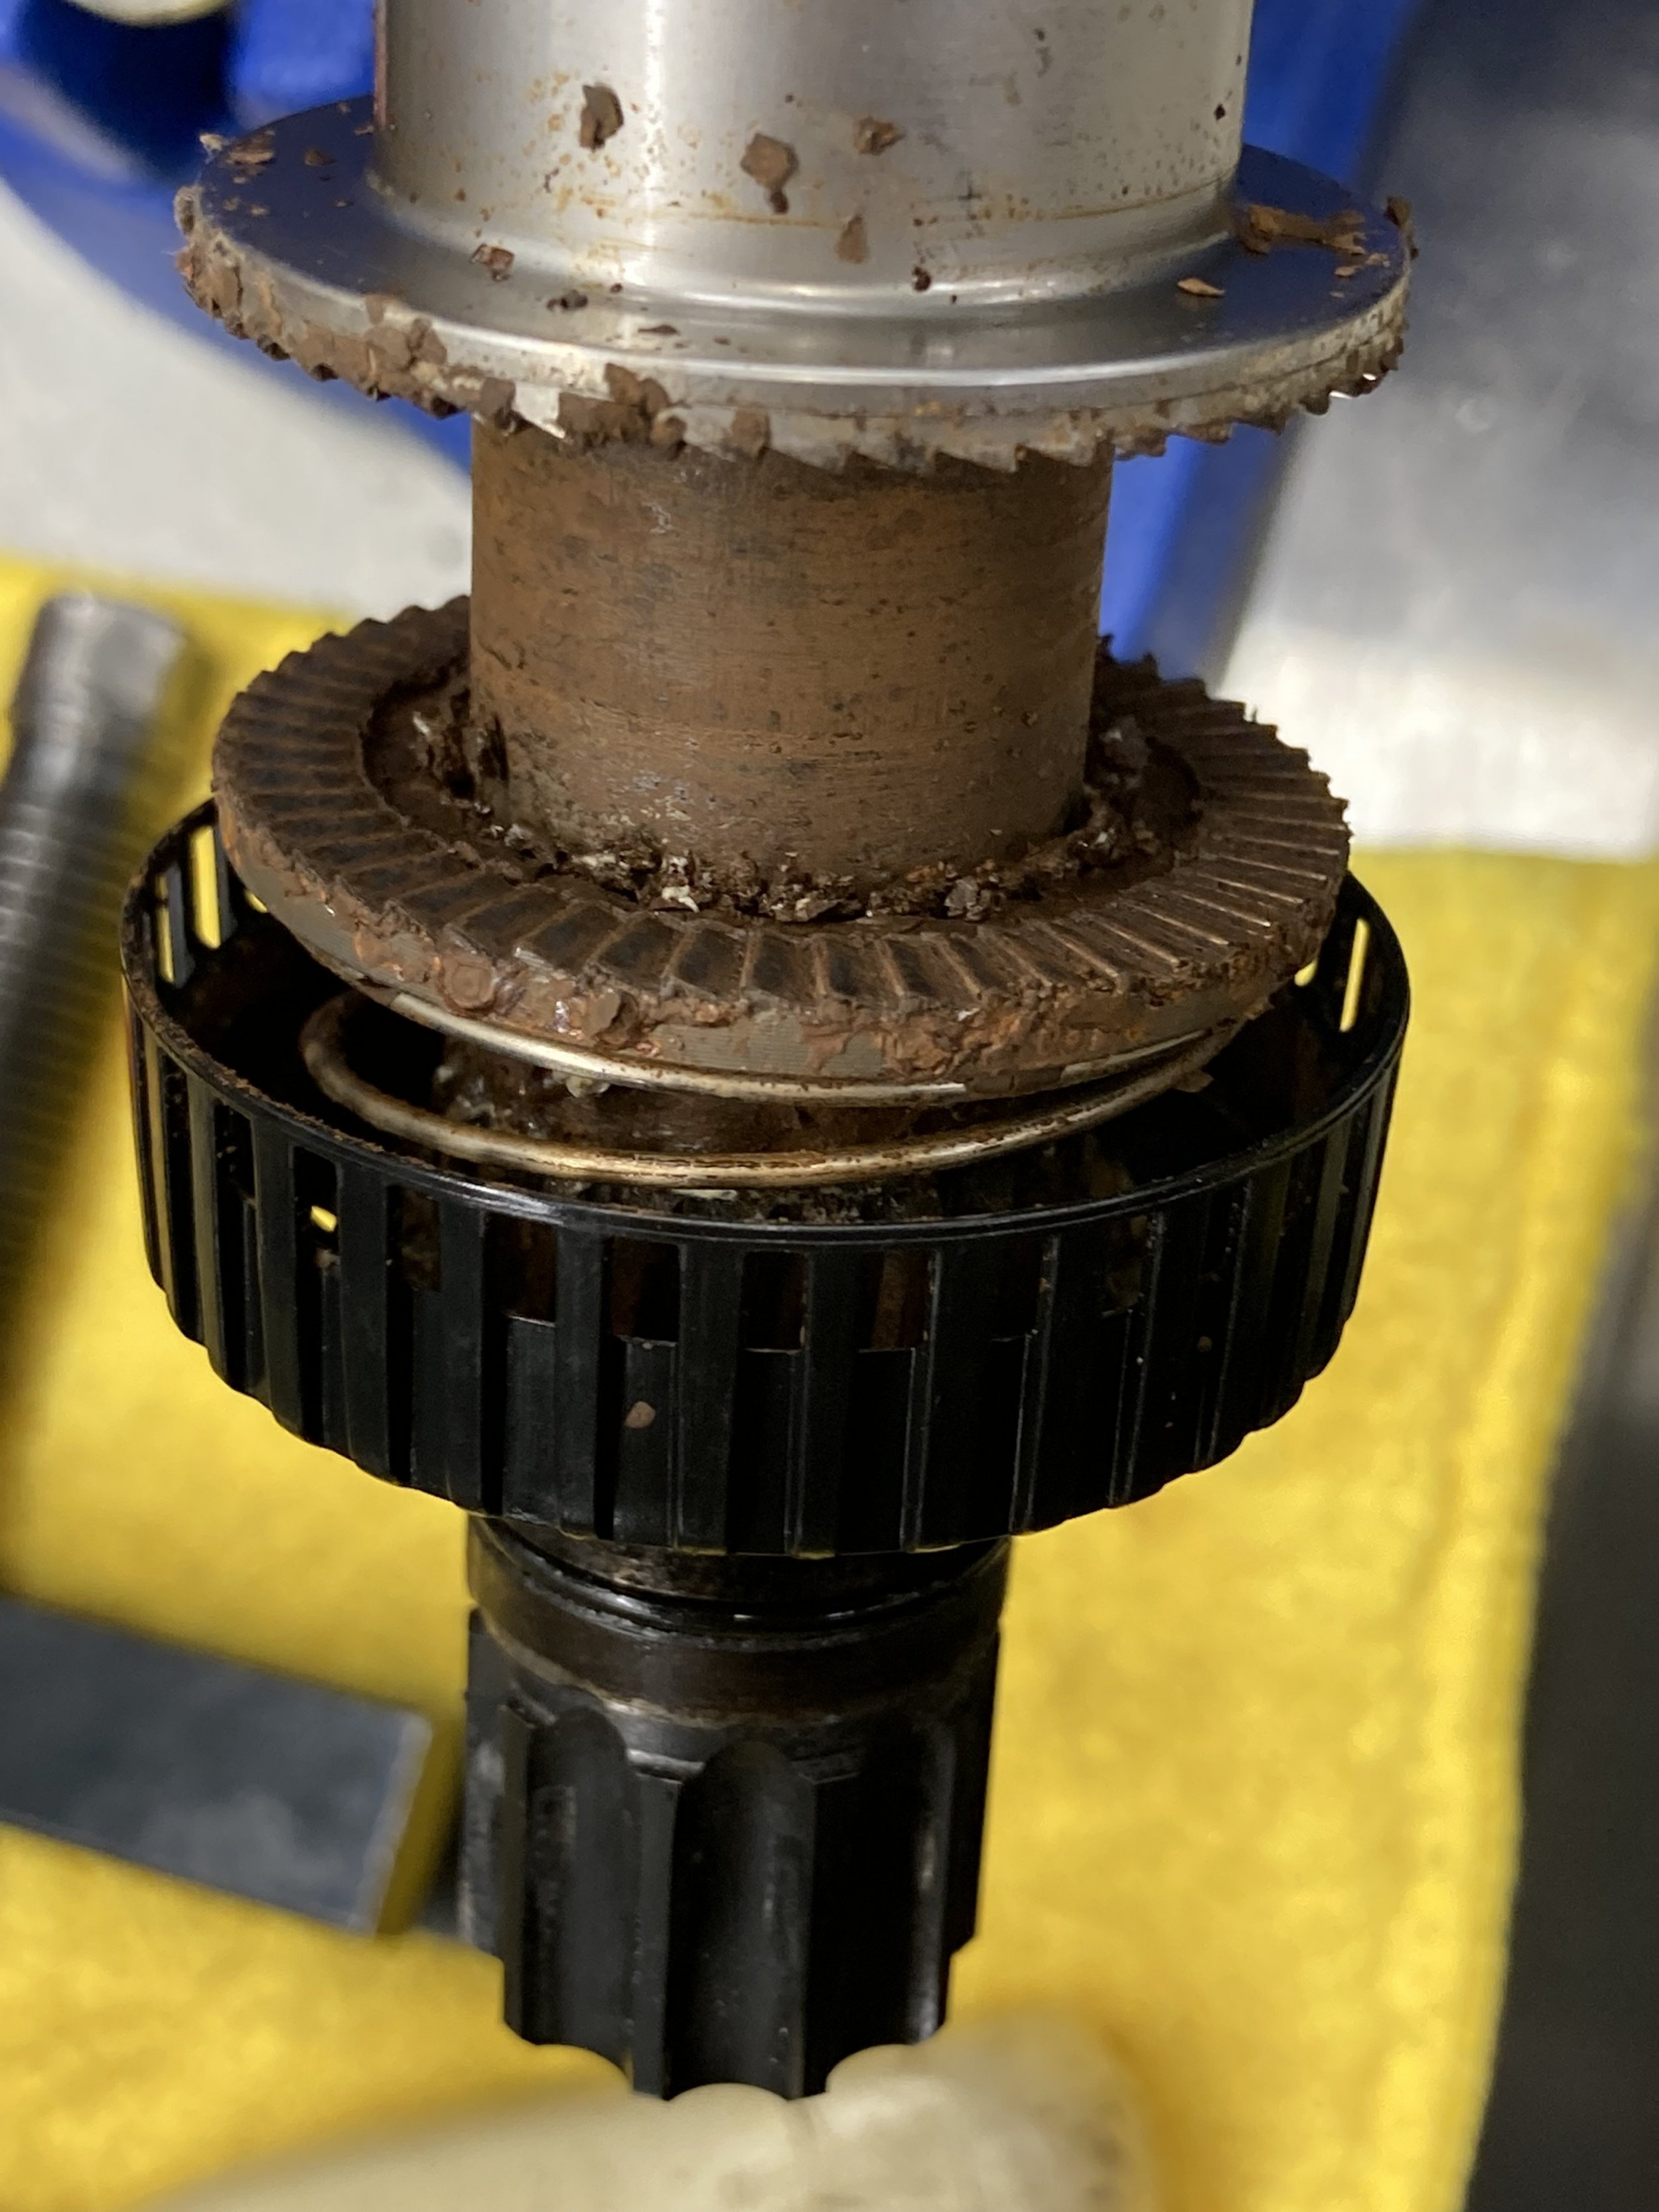
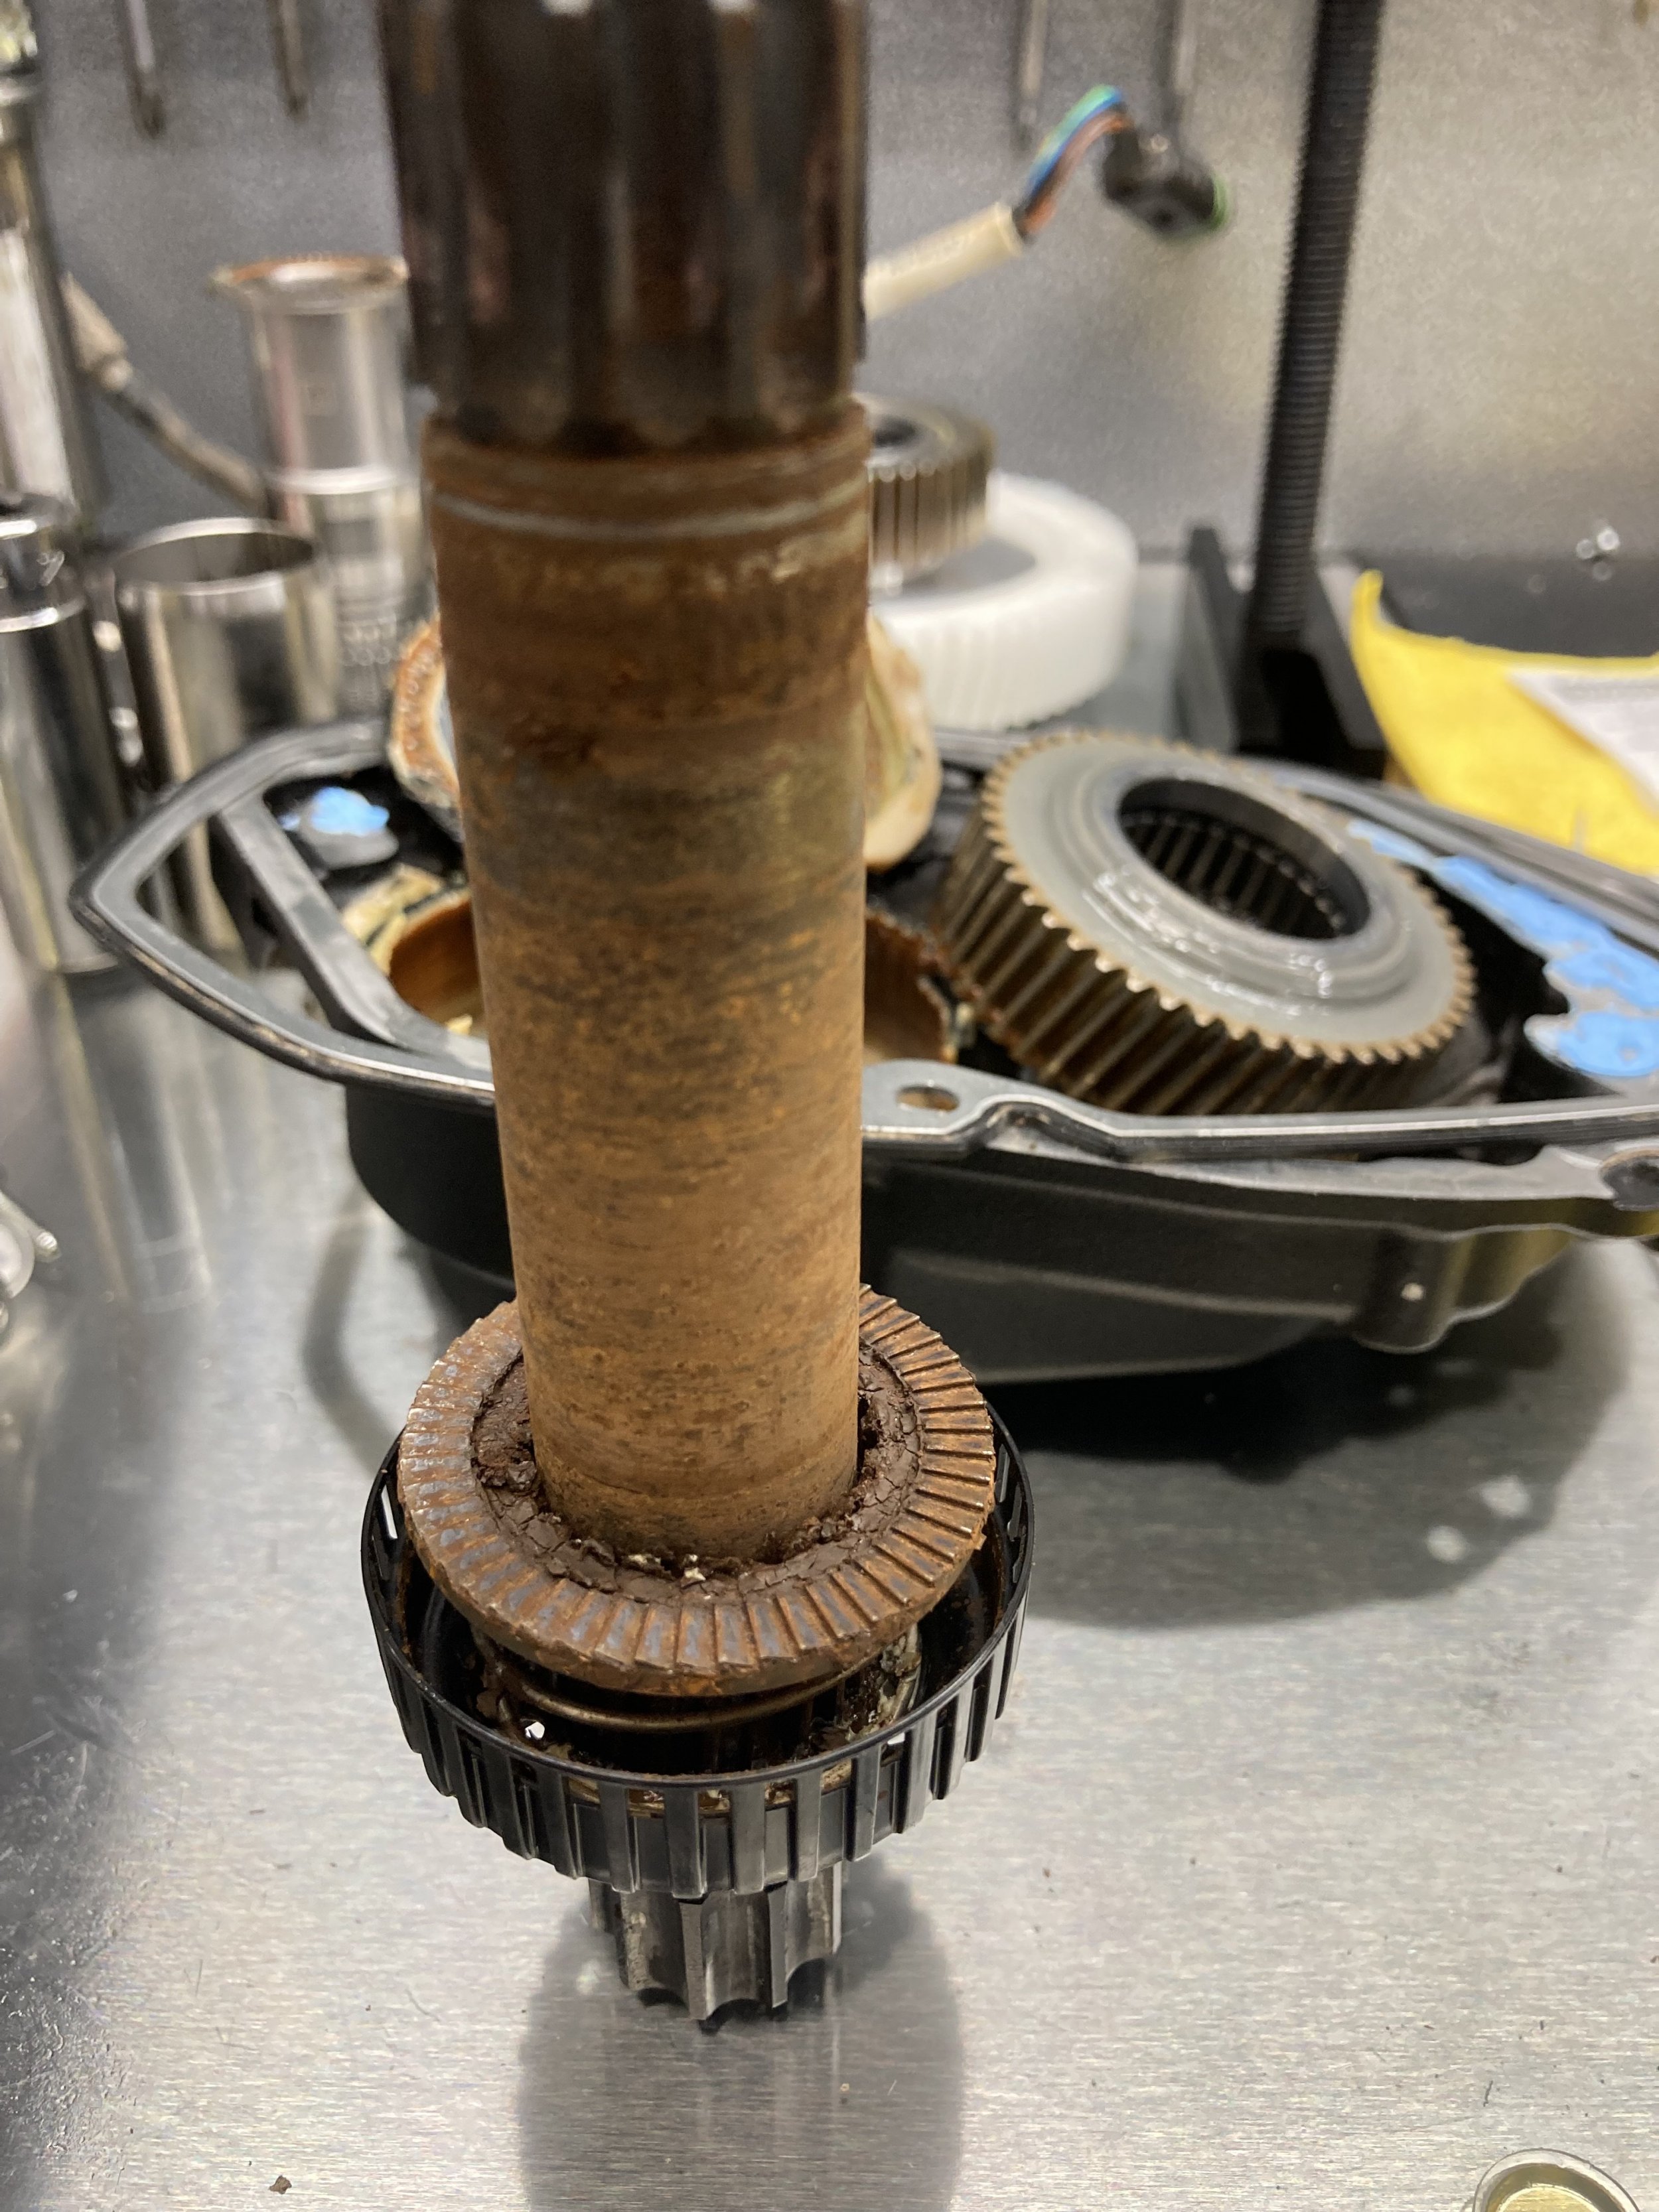


Fook, that's ugly!I do have some slightly bad news for you guys though. We have been logging lots of faults with the Gen 4's whilst constantly evaluating the failures we're seeing. We could not workout why the left hand crankshaft bearing keeps failing and the right hand does not (well, not so much anyway).
It turns out, the water is coming past the plastic washer that sits underneath the right hand circlip between the sprocket carrier and crankshaft. Once in this area, the water runs along the crankshaft and into the back of the left hand bearing. The left hand bearing does not have a seal on the factory bearing, just a metal shield. Therefore, not waterproof in the slightest.
This water also rusts the crankshaft, which in turn wears the plastic bushes that support the crankshaft IMG_5804, leading to play, that leads to more water! I will do a full post on this and the solution we have, as soon as time permits.
View attachment 135664 View attachment 135665 View attachment 135666 View attachment 135667
I’m my early teens (1972-ish), I use to rebuild Carter and Holley carburetors. A few local car repair shops would put them on their shelves and resell them. This would partially fund my small Snap-On tool collection. Things went downhill after when I changed careers.If we're doing confessions, my tool cabinet is a Halfords cheapy - like Princess auto & my mate who's a master tech at Aston Martin gave me a couple of Snap on badges which I stuck on the front!
View attachment 135663
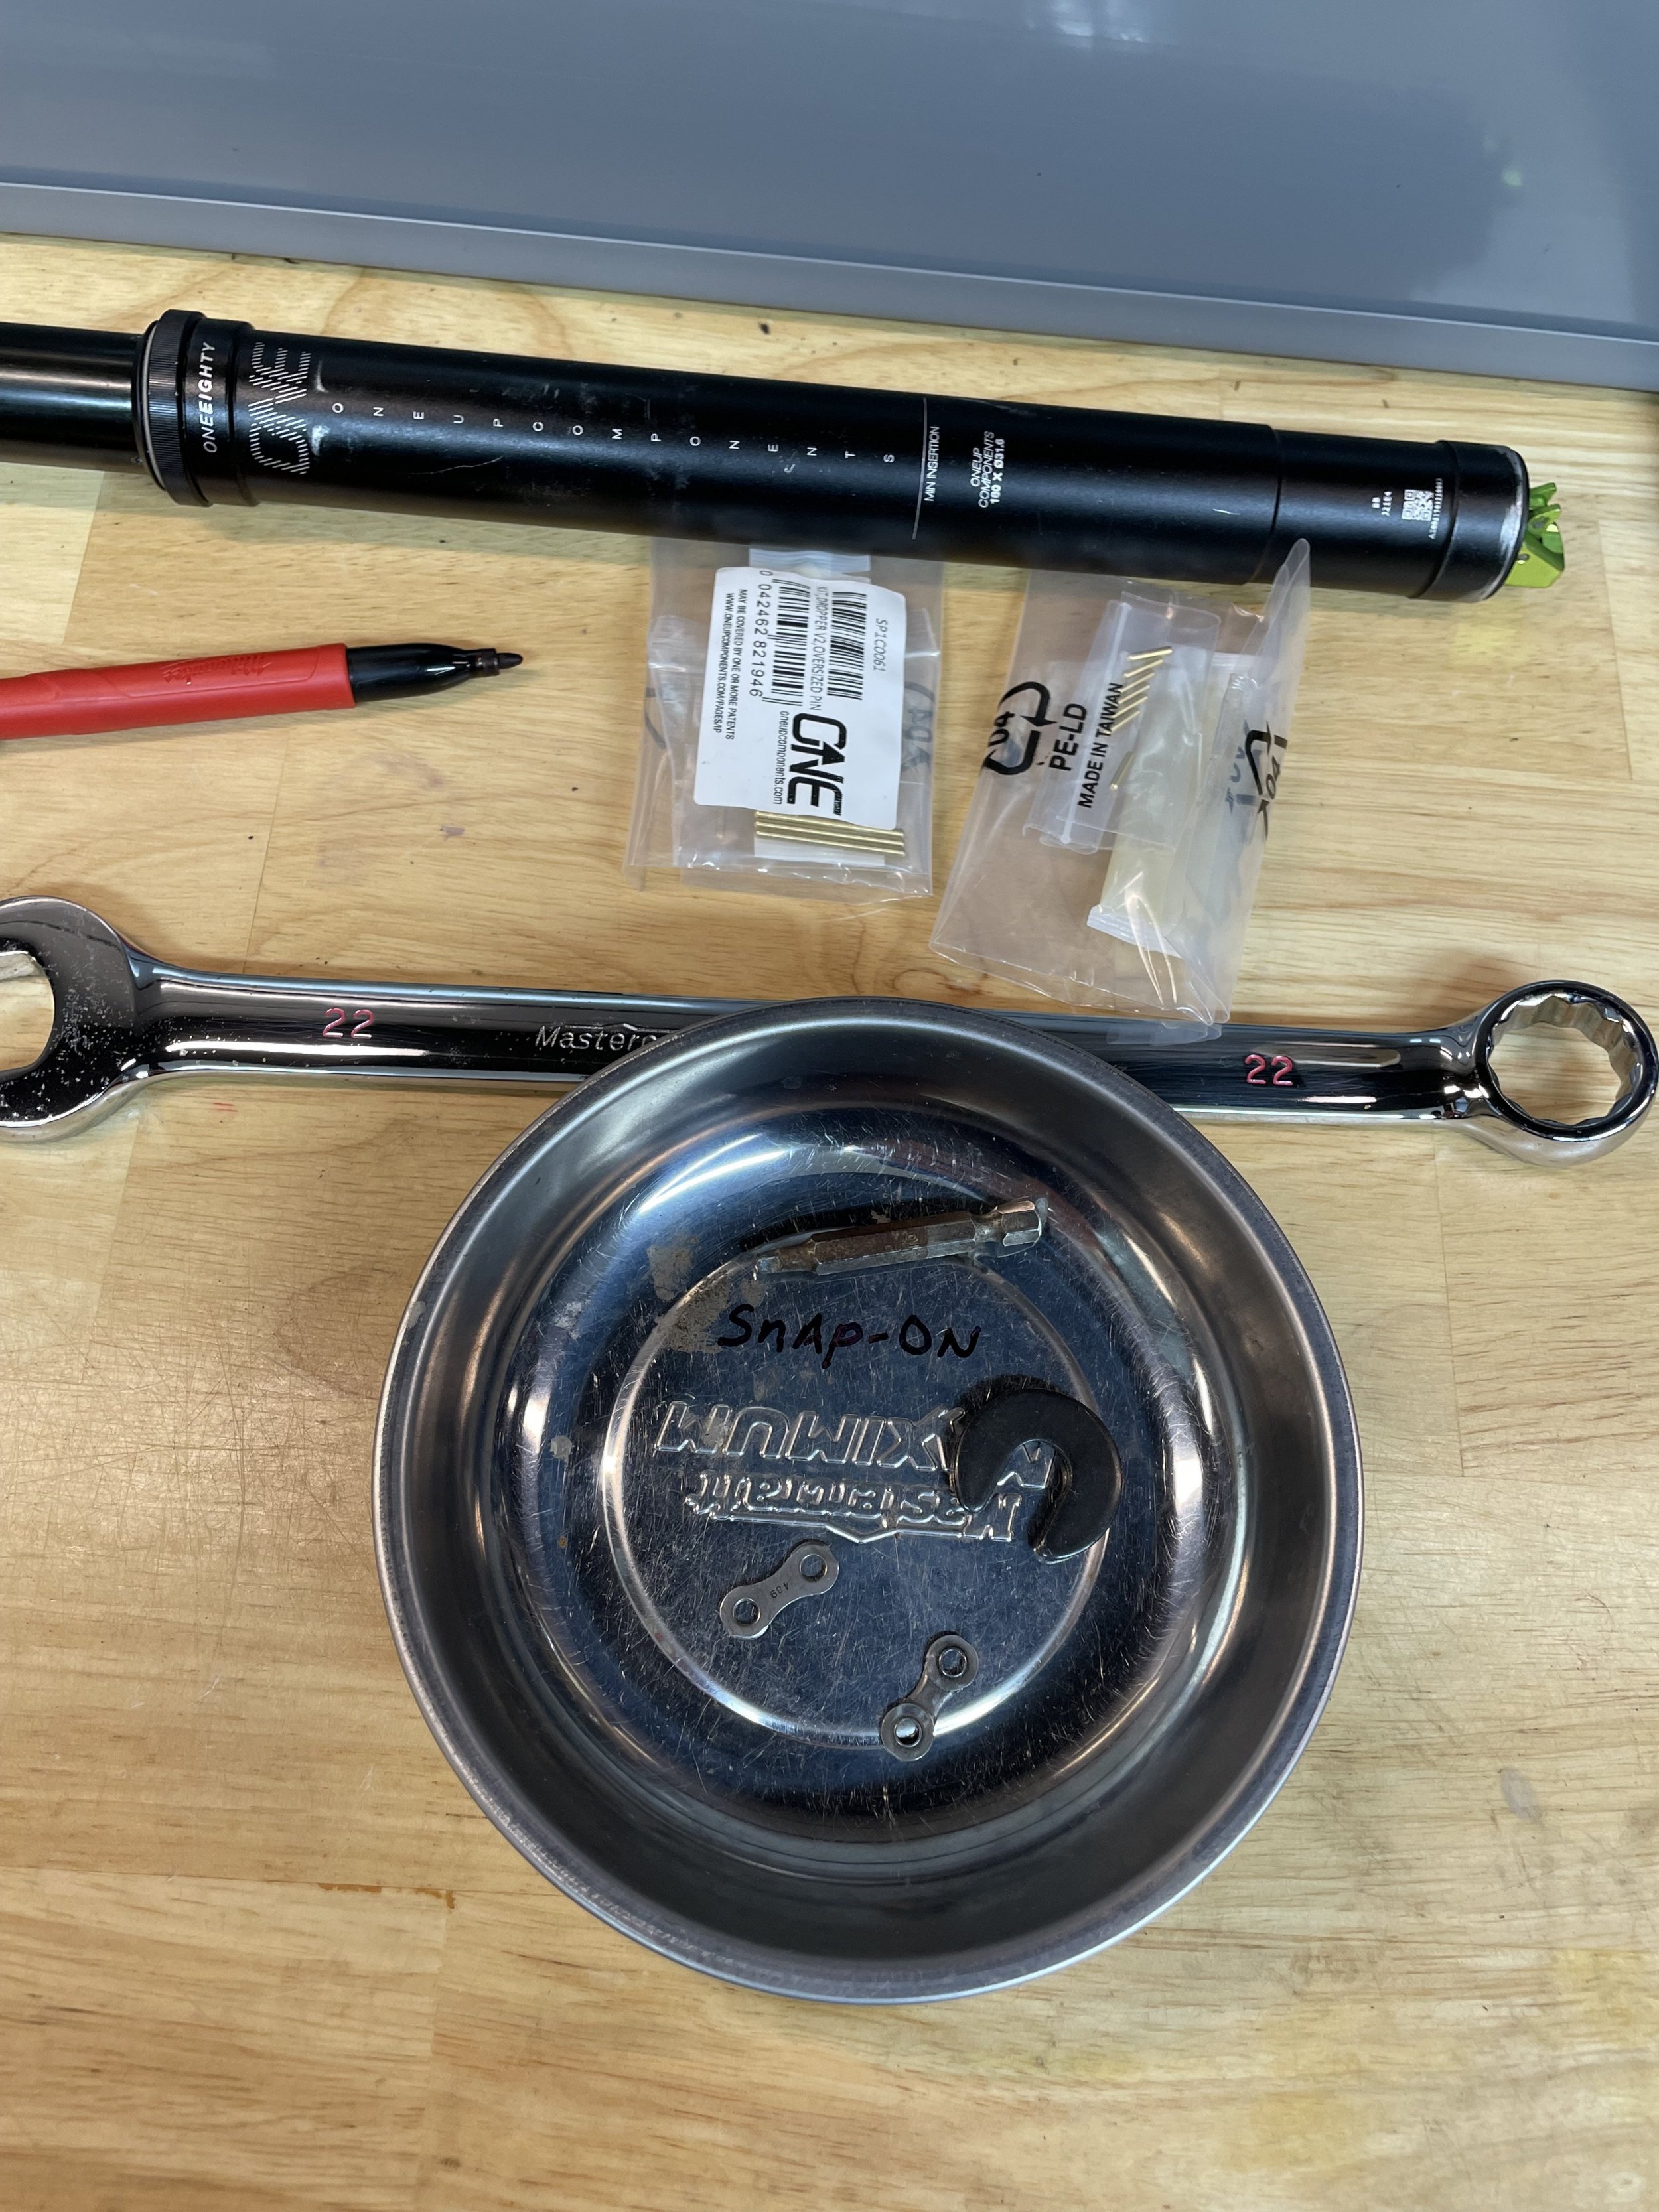
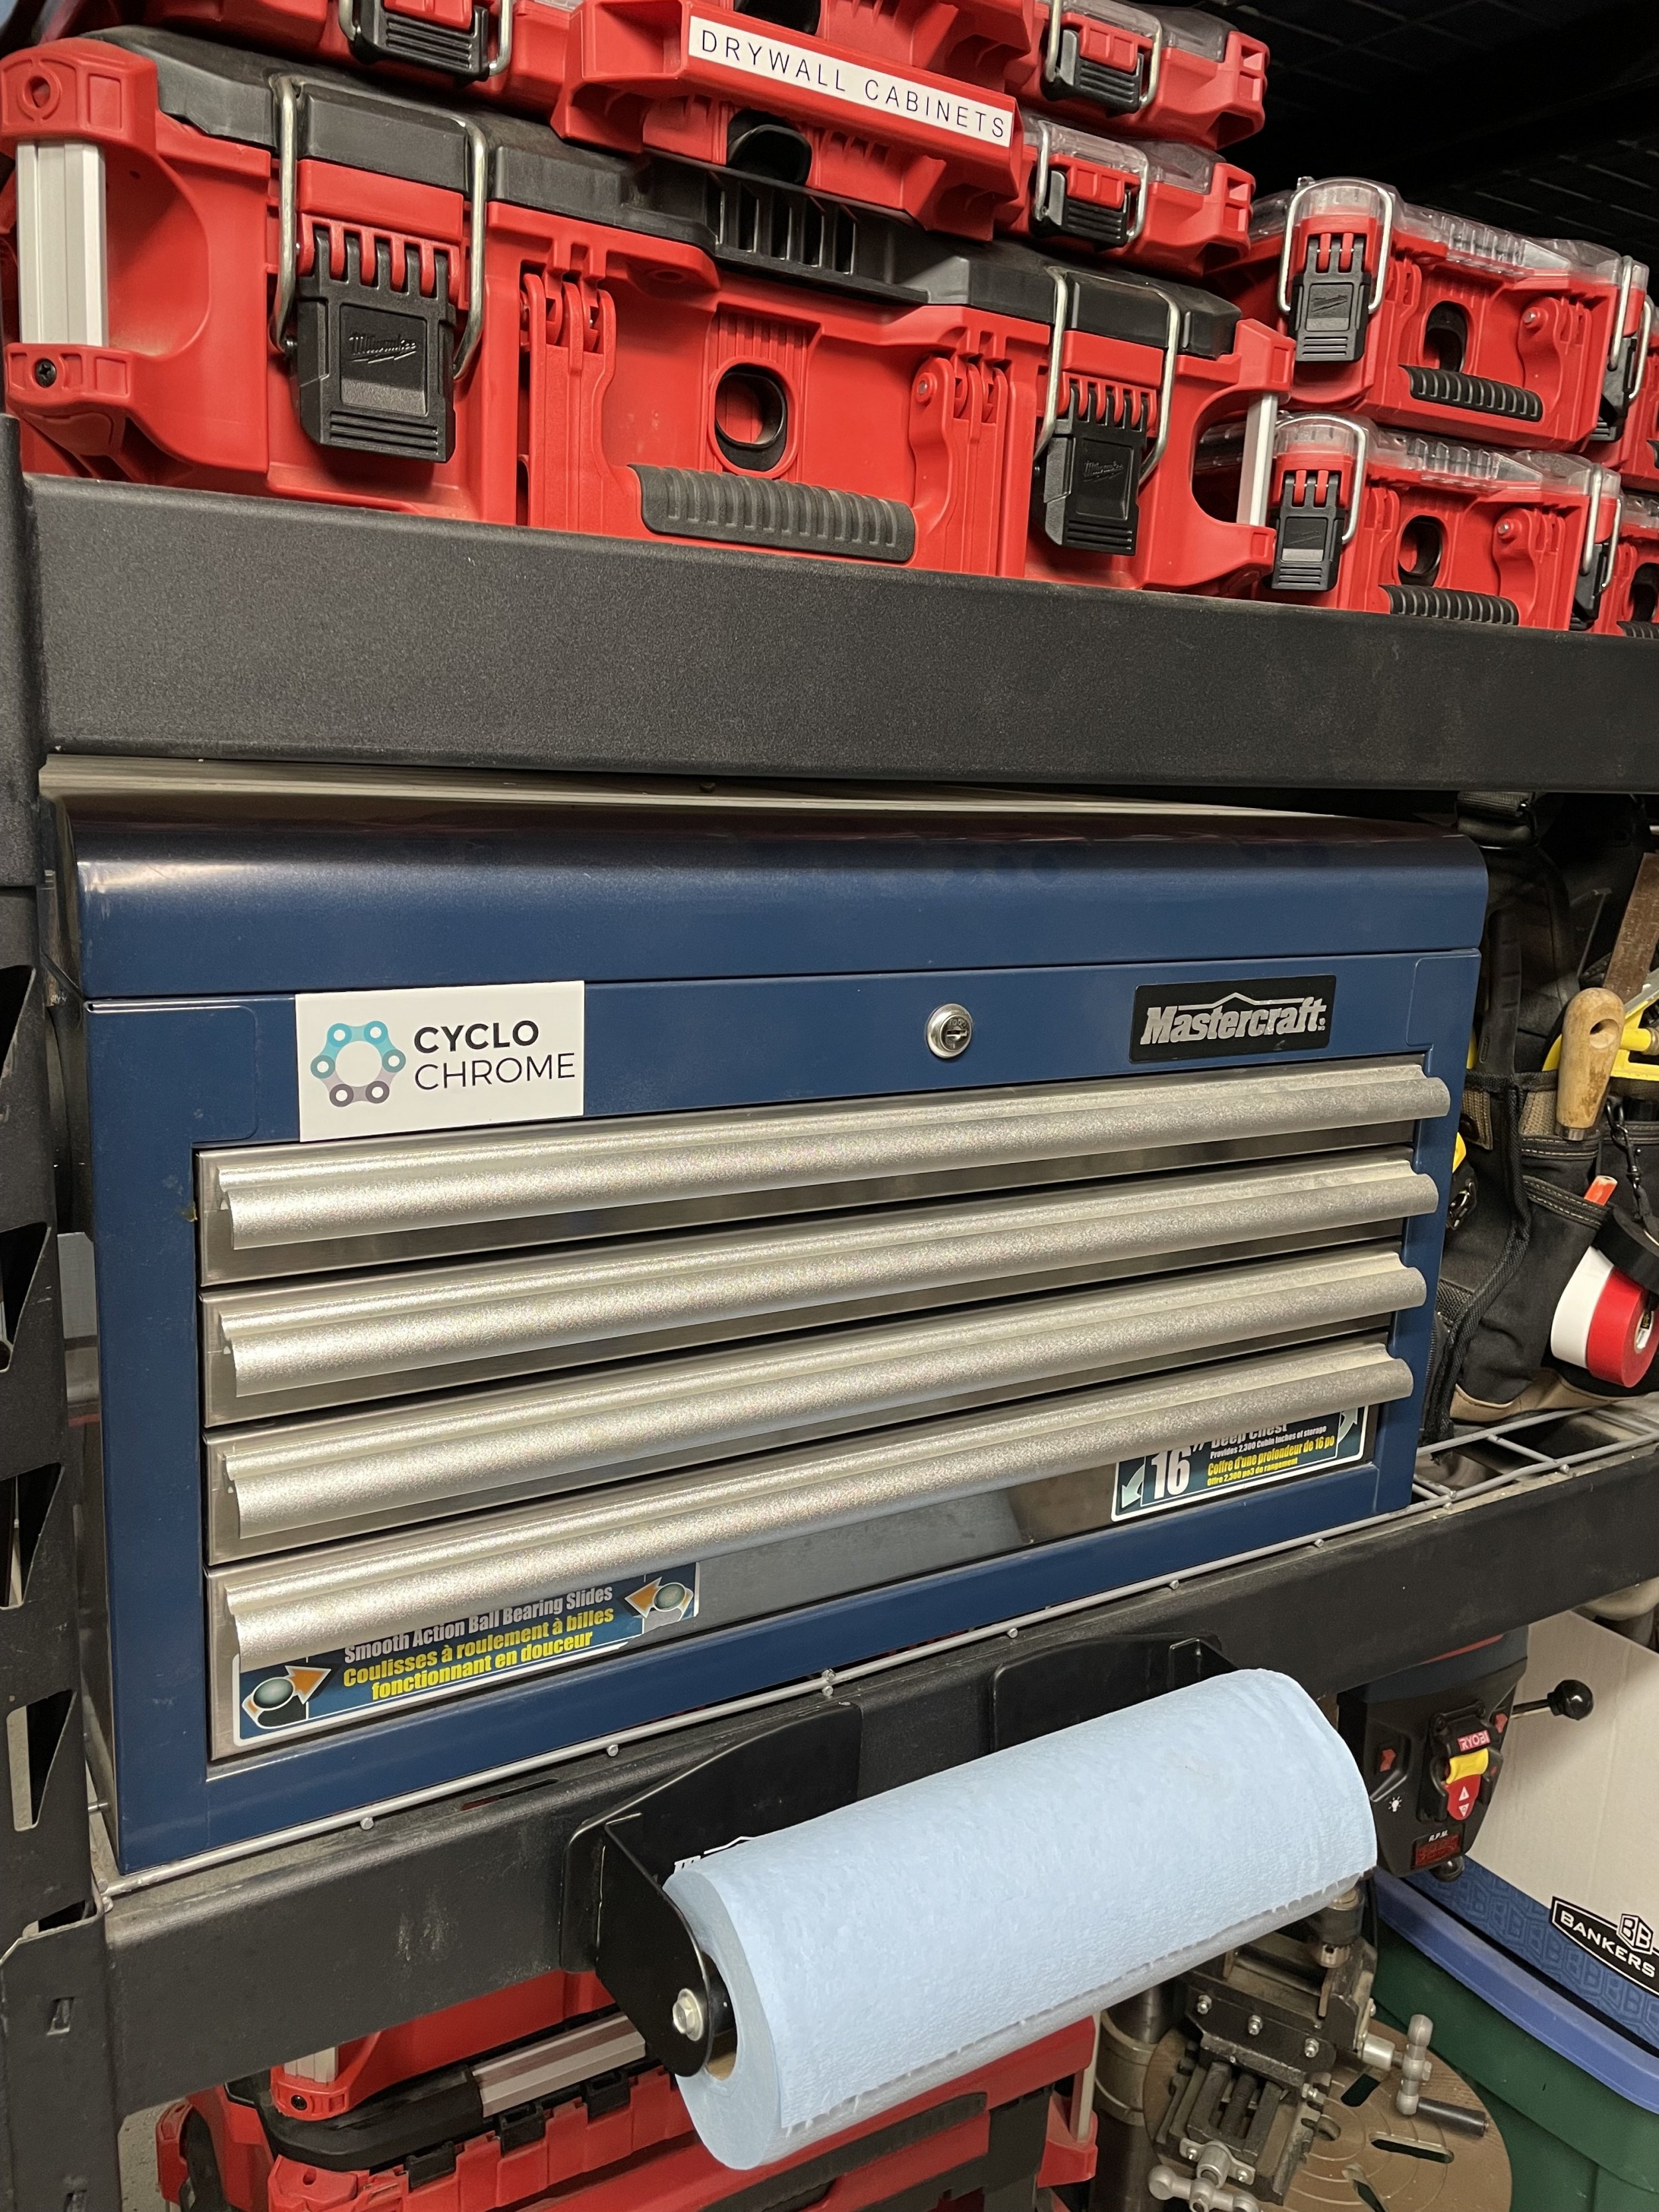
I wish I still had those Snap-On tools.
Very interested to find out your solution and recommendations! My bike has another 6 months of warranty but I'd like to do some preventative maintenance.I do have some slightly bad news for you guys though. We have been logging lots of faults with the Gen 4's whilst constantly evaluating the failures we're seeing. We could not workout why the left hand crankshaft bearing keeps failing and the right hand does not (well, not so much anyway).
It turns out, the water is coming past the plastic washer that sits underneath the right hand circlip between the sprocket carrier and crankshaft. Once in this area, the water runs along the crankshaft and into the back of the left hand bearing. The left hand bearing does not have a seal on the factory bearing, just a metal shield. Therefore, not waterproof in the slightest.
This water also rusts the crankshaft, which in turn wears the plastic bushes that support the crankshaft IMG_5804, leading to play, that leads to more water! I will do a full post on this and the solution we have, as soon as time permits.
View attachment 135664 View attachment 135665 View attachment 135666 View attachment 135667
This is all a bit shit really. I mean, we shouldn't have to be using grease as a barrier to water (which is a crutch at best), thats what oil seals are for. Can the stock setup be modified in any way to incorporate a proper seal that actually works? I mean, like the old days when we used to get modified rear covers for the Lotus twin cams so we get ditch the shitty rope seals and run proper crank oil seals!The left hand bearing does not have a seal on the factory bearing, just a metal shield.
- Thread starter
- #86
Is there anything to update on this Pete?I do have some slightly bad news for you guys though. We have been logging lots of faults with the Gen 4's whilst constantly evaluating the failures we're seeing. We could not workout why the left hand crankshaft bearing keeps failing and the right hand does not (well, not so much anyway).
It turns out, the water is coming past the plastic washer that sits underneath the right hand circlip between the sprocket carrier and crankshaft. Once in this area, the water runs along the crankshaft and into the back of the left hand bearing. The left hand bearing does not have a seal on the factory bearing, just a metal shield. Therefore, not waterproof in the slightest.
This water also rusts the crankshaft, which in turn wears the plastic bushes that support the crankshaft IMG_5804, leading to play, that leads to more water! I will do a full post on this and the solution we have, as soon as time permits.
View attachment 135664 View attachment 135665 View attachment 135666 View attachment 135667
Yes, we have had the seals manufactured and we are just being held up for another few weeks by the machine shop making one of the other components for us. But we are trialing the prototypes and everything is looking good at this time.Is there anything to update on this Pete?
Would this be something you'd sell for home user to fit or only done by yourselves?Yes, we have had the seals manufactured and we are just being held up for another few weeks by the machine shop making one of the other components for us. But we are trialing the prototypes and everything is looking good at this time.
I would love for this to be a simple home fix for people, but to fit this part to the Gen 4 motor does require a full strip down because the crankshaft must be removed and this cannot be done until the PCB, transfer gears and electric motor have been removed. This would probably be ok for a few, but it would be a nightmare for many.Would this be something you'd sell for home user to fit or only done by yourselves?
Appreciate the effortYes, we have had the seals manufactured and we are just being held up for another few weeks by the machine shop making one of the other components for us. But we are trialing the prototypes and everything is looking good at this time.
Just a few questions regarding the Bosch Gen4 CX bearing seals??:
-Would this replace the current bearing seal kit available from Bosch or would it be an additional component (if you know what I mean).
-Are you developing a better crank shaft bearing that would prevent water ingress?
I understand if you’re not able to provide details (patent reasons), but I look forward to any improvements for the water ingress issue on this motor. These motors are getting better each year and you’re probably seeing issues that the engineers overlooked or never expected.
On a side note; I’m probably the “poster-boy” for motor abuse, but I’ve been lucky for the past 4 years. I try to service what I can but it’s difficult to avoid the daily washing, occasional submerging, types of weather, etc, but I make a conscious effort to maintain correct cadence and not “clunk” the crank. Not sure what else I can do?
Anyways, I’m glad you have a “rescue-room” along with possible solutions.
Similar threads
EMTB Forums
Since 2018
Join Our Community
The World's largest electric mountain bike community.
- 571K
- Messages
- 29,036
- Members
Latest articles
-
The new Whyte Kado – an existing design with a new price?
Don’t get me wrong, the Kado isn’t an old bike. It’s a brand-new model...- Knut Nes
- 2 min read
- Views: 2K
- Reaction score: 2
- Comments: 4
-
Pinion Motor Gearbox: What’s It Really Like?
Introduction The Nicolai S16 is a long-travel enduro eMTB that...- Rob Rides EMTB
- 5 min read
- Views: 4K
- Reaction score: 16
- Comments: 10
