Mario Antony
Active member
When new, the Strive :ON don't present any problem on the battery connection. The bike normally works flawlessly and some owners will concluded that the power surge problem is just on some bikes.
As rides accumulate, depending on the trails, and usage, the power cuts can start earlier or latter, but it'll occur.
This post is to help solving the problem it's aflicting the Battery Connection on Strive :ON
So, if your bike is suffering:
- Power cutout
- Not turning on (with the led doing the up/down thing, but turning off)
- Orange light turning on
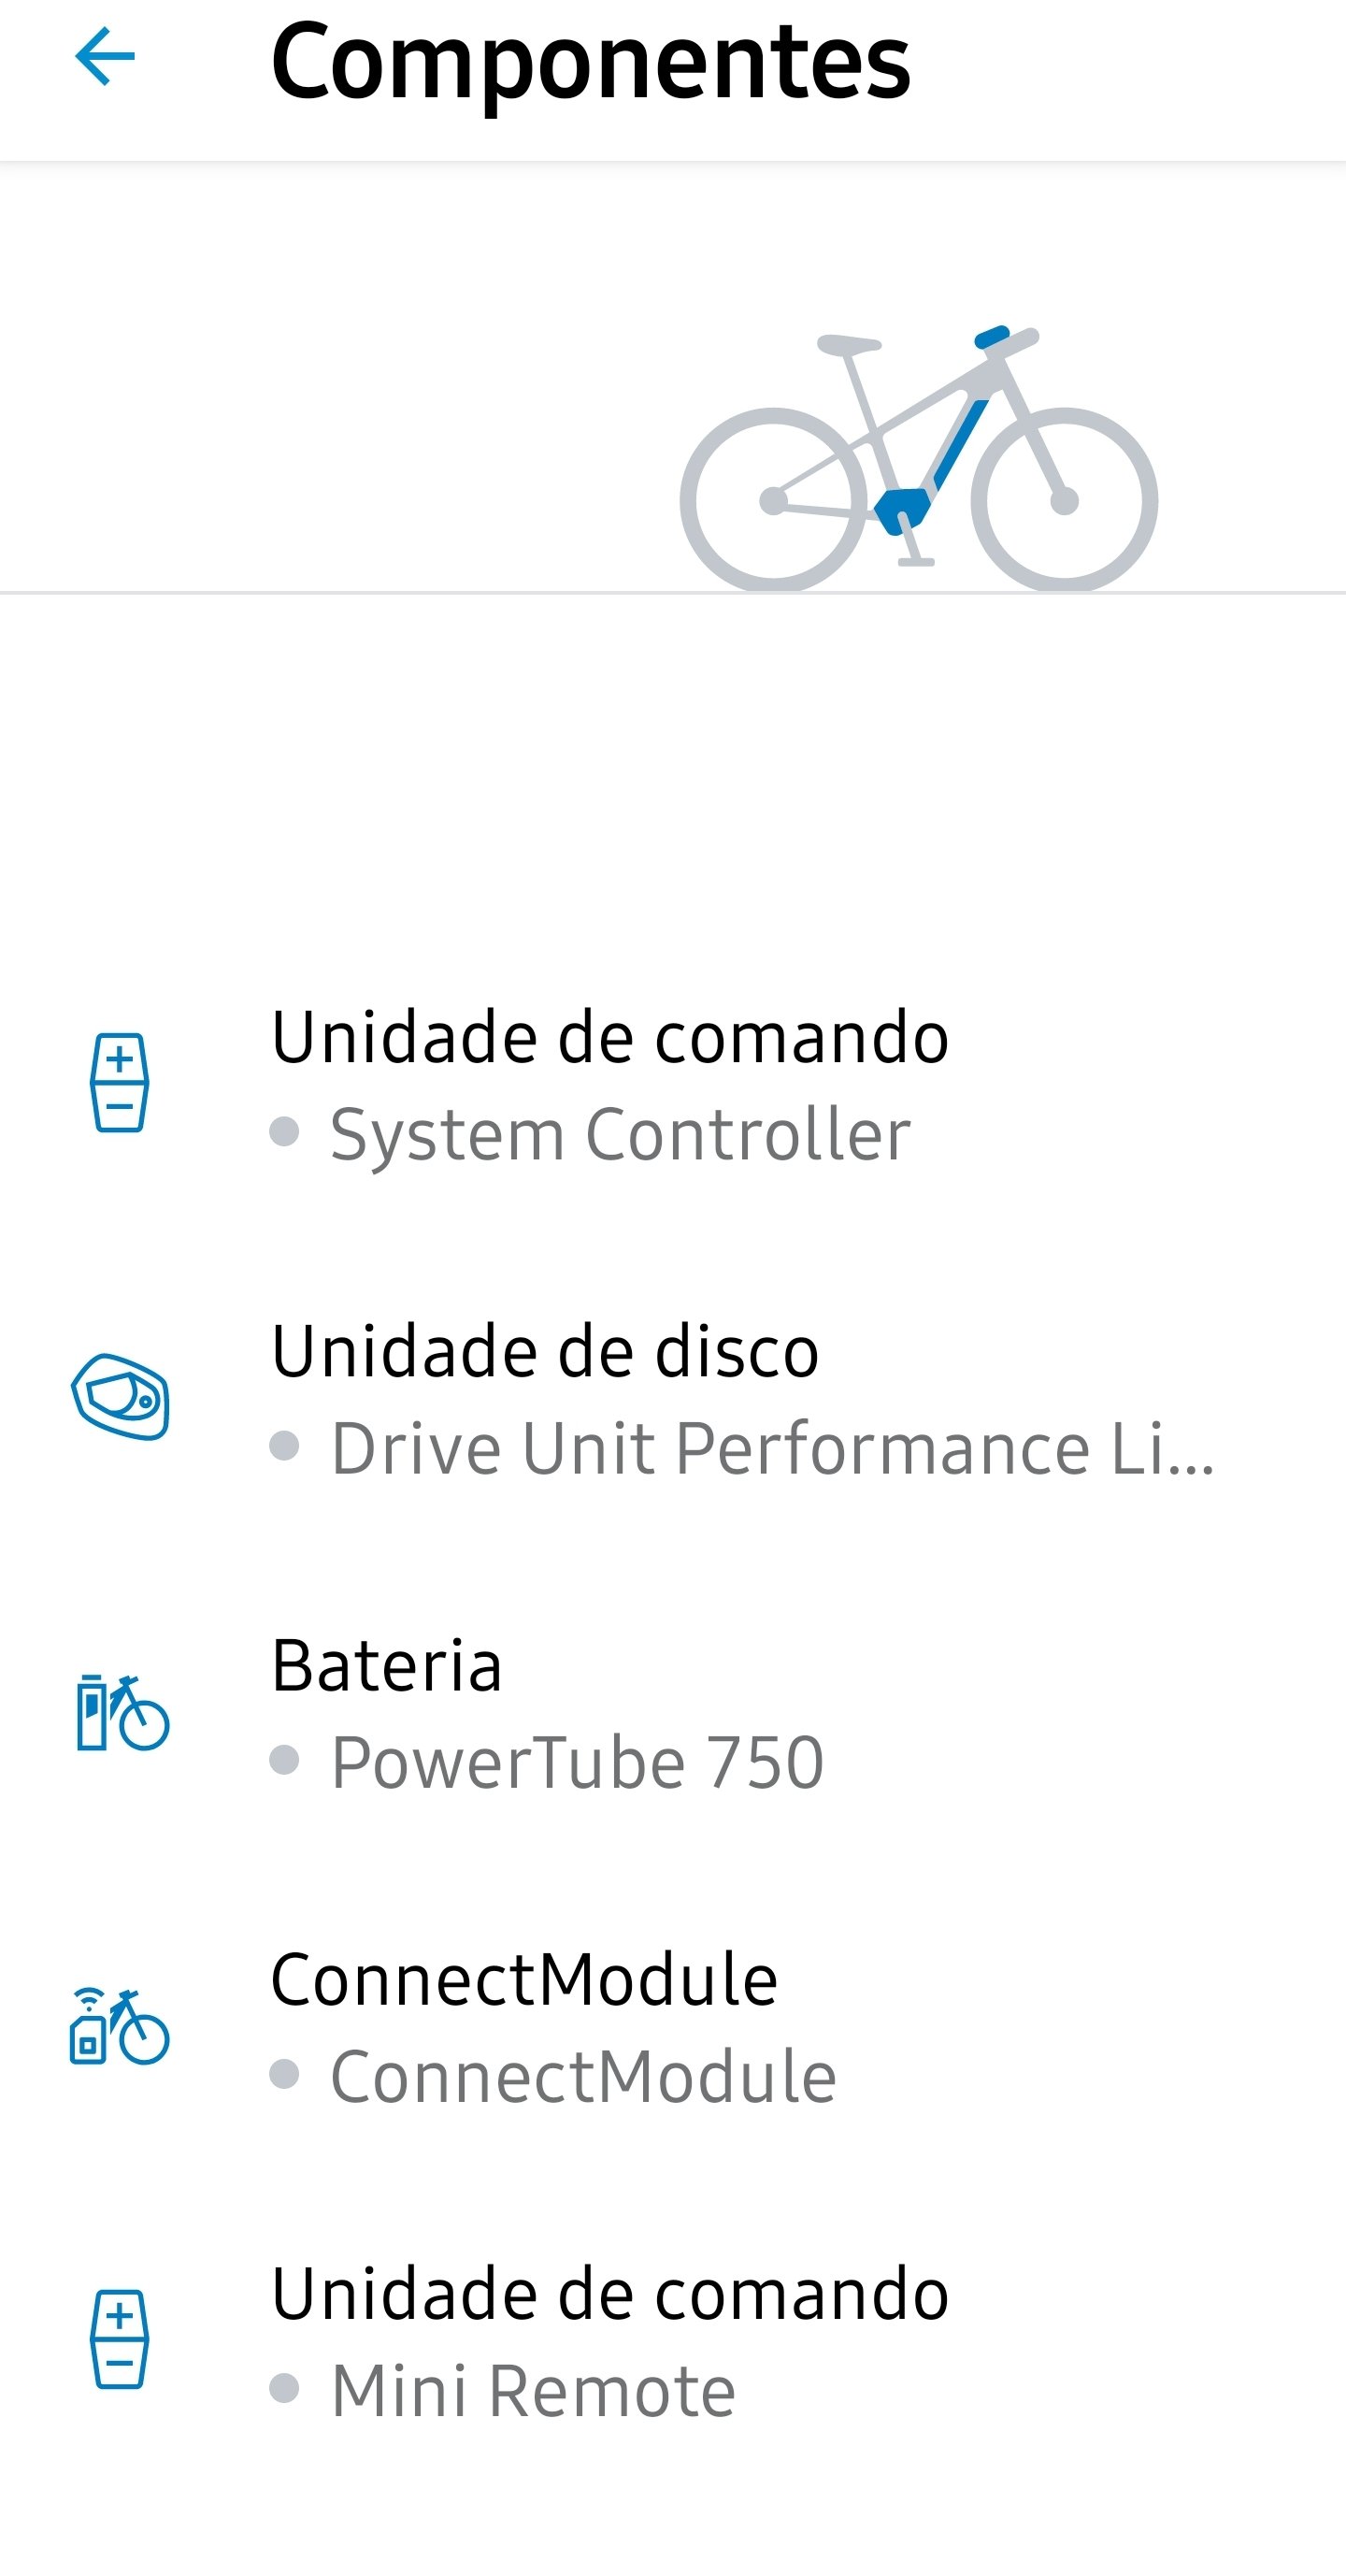
You should 1st, check battery connectivity using Flow App (check image bellow).
To solve the issue, you need to check 2 places:
#1- LATCH --> canyon has acknowledge this, and has released a new latch
#2- Upper Bracket
If you decide to continue ridding, ignoring this, next time the mode led goes orange, check flow app/components, and if battery status is not green, than it's disconnected.
The bolts that go throught the frame to connect the bracket to the frame normally are tight.
But you need to remove the bracket to check all bolts in it.
To check yours, you'll need the following:
- not too thick arms (you need to stick one on the downtube!)
- remove the lower closing bracket (where the latch closes, and has the 2 proctrutions to assemble the bash guard).
- connect the cables on one side, so that when assembly you don't mess things down (can be ziptie/electric tape/what ever)
- remove both aluminium stripes, that hold the cables (it might be tight... but take your time).
- remove the torxk skrews beneath the downtube and near the headtube.
- remove the all bracket assembly.
- remove the outer cover that "protects the electrical wiring on both plugs
INSPECTION
Check all wires for nicks or chanfing.
Remove all bolts from the bracket, and inspect everything.
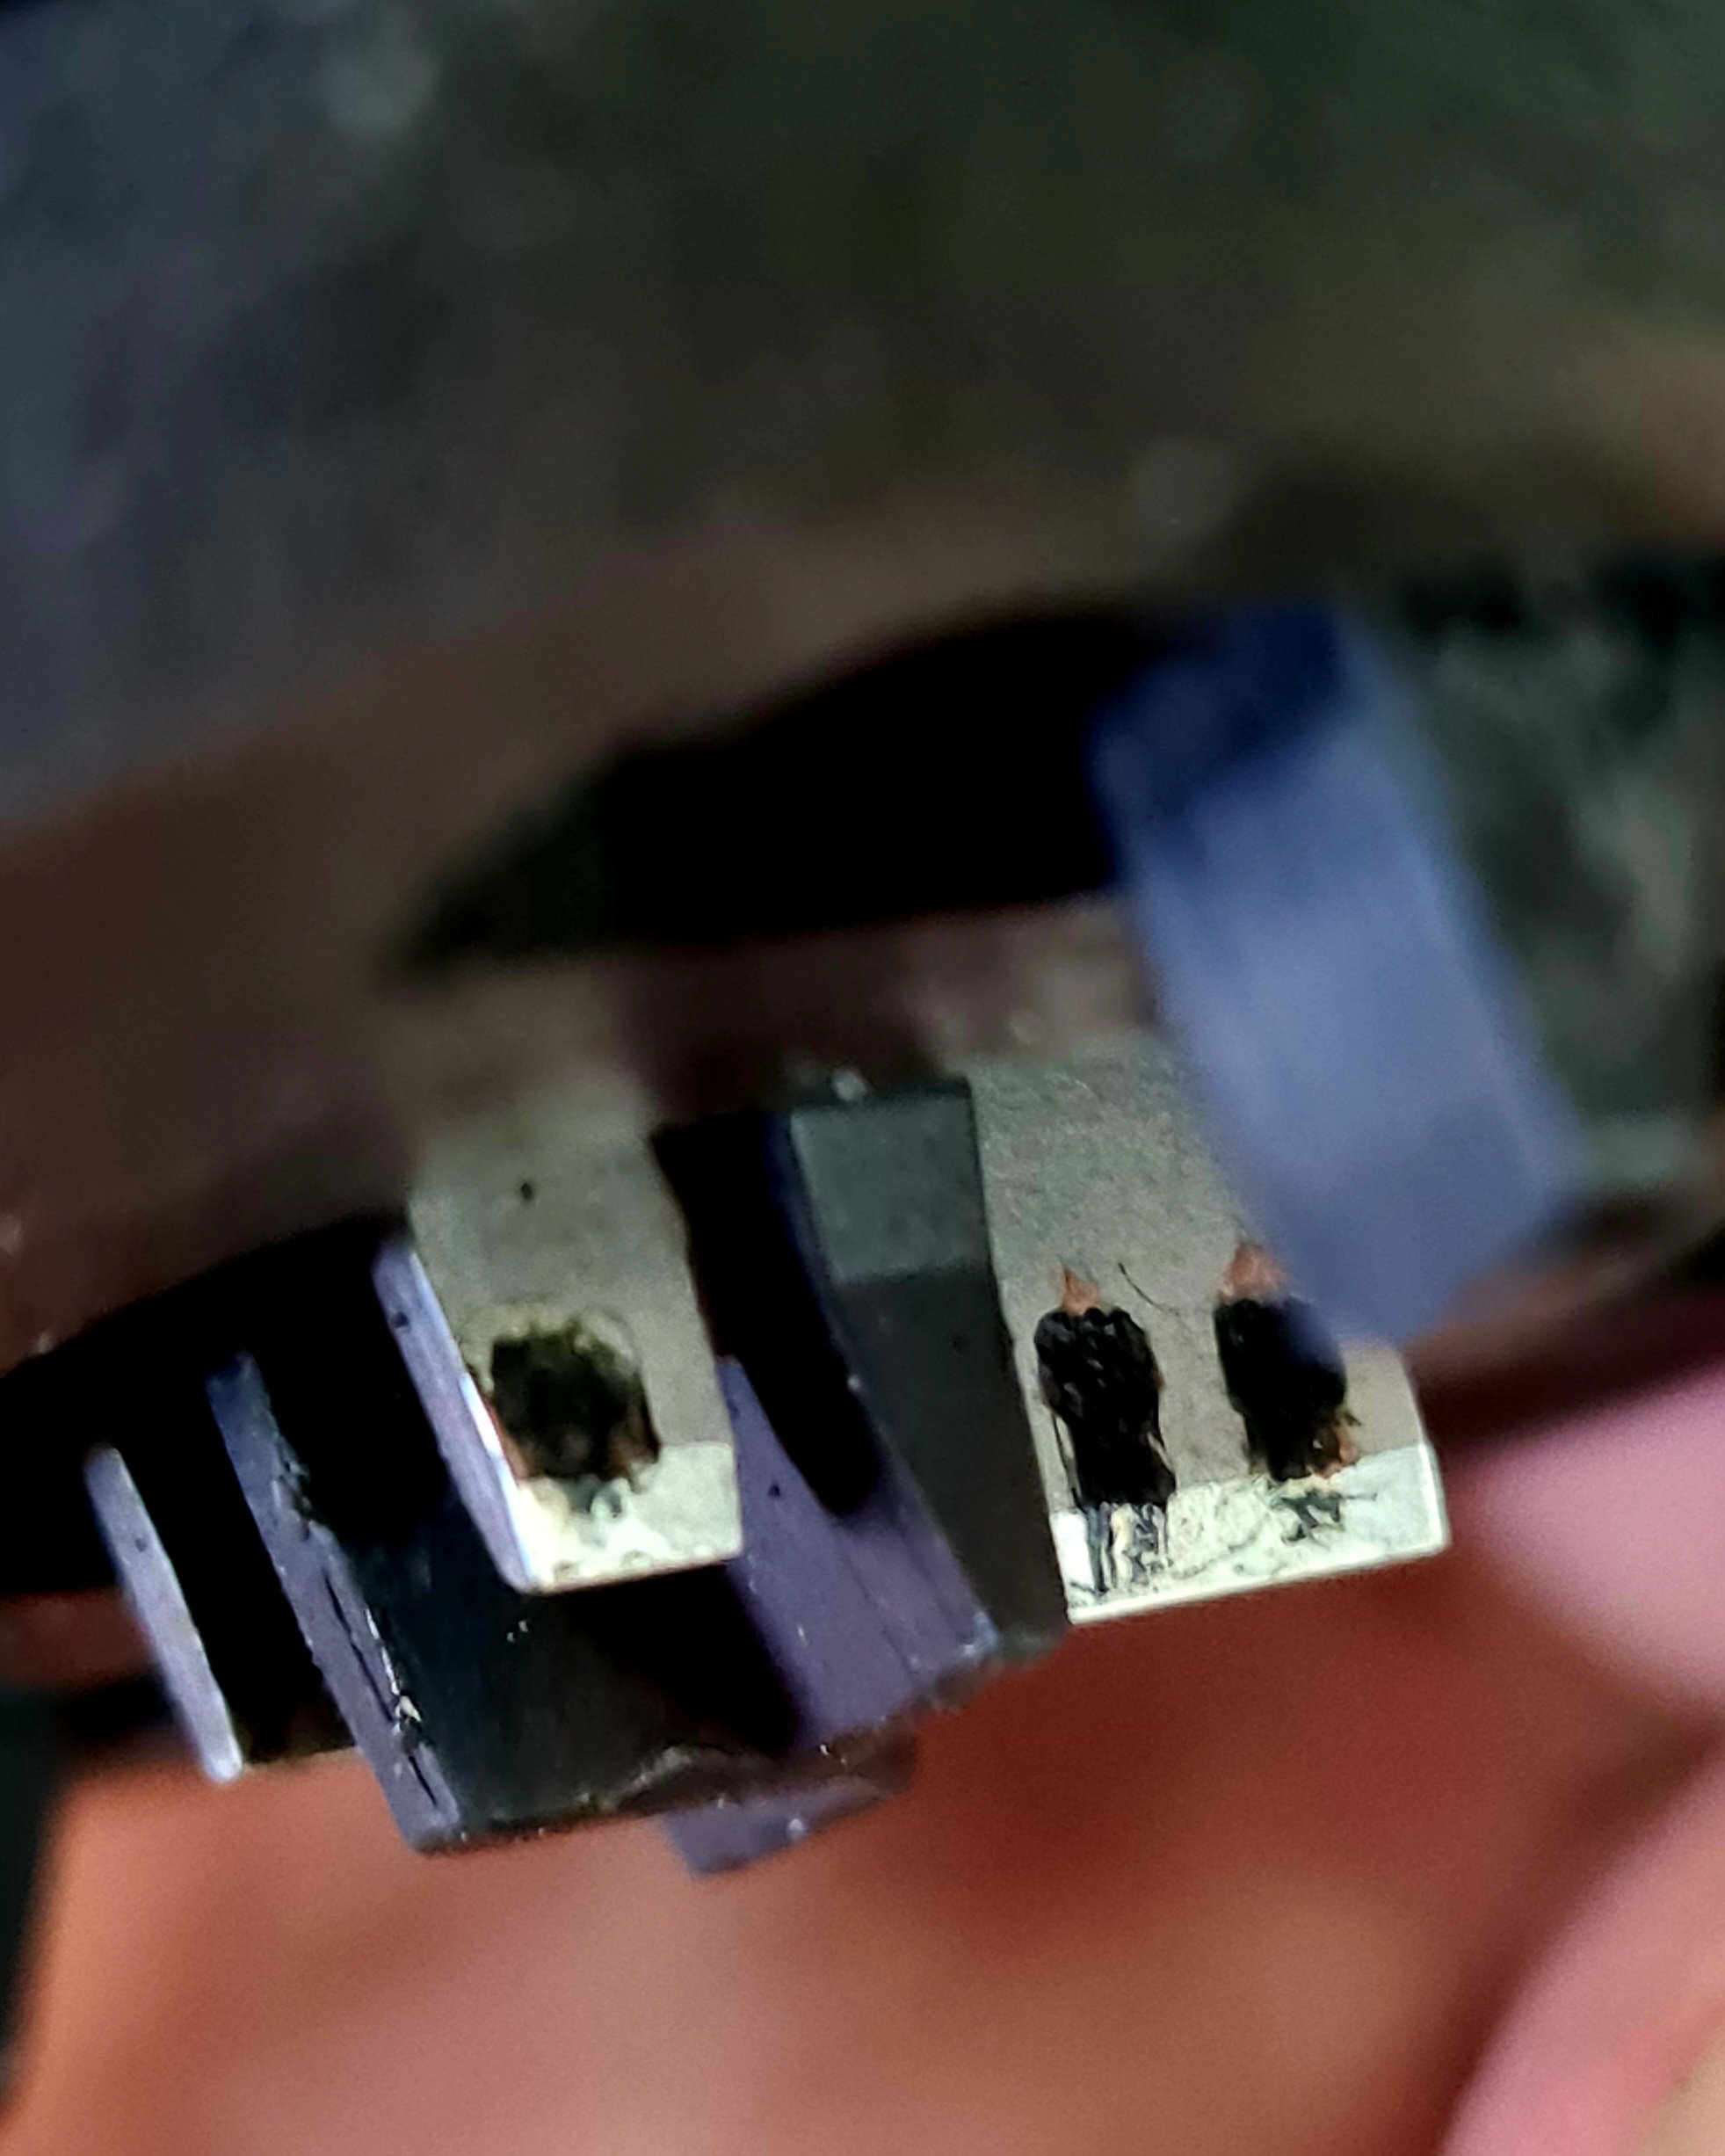
Check the plug pins, for any debried or deposits
CLEANING:
Clean everything, making sure that the plug pins are shinny
ASSEMBLY:
Start by assembly the wire cover.
Apply threalock on all bolts, and tigthen everything.
[[SPECIAL NOTE:
The bracket can be adjusted on the stainless support.
Align everything... and make sure it seats in a position that makes it tighter to the battery.]]
Once all is done, place the upper bracket.
Adjust the cables and assemble the wire covers, but don't squeeze all down.
Assemble the bracket inside the downtube, and bolt it to the downtube. Don't forget to place washers!
[[Note: secure and move around the bracket inside the downtube, until you found it's place with the outside bolts.]]
Once all done... just make sure the cables are correctly alligned, and squeeze the covers in.
Assembly the lower support, tighten correctly.
Assemble the battery, check for connection, DONE!
If your bike hasn't got the new latch, ask Canyon and apply for warranty case for the latch.
In the picture bellow, you can check the deposits on the plug pins
Final step: Go to a Bosch Dealer, and erase all errors from the bike.


Last edited:

