Trek Rail cable routing - bottom bracket area

Jamescoughlan

Active member
Subscriber
Jul 13, 2020
115
123
Aberporth
Hi,
Loving my Trek Rail 9.8 XT, already made some changes which I’ll highlight in the existing thread. I do have one concern though and that’s the cabling existing the bottom bracket area going to the chain stays - so the sensor, brake line and rear mech cable.

They currently cross over on exit and rub against each other and the stays. I would have thought that exiting straight into each stay would have been better. Is mine a one-off? I’m thinking of dropping the motor and re-routing them straight. Has anyone done this?

I know it would involve a complete re-route of the brake line from the lever because that’s of the banjo at the callipers - I’d actually prefer for the hose to enter on the right side of the head tube anyway so it would be two birds, one stone - UK spec, RH rear brake, FYI.

There’s already some rub and I can’t see the cables lasting terribly long in the current format. See pics:

Cheers,
James

87C14542-63ED-4F6F-BB50-07C936C5F8BF.jpeg


A2E8760B-7B80-473E-89EF-30742A5DEC25.jpeg


A09ED7F2-543B-456F-8165-A56AC59744A8.jpeg


DBA09652-1543-4014-BE78-EF6C9CE3E845.jpeg
 

Hob Nob

Active member
Jun 4, 2020
152
149
UK
Mine is the same. When i swapped my brakes I tried to re route the brake down the other wide, but with the cats cradle of wiring I couldn't get the motor back to it's mount points. I don't know if it's because there is less space that side, or just a PITA to do. I gave up in the end and just swapped it back.

I don't think you can run the cables the other way around the headtube as there isn't any spare holes in the internal eyelet, you already have the dropper & controller cable running in that side (well, I do on mine anyway).

I know Trek had a different bolt in cable guide that allowed for 3 cables on a different model (was either the early Slash 29, or Fuel - can't remember which). Whether it fits or not I have no idea, but could be an option.

Dropping motors & getting it all back together whilst trying not to pull/damage a cable was a headache, so i'm leaving mine alone. Likely you will also need a new cable too, as the current brake hose won't be long enough to go the 'long way' round the head tube.
 

Rikster

Member
Jul 3, 2020
28
23
There where my bike takes me
leave it like it is, the cables need a bit of flex there to accomodate the swing of the rear triangle. When I dropped the motor to swap the brakes (shimano out, SRAM in) had a look and did the reroute. As already said, the motor would not mount propperly and the cables were tot tight. The cross patern gives the just the ammount of flex they need ;)
 

Philly G

Well-known member
Jun 29, 2020
692
517
New Zealand
I always thought UK was the same as NZ, left-hand rear brake - and it was the US that was the opposite. Anyway, I can't see any reason at all why you can't re-route them, if it bothers you. Maybe over time it might be an issue with the outers rubbing on each other. It's quite easy to drop the motor. Break the chain, unplug the wiring, 6 bolts. Easy to tidy up the wiring so it's all routed nicely. Good idea when replacing the motor, before you torque up all the bolts, make sure the dropper cable is free to move, that way you won't need to drop the motor when it's time to service your dropper ;)
 

Jamescoughlan

Active member
Subscriber
Jul 13, 2020
115
123
Aberporth
Thanks for the feedback all - first of all Philly G, you're right, it was typo, should have said LH rear brake hence RH entry port on frame.

When I do it's first big service I'll look to swap the Purion cable entry with the rear brake hose. The controller hose is really flexible so I'd prefer this to exit on the LH and then into the controller then I can use the (now) free port on the RH for the rear brake hose.

OK, if the cables have to cross that's fine, I'll just slide on some old camelbak hose I've got to stop the cable rub/wear. Boom!
 

Philly G

Well-known member
Jun 29, 2020
692
517
New Zealand
OK, if the cables have to cross that's fine, I'll just slide on some old camelbak hose I've got to stop the cable rub/wear. Boom!
My brakes are the same way round as you, and the cables are not crossed over where they enter the chainstays. I think it would annoy me too. The only way to fix it would be to disconnect the brake hose from the caliper, and the shift cable from the derailleur, pull them both back through the stays, re-route them through the correct exit holes in the motor cavity. It's kinda a big job for a small job, but I agree it doesn't look right and I would want to fix it too.
20200814_154458.jpg
 

Jamescoughlan

Active member
Subscriber
Jul 13, 2020
115
123
Aberporth
You jammy bugger! I agree, big job, small gain but it's killing my OCD knowing mine could be better!
Out of interest, does your rear brake hose exit on the RH or LH like mine?
 

Philly G

Well-known member
Jun 29, 2020
692
517
New Zealand
You jammy bugger! I agree, big job, small gain but it's killing my OCD knowing mine could be better!
Out of interest, does your rear brake hose exit on the RH or LH like mine?
Yeah it seems a bit luck of the draw as to how they're assembled. Not really the best on such expensive bikes. I'm a bit OCD as well, I don't think I could leave mine like that either. So as per my pic, my shift cable exits the drive side of the motor housing and straight into the drive side chain stay. Brake hose exits the other side, with the sensor wire, into the opposite chain stay. You'll just have to go ahead and do it, otherwise it will drive you crazy ;)
 

Jamescoughlan

Active member
Subscriber
Jul 13, 2020
115
123
Aberporth
I've busted my ribs crashing last week which mean no riding for a while but I can fiddle with the cable routing!

I've "corrected" the bottom bracket routing to the same as Philly's above. Very pleased I've done this because both the brake and rear mech cable/hose were already wearing the carbon exit ports on the chain stays!!

I also swapped the Purion control cable over with the rear brake hose - so now I have RH exit for the brake to the LH rear brake lever - far more feng shui.

Struggling to get the motor to sit without pressure to align the bolt holes, I need to do some cable fiddling...
 

Philly G

Well-known member
Jun 29, 2020
692
517
New Zealand
James, sorry to hear about your crash! Hope you're out on the trails again soon. I didn't think about how the cables could wear away the carbon, it's lucky you've been able to sort it sooner rather than later! It is a bit tricky getting the motor back, I just made sure the wiring wasn't under tension and let the shift cable/brake hose just lie where they wanted. I don't think it would matter too much if the motor does press down on these a little, as long as they're not being crimped or crushed of course, and there is a bit more space above the motor than I thought initially. You'll get it sorted!
 

Jamescoughlan

Active member
Subscriber
Jul 13, 2020
115
123
Aberporth
Cheers mate, peak pain was 3 days after the crash with couple of days of no sleep! Getting better a week on thankfully so I guess bruising only and no fractures - phew.
Anyway, more importantly, the cable routing. Good shout, I was looking to introduce as much slack as possible in the motor area - which probably means removing the bottom battery clamp connection unfortunately.
Still another week off the bike so time to get this perfect!
Then what do I "fix"...
 

Philly G

Well-known member
Jun 29, 2020
692
517
New Zealand
Good to hear you're on the mend! You shouldn't have to remove the battery connector, there is room underneath it (just) for the cables to slide.
I would just loosen, or remove, the two cable clamps on the downtube . This should allow you to feed through as much slack as you want. You want the dropper cable routed as naturally as possible so you can feed it through with the motor in place when it's time to service or swap out the dropper. I did a dry run with loosely bolting the motor in just to make sure the dropper cable would move. There is a sort of machined lip where the motor bolts in, and another lip below that, just let your electrical cables lie on that lower lip. There'll be enough slack that they'll plug into the motor OK, but they'll be out of the way so they won't get caught or pinched when you put the motor back . Sorry I don't have a better pic for you than this
(I was in the middle of something here, it didn't look like this when I was ready to refit the motor)
20200819_172057.jpg
 

Lawzio

New Member
Mar 22, 2021
3
0
England
My brakes are the same way round as you, and the cables are not crossed over where they enter the chainstays. I think it would annoy me too. The only way to fix it would be to disconnect the brake hose from the caliper, and the shift cable from the derailleur, pull them both back through the stays, re-route them through the correct exit holes in the motor cavity. It's kinda a big job for a small job, but I agree it doesn't look right and I would want to fix it too.
View attachment 38017
What rear mudguard are you using?
 

Philly G

Well-known member
Jun 29, 2020
692
517
New Zealand
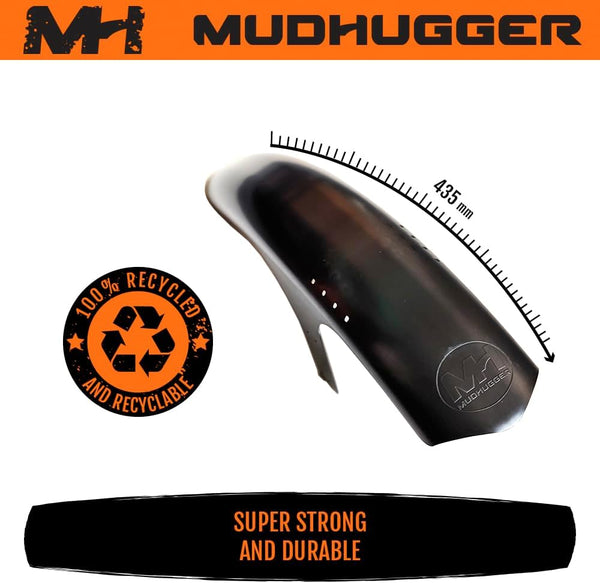
@Lawzio it's an FRX Mudhugger , which is actually front mud guard, but easily adapted. Got the idea from Sam Hill. Fits perfectly without trimming any length, but I did have to make my own holes for zip ties. Used Heli tape as well to protect the frame.
 

Stihldog

Handheld Power Tool
Subscriber
Jun 10, 2020
3,494
4,872
Coquitlam, BC
Another option; I used Monkey Nuttz on the rear with slight modification. Mainly to keep stuff away from the pivot. Cut about an inch off the bottom to fit and drilled a few holes for zip ties. No tire rub but I still get the awesome mud stripe on my back. ??

52730DB1-8B7E-4BAB-8533-E459E4CB6051.jpeg
 

dixie600mhz

Active member
Oct 13, 2020
174
159
Austin, Texas
Reviving this thread. I also have the cross over cables and am wondering if straightening them out will make pressing the shifter less stiff. If I disconnect my derailleur my shifter still has some pretty substantial resistance. I'm getting a blister on my thumb from riding too much.

Has anyone did this fix and noticed an improvement on the shift pressure? I've adjusted my clutch to spec but downshifting is still stiff. It never misses a shift, but needs pretty firm pressue. Thinking flex in the cable at the chain stay might be making it worse or it could just be that I need to replace the cable?
 

rzr

Active member
Sep 26, 2022
359
228
bcn
I have to change derailleur cable, is it enough to remove the battery, and drop the motor? do I have to disconnect motor completely ?
And then, is it easier to feed the cable from back or from headtube? any other advices? :)

1676912330363.png
 

Stihldog

Handheld Power Tool
Subscriber
Jun 10, 2020
3,494
4,872
Coquitlam, BC
If it’s just the inner derailer cable you’re replacing this could be fairly easy. When you remove the inner cable insure that there is no serious binding. When inserting a new derailer cable follow and remember how the old one was removed. I generally apply some general purpose grease to the new cable. Run the new cable between your fingers and apply just enough grease to lightly cover the cable.

If you’re replacing cable and sheath you may need to drop the motor. A small connector may be useful for a push/pull method. This works sometimes but the motor compartment can be tricky.

If you need to drop the motor use the correct tools. Carefully remove the wires attached to the motor incase you accidentally drop the motor or stretch the wires. Take reference pictures. I’ve dropped Bosch motor’s several times, but the first time can be daunting.

There’s lots of information on this forum for different methods, techniques and proper tools.

F5C256E9-0EF5-4A5E-A179-95AD01E5B2BB.jpeg
 

rzr

Active member
Sep 26, 2022
359
228
bcn
any special tools needed for motor removal ? or allen keys are enough?
I need to change outer housing unfortunately
 

Stihldog

Handheld Power Tool
Subscriber
Jun 10, 2020
3,494
4,872
Coquitlam, BC
Torx Plus 40 for the motor mount bolts. You could use a standard Torx 40 but you could also strip the head easily. (Bosch motor, 6 bolts)
 

Philly G

Well-known member
Jun 29, 2020
692
517
New Zealand
@rzr the torque on the motor bolts is 20nm. Use loctite threadlocker on them when you reassemble. It's really easy to remove the motor...take off the bash guard, unplug the connectors (take a pic beforehand if unsure) split the chain, undo the 6 torx plus 40 bolts and lift it out.
 

vertrkr

Member
Nov 19, 2021
32
61
California

Stihldog

Handheld Power Tool
Subscriber
Jun 10, 2020
3,494
4,872
Coquitlam, BC
Ha, i just bought that hose connector. I'm replacing my dropper and really hoping that will attach the old and new hose so I can pull it all thru without dropping the motor. It's called the Rockshox Reverb Stealth Barb Connector.

Yah, that’s it. Cheapest little tool I’ve ever bought. Used it many times for new rear brake lines. Going through the head tube with a push/pull technique is a breeze now. I don’t want to misplace this little “gem” so I keep it in the original packaging.
 

vertrkr

Member
Nov 19, 2021
32
61
California
Got it for less than $5 at my LBS. Unfortunately it didn't work for this application. My motor/wires are jamming the housing/hose for the dropper so it won't move. I'll have to drop the motor, buying the torx plus kit now.
 

Stihldog

Handheld Power Tool
Subscriber
Jun 10, 2020
3,494
4,872
Coquitlam, BC
Got it for less than $5 at my LBS. Unfortunately it didn't work for this application. My motor/wires are jamming the housing/hose for the dropper so it won't move. I'll have to drop the motor, buying the torx plus kit now.
Someone here mentioned using a small fine thread screw cut very short . Might work in a pinch?

Motor compartment can be tricky.
 

vertrkr

Member
Nov 19, 2021
32
61
California
Hose wouldn't move at all trying to push or pull it using all of my finger force around the bottom bracket/motor with every clip loossened up. Motor gotta drop a little bit.
 
Last edited:

EMTB Forums

Since 2018

The World's largest electric mountain bike community.

553K
Messages
27,935
Members
Join Our Community

Latest articles


Top