DIY bike 3D print files

patdam

Well-known member
Jan 17, 2019
904
601
france
I propose to open this tread to share our .stl files for 3D printer.

We can mention in first:

Destination: exemple: "E10 frame"

Function: exemple: "display DPC860C frame mount"

And we insert the file.stl (named.pdf to upload) + .jpeg if it is not perfect but functional (those can help somebody who want to build something near). Or thingiverse link for items finalized

My first deposit, based on initial build of "luky luke" to adapt display mounting at my frame:

860.JPG
 

Attachments

  • C860_dengfu.pdf
    7 MB · Views: 470

Hagbard

Active member
Aug 25, 2021
103
54
York
A couple of fairly poorly modelled little doohickies aimed at making the e10 a little less prone to water induced issues.

Cable cover is desiged to slot into the cable ports at the headtube and cover off 2 holes if you're only presently using one cable.

Power plug is designed to be pushed (fairly hard) into the power port at the bottom of the frame, rather than the crappy rubber cover that the frame comes with that seems impossible to keep in place.

I do also have a template that I used to make a top tube graphic on my vinyl cutter if anyone is interested. Took me long enough to make, that someone else might as well benefit!

If anyone has any ideas for other parts I'm happy to apply my relatively rudimentary modelling skills to them, and share them here.
 

Attachments

  • cable cover.pdf
    89.7 KB · Views: 433
  • power plug.pdf
    74.4 KB · Views: 380

boBE

Active member
Apr 12, 2020
415
363
FL
Here is a mount for a tire pump to fit a Levo SL. The pump is a Topeak Race Rocket (just the name is worth another 2 mph).

20210824_100815_resized.jpg
20210826_095731_resized.jpg
 

Attachments

  • bike_pump_mount3.pdf
    349.3 KB · Views: 376

Hagbard

Active member
Aug 25, 2021
103
54
York
One I designed today whilst my frame is in pieces (don't ask, maybe I'll post about it later, still traumatised). This is a cap designed to fit in the big hole at the 'bottom bracket' of the dengfu e10. My intention is to stuff some foam behind it, and the cap will keep that foam in place.
 

Attachments

  • hole blocker bottom.pdf
    193.6 KB · Views: 412

thaeber

Well-known member
Jan 26, 2021
888
769
Bruchsal, Germany
One I designed today whilst my frame is in pieces (don't ask, maybe I'll post about it later, still traumatised). This is a cap designed to fit in the big hole at the 'bottom bracket' of the dengfu e10. My intention is to stuff some foam behind it, and the cap will keep that foam in place.
uhhhhh…sorry to hear….well You mentioned dont ask - something broken?
 

Hagbard

Active member
Aug 25, 2021
103
54
York
uhhhhh…sorry to hear….well You mentioned dont ask - something broken?
Short version is that I suffered some chain suck when riding normally on a road. This caused the rear mech cage to be pulled up into the chainstay. Now when I say into, I mean INTO (the hole was 40mm long, 4mm wide and all the way through the carbon). So now my cheeb is currently in pieces and the chainstay is with a nice man in Lancashire who I hope can make it whole again. I'll post a thread about it all in due course!
 

thaeber

Well-known member
Jan 26, 2021
888
769
Bruchsal, Germany
Short version is that I suffered some chain suck when riding normally on a road. This caused the rear mech cage to be pulled up into the chainstay. Now when I say into, I mean INTO (the hole was 40mm long, 4mm wide and all the way through the carbon). So now my cheeb is currently in pieces and the chainstay is with a nice man in Lancashire who I hope can make it whole again. I'll post a thread about it all in due course!
Cross fingers it will work and You get it back soon! Season is coming 😊
 

patdam

Well-known member
Jan 17, 2019
904
601
france
Short version is that I suffered some chain suck when riding normally on a road. This caused the rear mech cage to be pulled up into the chainstay. Now when I say into, I mean INTO (the hole was 40mm long, 4mm wide and all the way through the carbon). So now my cheeb is currently in pieces and the chainstay is with a nice man in Lancashire who I hope can make it whole again. I'll post a thread about it all in due course!
Have you ask to dengfu to buy only the broken part ?
 

Hagbard

Active member
Aug 25, 2021
103
54
York
I thought the odds were so low that I didn't bother. Plus learning how to get carbon fibre repaired feels like a useful skill to have, as it's only a matter of time!
 

thaeber

Well-known member
Jan 26, 2021
888
769
Bruchsal, Germany
I thought the odds were so low that I didn't bother. Plus learning how to get carbon fibre repaired feels like a useful skill to have, as it's only a matter of time!
Remember Ben, sales rep from Dengfu? He‘s here on the forum. If You think about a backup part, try it via Ben. Would be interesting if it is possible and what the cost are.
 

patdam

Well-known member
Jan 17, 2019
904
601
france
I thought the odds were so low that I didn't bother. Plus learning how to get carbon fibre repaired feels like a useful skill to have, as it's only a matter of time!
Sorry i will not help you. I'm not expert, but i would say that i don't trust in carbon repair. Mainly on part with lot of constraint. The fiber is torn, the integrity is compromised.
 

patdam

Well-known member
Jan 17, 2019
904
601
france
Sorry i will not help you. I'm not expert, but i would say that i don't trust in carbon repair. Mainly on part with lot of constraint. The fiber is torn, the integrity is compromised.
Remember Ben, sales rep from Dengfu? He‘s here on the forum. If You think about a backup part, try it via Ben. Would be interesting if it is possible and what the cost are.
You have also KaroKönig. You can ask advise.
 

captainhightop

Active member
Feb 26, 2021
136
143
UK
Destination: E10 frame (v2 with square charge mount)

Function: XT-60-HF bulkhead mount (DC jack suck!)

Extras: M3 bolts to clamp the XT-60-HF tightly together

Notes:

- Print the back in PLA/PETG/ASA
- Dust cap in TPU/TPE
- 0.2 or less layers
- The recessed holes for the bulkhead mounting bolts are very close to the edges, so double check the preview in your slicer, to check you're actually getting a wall there to avoid printing spaghetti! (I might change these to something with a smaller head at some point)

I replaced thec charge port JST with an XT-30 internally, so the bulkhead together with the XT-60-HF is easily removeable.

I also used genuine XT-60-HFs if that makes any difference. I did have some others without the grey cover over the rear bucket terminals, but they are slightly different in size (redesigned the whole thing for the XT-60-HF).

1645953610996.png

1645953787613.png
 

Attachments

  • xt60-hf bulkhead 28x28 v8.pdf
    629.2 KB · Views: 355
Last edited:

captainhightop

Active member
Feb 26, 2021
136
143
UK
Destination: E10 frame (v2 with square charge mount)

Function: Rear cable entry

Notes:

- Print in flexible (I used TPU)
- Add custom supports in your slicer for the wings

Didn't like adhesive rubber tape for this (although it's great for a chainstay protector), so I wanted something that wouldn't pop out (hence the wings).

1645954543834.png

1645954635196.png
 

Attachments

  • rear cable entry M600 v2.pdf
    397.5 KB · Views: 313

captainhightop

Active member
Feb 26, 2021
136
143
UK
Destination: E10 frame (any version)

Function: Protect vulnerable areas of downtube from grit/water (particularly the sliding catch)

Notes:

This might be a bit more niche, but I used old inner tubes sewn into these buckles to cover the areas of worst water/grit ingress.

For the sewing I used a PFAFF 130 (ancient but sturdy sewing machine) which I am still learning to use properly!

I found that the top sliding catch get's gritted up all the time even with mudguards so this allows me to wrap an older inner tube cut into 90mm and 110mm widths (sized on the bike for length, not sure what that is).

I wanted them not to be dependent on any kind of precision and not be affected by mud/grit too much, so they work a bit like a motorcycle double-d buckle in that you push one through the other.

The 110mm one has a slightly gap between the slots because I wasn't paying attention ;-)
1645955038204.png

1645955472746.png
 

Attachments

  • battery cover buckles v2.pdf
    812.4 KB · Views: 367

captainhightop

Active member
Feb 26, 2021
136
143
UK
Destination: E10 frame (any version)

Function: Block hole for power switch (removed due to water ingress on dock).

Note:
- In order to remove the power switch, you really should link the ignition switch circuit inside the battery (it's easy).
- If you only link the wire coming out from the pogo pins, you will still have water ingress problems causing the battery to cycle on/off.

1645955679252.png

1645955701243.png
 

Attachments

  • Blanking Plug.pdf
    127.2 KB · Views: 320

patdam

Well-known member
Jan 17, 2019
904
601
france
destination: throttle stopper (bafang M500/600, BBS)

function: to limit mechanically the throttle range for those who use the throttle for walk mode

DSCF1730.JPG
 

Attachments

  • gachette-BodySketch012.pdf
    3.4 MB · Views: 333
Apr 27, 2022
73
22
UK
For anyone with access to a 3D printer, check out this website for a downloadable file to make your own pivot guard protector: Printables. The designer is happy to give away the files for free and you can make a donation if you wish.
 

patdam

Well-known member
Jan 17, 2019
904
601
france
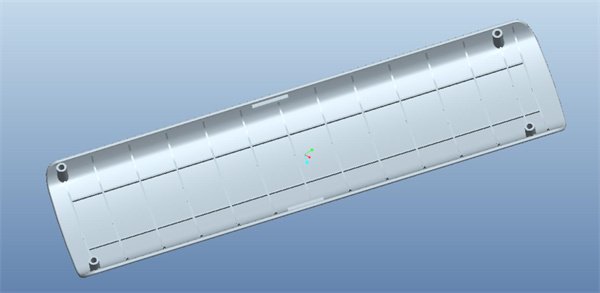
Bafang BTF03 cover modified to use with DIY battery. Files need to rework, Done lot time ago and i don't find other, sorry. I hope that could help somebody. if somebody want original file.stl or STEP, send me mail address in private message and i will sent it Battery cover-1.jpg
 

Attachments

  • Cover BTF03final.zip
    2.8 MB · Views: 209
Last edited:

patdam

Well-known member
Jan 17, 2019
904
601
france
I just found it's not necessary to change the file extension to share it. the compressed file (.zip) can be uploaded directly here
 

PH1L1PP3

New Member
Apr 27, 2023
99
57
France
LCES004 BATTERY HOUSING COVER
Made by @merc123123 (Thanks to him)


merc123123 comments:
"I did modify the cover to be correct since printing my version because I noticed that the opening curvature is not symmetrical, but it still fits ok as is in my version and I don't want to spend another 8h printing it the correct way.
In the files, you will notice space to press in M4 nuts (heated with a soldering iron) and they attach to the frame with M4 screws lengths around 13-15mm. There is also an M6 bolt, just screwed in the upper retaining "lip", so that it can be manipulated from the outside locking the cover, before being screwed to the frame holes."


LCES004 COVER.jpg
 

Attachments

  • lces004.zip
    9 MB · Views: 179
Last edited:

powerup

New Member
Jun 13, 2023
10
2
England
I propose to open this tread to share our .stl files for 3D printer.

We can mention in first:

Destination: exemple: "E10 frame"

Function: exemple: "display DPC860C frame mount"

And we insert the file.stl (named.pdf to upload) + .jpeg if it is not perfect but functional (those can help somebody who want to build something near). Or thingiverse link for items finalized

My first deposit, based on initial build of "luky luke" to adapt display mounting at my frame:

View attachment 79166
A belt sander attachment. I was looking for one of those. Thanks. :geek:
 

powerup

New Member
Jun 13, 2023
10
2
England
Destination: E10 frame (v2 with square charge mount)

Function: XT-60-HF bulkhead mount (DC jack suck!)

Extras: M3 bolts to clamp the XT-60-HF tightly together

Notes:

- Print the back in PLA/PETG/ASA
- Dust cap in TPU/TPE
- 0.2 or less layers
- The recessed holes for the bulkhead mounting bolts are very close to the edges, so double check the preview in your slicer, to check you're actually getting a wall there to avoid printing spaghetti! (I might change these to something with a smaller head at some point)

I replaced thec charge port JST with an XT-30 internally, so the bulkhead together with the XT-60-HF is easily removeable.

I also used genuine XT-60-HFs if that makes any difference. I did have some others without the grey cover over the rear bucket terminals, but they are slightly different in size (redesigned the whole thing for the XT-60-HF).

View attachment 82951
View attachment 82952
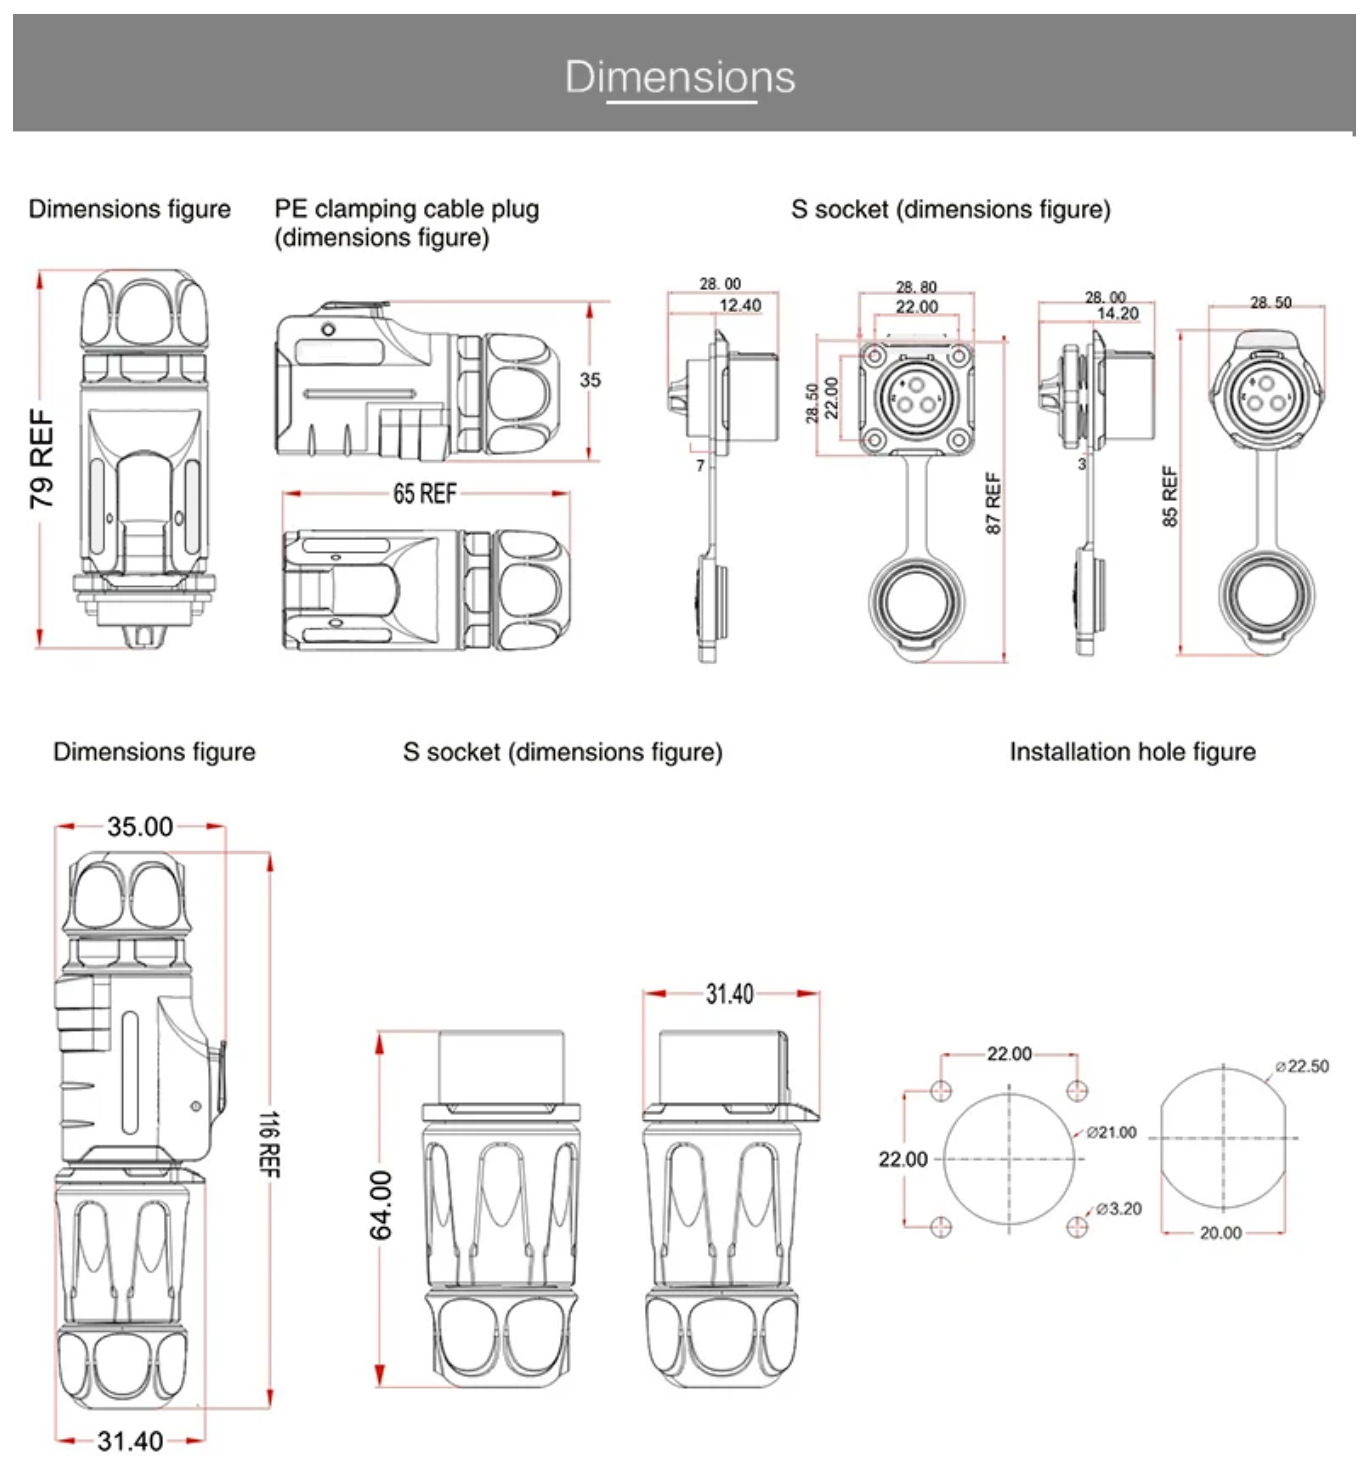
I have not checked the dimensions of the file but I suspect the Jellyn XHE20 might well fit into this. I am not sure if it will protrude too much.

Screenshot 2024-04-27 at 02.44.18.png
 

EMTB Forums

Since 2018

The World's largest electric mountain bike community.

559K
Messages
28,287
Members
Join Our Community

Latest articles


Top