Like many here, my gen 3 levo original charge port door busted. The new spring loaded door is about $20 bucks (S229900031).
With the original charge port door assembly, the square/round plug fit snuggly in place with little to no wobble when seated. The new assembly doesn't allow the plug to actually seat deep enough down in to the assembly to make contact with the battery terminals. Maybe I got a bad replacement door, who knows. Anyway, I saw a few people with this issue and wanted to show you my solution.
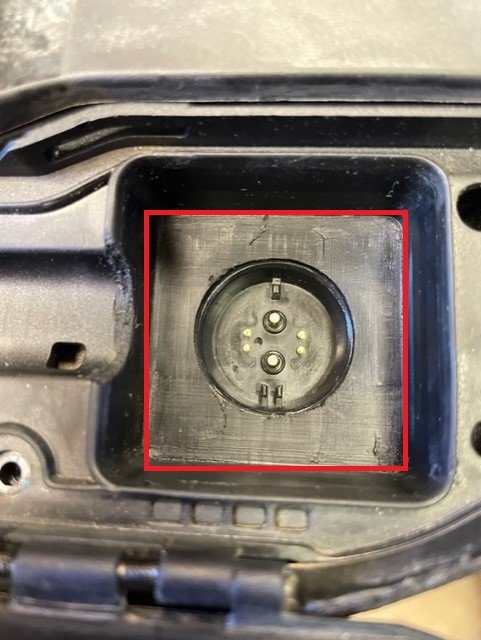
In order to get the plug to seat into the charge port door assembly and make contact with the battery terminals and not wobble, I removed the entire door assembly, stuck it in a vise, took a 1/2 inch chisel and gently shaved the plastic from the inside base of the assembly. You need to be careful not to gouge the rubber gasket that surrounds the wall of the assembly, and do not shave the backside of the assembly since there's a rubber gasket there too. This is the area highlighted in the red box. I shaved small bits at a time making sure to take the same amount off of the entire surface. Ultimately this thinned the base out by about 1mm which was sufficient to fix the issue.
The base is pretty thin now but all gaskets are intact and seat properly, and most importantly, the plug seats correctly with no wobble.
Not suggesting anyone try this, but it worked for me.

