PeeWee2000
New Member
So I purchased my Rail a little over a year ago. The first day I got it home after a month of waiting the only thing I felt after my first ride was pure disappointment. Sure it looks awesome and rides great but when I maxed out the assist after 2 minutes into my ride, even on eco/low, I quickly saw how much e-bike laws bogged down the e-biking industry's potential.
That being said I don't recommend anyone do anything I've done to my bike, and if you do you must keep your riding restricted to private property.
The easy problem: the built in limiter.
Being a software engineer my first thought was to hook up a usb connection (check on the side of your display, theres a terminal if you never noticed) to the display and start fuzzing the controller but after hours spent on that I decided to just break down and buy a speedbox 3.0. Problem solved, on to the next subsequent problem. If anyone wants to continue my progress with fuzzing and create a solution that doesn't require a mod box check out my very limited progress here: PeeWee2000/BoschCFW
The real problem: too much power
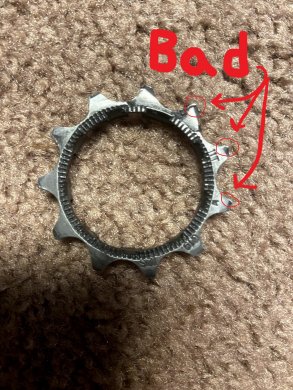
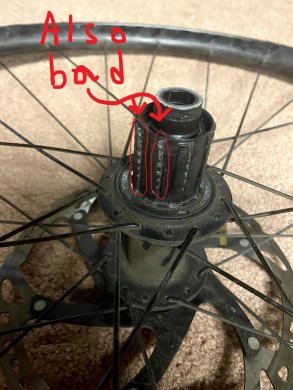
So I'm a pretty fit rider and cycle 1-2 hours on an average day when the weather is good. That being said when I combine my strength with the full power of the motor on the e-bike its way too much for the cogs in the rear cassette to keep up with, especially in the top 3 gears. I burnt up about 4-5 cassetes (all 3 top gears in each mind you) before I decided it was time for a major overhaul.
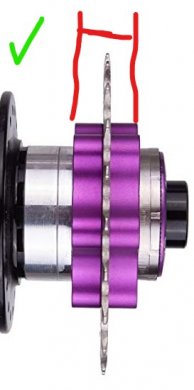
The first issue in power handling was that a small cog applies too much power to the hub and subsequently was chewing the hub apart itself. Solution: fixie gear. Altough this solves the problems of chewing the hub and teath on rear cassette gears it creates a new issue: the gear ratio is too narrow now since the smallest size fixie gear I could find was only a 16t.
The original ratio was 34-11 max which = ~3.09 ratio. So my target was at least that since I was already topping out even with that high of a ratio.
I settled for upgrading to a 52t 104bcd chainring in the front which gets me up to a ~3.25 ratio. Better but not ideal. Fortunately as I've found out now that this project is more or less complete, 3.25 is more than sufficient for me to max out the bike and my strength.
So now that I had the new chainring, it was time to mount it. I tried a couple different spiders but was forced to go with the FSA 104bcd spider because it is somewhat conical in shape (rather than flat) and gives me more wiggle room to put in spacers.
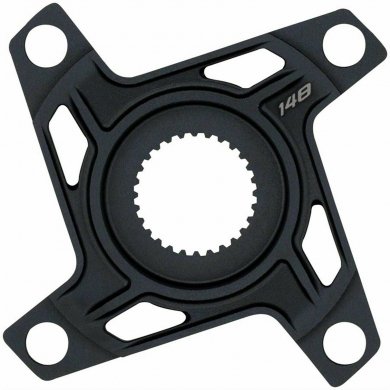
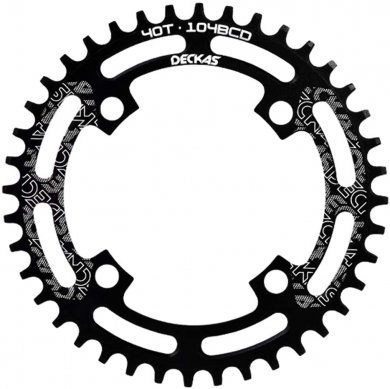
The next issue - spacing. Due to the way the Rail 9.7s bottom support arm is designed it supports at most a 34t chainring without any spacers (lame). So in order to get around this I had to order some extra long spacing bolts, 16mm long I believe, but even that wasnt long enough. So from there I set out making some custom aluminum spacers on my lathe. Note that I had to make two separate spacers. One (pictured left) was to go inside the chainring holes to act to eliminate any space between the bolt and the chainring . The second (pictured right) was to give me wiggle room to extend the 16mm factory spacer bolts past what they were intended to do.
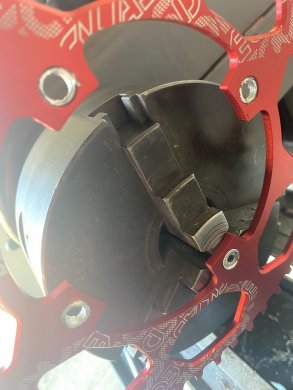
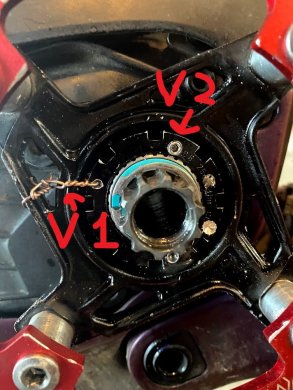
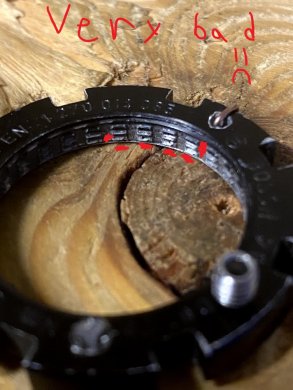
Alright that's everything solved now right? Just put it back together and go for a ride. Nope. I got about 30 minutes into my first ride before my chainring popped off. Wtf? Turns out it was the lock ring washer that came loose so I borrowed a trick I saw on this forum and used some welding wire to secure the lock ring and keep it from coming off. I also drilled out and tapped a spot for a grub screw to see if that would work too because that seemed a lot easier to disassemble (which I have to do entirely way too much) than the welding wire. Neither of these worked unfortunately. They did their purpose, but unsurprisingly lead to another issue: the chainring was exerting enough axial force to destroy the threads on the lock ring. This imo is due to 2 reasons, the first is that only 50% of the shaft is threaded because it is splined. The second reason is that its a light weight aluminum locking not designed for much axial load.
So in conclusion don't try either of these if you're upgrading the chainring. They might be ok for the factory 34t but I wouldn't do it unless I was desperate, if you do the grub screw method use at least two so the load is supported more evenly, 4 would even be better.
My next attempt at a solution to this final hurdle - an axial (thrust) bearing. After a lot of googling and brainstorming I found that amazon sells bearings that are quite close to the size needed for about $10 per 3 bearings. The plan was to place it inbetween the drive side crank arm and the spider with the lockring as a limiter. This has the benefit of using the cone shape on the crank arm to help self center the bearing as well as provide a lot (but not too much) of compression force and keep the chainring nice and parallel.
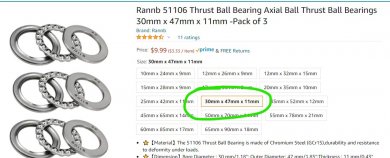
So now that I had an idea for what to do with the bearing the next trick was putting it where I needed it. The FSA spider was just a hair too big for the bearing to seat inside it so I turned it a little so that it would easily fit in it. I thought about making it tight enough that it could be a press in fitting but disassembly would be a nightmare so I turned it down so it was snug enough to push in by hand but not hard to get out.
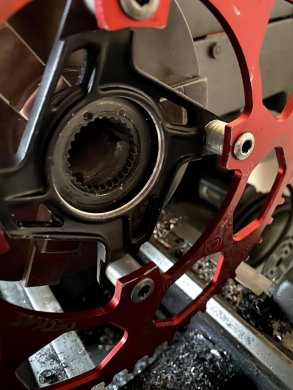
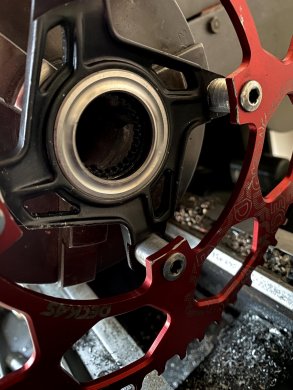
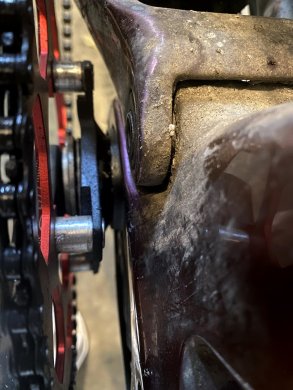
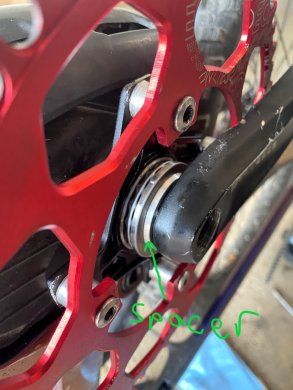
And finally I put it all back together and so far its worked like a dream. Cranks smoother and quieter than it ever has (probably some bias due to project finishing pride) but I'm going to keep riding it until it breaks, if it does I'll update this thread if not I'll be out riding it. Note in the final picture I used the spacer from the factory in reverse as a washer to help center and position the bearing where I wanted.
That being said I don't recommend anyone do anything I've done to my bike, and if you do you must keep your riding restricted to private property.
The easy problem: the built in limiter.
Being a software engineer my first thought was to hook up a usb connection (check on the side of your display, theres a terminal if you never noticed) to the display and start fuzzing the controller but after hours spent on that I decided to just break down and buy a speedbox 3.0. Problem solved, on to the next subsequent problem. If anyone wants to continue my progress with fuzzing and create a solution that doesn't require a mod box check out my very limited progress here: PeeWee2000/BoschCFW
The real problem: too much power
So I'm a pretty fit rider and cycle 1-2 hours on an average day when the weather is good. That being said when I combine my strength with the full power of the motor on the e-bike its way too much for the cogs in the rear cassette to keep up with, especially in the top 3 gears. I burnt up about 4-5 cassetes (all 3 top gears in each mind you) before I decided it was time for a major overhaul.
The first issue in power handling was that a small cog applies too much power to the hub and subsequently was chewing the hub apart itself. Solution: fixie gear. Altough this solves the problems of chewing the hub and teath on rear cassette gears it creates a new issue: the gear ratio is too narrow now since the smallest size fixie gear I could find was only a 16t.


The original ratio was 34-11 max which = ~3.09 ratio. So my target was at least that since I was already topping out even with that high of a ratio.
I settled for upgrading to a 52t 104bcd chainring in the front which gets me up to a ~3.25 ratio. Better but not ideal. Fortunately as I've found out now that this project is more or less complete, 3.25 is more than sufficient for me to max out the bike and my strength.
So now that I had the new chainring, it was time to mount it. I tried a couple different spiders but was forced to go with the FSA 104bcd spider because it is somewhat conical in shape (rather than flat) and gives me more wiggle room to put in spacers.


The next issue - spacing. Due to the way the Rail 9.7s bottom support arm is designed it supports at most a 34t chainring without any spacers (lame). So in order to get around this I had to order some extra long spacing bolts, 16mm long I believe, but even that wasnt long enough. So from there I set out making some custom aluminum spacers on my lathe. Note that I had to make two separate spacers. One (pictured left) was to go inside the chainring holes to act to eliminate any space between the bolt and the chainring . The second (pictured right) was to give me wiggle room to extend the 16mm factory spacer bolts past what they were intended to do.


Alright that's everything solved now right? Just put it back together and go for a ride. Nope. I got about 30 minutes into my first ride before my chainring popped off. Wtf? Turns out it was the lock ring washer that came loose so I borrowed a trick I saw on this forum and used some welding wire to secure the lock ring and keep it from coming off. I also drilled out and tapped a spot for a grub screw to see if that would work too because that seemed a lot easier to disassemble (which I have to do entirely way too much) than the welding wire. Neither of these worked unfortunately. They did their purpose, but unsurprisingly lead to another issue: the chainring was exerting enough axial force to destroy the threads on the lock ring. This imo is due to 2 reasons, the first is that only 50% of the shaft is threaded because it is splined. The second reason is that its a light weight aluminum locking not designed for much axial load.
So in conclusion don't try either of these if you're upgrading the chainring. They might be ok for the factory 34t but I wouldn't do it unless I was desperate, if you do the grub screw method use at least two so the load is supported more evenly, 4 would even be better.


My next attempt at a solution to this final hurdle - an axial (thrust) bearing. After a lot of googling and brainstorming I found that amazon sells bearings that are quite close to the size needed for about $10 per 3 bearings. The plan was to place it inbetween the drive side crank arm and the spider with the lockring as a limiter. This has the benefit of using the cone shape on the crank arm to help self center the bearing as well as provide a lot (but not too much) of compression force and keep the chainring nice and parallel.

So now that I had an idea for what to do with the bearing the next trick was putting it where I needed it. The FSA spider was just a hair too big for the bearing to seat inside it so I turned it a little so that it would easily fit in it. I thought about making it tight enough that it could be a press in fitting but disassembly would be a nightmare so I turned it down so it was snug enough to push in by hand but not hard to get out.


And finally I put it all back together and so far its worked like a dream. Cranks smoother and quieter than it ever has (probably some bias due to project finishing pride) but I'm going to keep riding it until it breaks, if it does I'll update this thread if not I'll be out riding it. Note in the final picture I used the spacer from the factory in reverse as a washer to help center and position the bearing where I wanted.


