Making your own tec pack?

themoon

Member
Sep 12, 2020
96
16
Ukraine
During last ride I noticed that the pack would disconnect from the bike. Turns out that the connector needs to be pushed firmly and to one side for the contact to be made, but then still it is not very stable. Will have to take the battery apart and solder a shorter cable. Maybe that additional length/weight was causing issues.

Also noticed that the sockets on the connector itself are quite deformed / oxidized. Maybe that's due to constant vibrations under current or other factors, but doesn't look good. Compared to the charger, where everything is pristine (see below). Actually even the ends of the plugs on the frame connector are now a bit oxidized as well - will post a pic later though, the bike is in shop.

Guess the TEC pack with their battery design is not so bad after all, at least the connections seem to be quite secure there, so hopefully this problem won't be there.

Wonder how easy it will be to replace the connector on the frame.

8E170676-2C58-442E-BE3D-F7DD87D49518.jpeg


9D8BDD7C-D1D4-420E-B98B-43207166D23D.jpeg


F378E537-A0A4-439B-A0EA-F643E17C504C.jpeg


C55D7859-A547-46C2-BAC3-FA000EA23C6A.jpeg


63467133-94AD-4834-A3D1-ABBAA4BFDFB4.jpeg


127A00BD-B252-4714-B280-99E47F3DC90E.jpeg
 

sdcoffeeroaster

Active member
Jul 22, 2018
563
209
San Diego, CA
I keep mine covered at all times when not in use bit some 7/8" plastic/rubber caps. They still look nice and shiny. But your comment about weight is probably spot on. Too much momentum with a hard hit if it's too heavy. The magnets are very strong but not if the cable is bulky and heavy. My cable run is pretty short but I do have some very light 12 gage silicone ones I might try some day if I start having too many disconnects. They two wires, red and black sort of formed together, very flexible and not extra weight. But soldering them to the plug might add a bunch of shrink tubing and weight right where you don't want it, lol.

Maybe some contact cleaner and a toothpick or wooden dowel would clean it up.

Oh my BMS failed on my Tesla pack. I was trying to run in the combined mode without a separate charge connection like my other BMS and this one did not like that. It quit and locked me out and upset the bike for a cycle too. The pack was also jammed in the bottle I used so that I once in I could not get it out and had to cut the bottle and take the pack apart too, ughhhh.

Oh I've had the bikes connector out when I swapped frames and it's not that hard if you can get a replacement. I think there's enough service length to just take it off, disconnect and put a new one in.
 
Last edited:

themoon

Member
Sep 12, 2020
96
16
Ukraine
Thanks, I'm glad that I've got replacement connectors for the frame then :)

Regarding your point with lighter cable - definitely a good idea. I might try to put some velcro over connection as well - just for peace of mind. Even though I'm not riding very aggressively with the new battery due to the concerns about the weight limit of the fidlock mount. They guarantee 1 kg, and with the older 1.3 kg battery I rode it any way I wanted - jumps, drops etc. This one at 1.9 kg though... a bit scared :) So now this is rather a transport battery to get to / from a spot, or for leasure trailing
 

sdcoffeeroaster

Active member
Jul 22, 2018
563
209
San Diego, CA
Do you wash your bike or ride a lot of mud and water. It's bone dry here in SoCal and only rarely do I wash mine. I have not looked at the bike's connector and will try to check that out today. I'm making another bottle to hold the hoverboard 250 wh battery. It had a clearance slice at the bottom to clear the DVO shock once I get it and slightly smaller OD with a snap fit lid. I'll post when my friend finishes running it soon.
 

themoon

Member
Sep 12, 2020
96
16
Ukraine
Well, I rode through all the winter and washed after every ride... when it is dry, I wash every 2-3 rides. But I also use protective cap for the connector - so guess water is not a big factor here.

What I noticed is that clamps that hold power plugs on my charger and on the cable which I bought for pack are different. You can see in the pictures above that the clean one (charger) has metal "petals", while the pack cable has a fine spring in the same place. It might not be clearly visible in the pictures though, but once I tried to fix the pack cable and scrub off some molten metal bits from it, that spring just came off. Using some foil it is still possible to make a connection, but better to replace the cable altogether, especially that I need it cut to a proper length anyway.

I unscrewed the frame connector and cleaned its plugs with a point of a knife. All the muck came off nicely, exposing the metal a bit - but this should be ok I guess... looks like copper or some kind of copper alloy, by the color. Charger works fine anyhow. Btw, cable came off only about 2-3 cm from the frame, did you manage to pull it off any longer than that?

Also I'm wondering, which type of plugs do you use - "petal" or spring ones?
 

sdcoffeeroaster

Active member
Jul 22, 2018
563
209
San Diego, CA
Since I had to remove the battery and the entire wiring harness it all came out but the rest of the harness must be holding it in or maybe the start switch connection.

I don't think mine are springs. I bought them from PowerButler in Germany. Looks like I should probably clean them up from time to time with some contact cleaner.

IMG_6155.JPG
 

sdcoffeeroaster

Active member
Jul 22, 2018
563
209
San Diego, CA
I had a very weird thing happen today. I finally replaced the BMS on the 180 wh Tesla pack (what a nightmare to take it apart and reassemble) and have also gone back to my original style of pack. It can accept any of my 3 batteries, 125, 180 and 250 wh. I was doing to ride to gage the distance on the 180 pack and swapped over to the native battery for a short steep hill when the pack voltage was about 32-33 volts. I didn't want the 180 pack to cut out early under this high load. After I got up the hill I went back to the 180 pack and noticed after some distance that my native pack went down 1 bar (was fully charged) and the voltage on the 180 pack was up to 37-38 volts, like it drew a charge from the native pack! Diodes normally prevent this so I'll have to see what happens on the next ride and if it behaves normally. No data lines were shorted out in my pack so I'm not sure what caused this. I also used a very small amount of that silicon grease on the 180 packs connection which should not be related to this.

IMG_0043.JPG
 

merlot

Member
Apr 27, 2021
25
7
ES
I can't help you since I'm a dummy and yesterday i rode for the first time with a basic home made tec pack. A liitokala 5200mAh.

I have just connected a Rosenberger cable and a 5,5 por the charger. Should I put some diode or current protection? Or is the BMS enough? Guessing that there is one

Some more doubts. Rosenberger cable is difficult to peel the external cover off without damaging the internal cables. Any trick or tool?

I was able to ride 26km with a positive level of around 400m. The bike just switch off, suddenly, and apparently it was switching on again, but I disconnected the cable while starting. Can I keep it connected or which "protocol" I should follow?

Thanks
 

sdcoffeeroaster

Active member
Jul 22, 2018
563
209
San Diego, CA
I can't help you since I'm a dummy and yesterday i rode for the first time with a basic home made tec pack. A liitokala 5200mAh.

I have just connected a Rosenberger cable and a 5,5 por the charger. Should I put some diode or current protection? Or is the BMS enough? Guessing that there is one

Some more doubts. Rosenberger cable is difficult to peel the external cover off without damaging the internal cables. Any trick or tool?

I was able to ride 26km with a positive level of around 400m. The bike just switch off, suddenly, and apparently it was switching on again, but I disconnected the cable while starting. Can I keep it connected or which "protocol" I should follow?

Thanks
If you attach some pictures of your set up we can evaluate the connection. Yes the cable is tough to strip without cutting the insulation you need. I've used a single edge razor and pulled wires to the opposite side I'm cutting but it's a struggle.

26km which is about 16.2 miles is not bad from a 5.2A pack. Your pack is only about 187 wH. As the pack runs out the voltage drops and it also drops even more if you are climbing and on a higher assist level. The controller on the bike looks at this voltage from the pack and at some point will cut out (e20 I think) because the voltage is somewhere below 31 volts or so for too long. This is true with any battery. If you could actually run your battery down below 26v you would find that it would never function again and shut itself down permanently. The BMS from your pack could also limit how low you can go but I'm guess the Focus internal controller shut you down first. I believe there are also the right diodes to run an external pack inside the focus controller, not your BMS, which is why on the Focus bikes we can just plug in an external pack.

Now about your particular pack. Looks like it's probably made from 20 cells, 2 parallel strings of ten 2600 mah cells for each string. Each "string" has half of the current going to the motor running thru it. So if you are running on boost and pulling say 10-15A, each string is providing 5-7.5A of current. In the same situation the native pack of 30 cells only has 3.3-5 A of current per string, much easier on the batteries. I am also guessing the liitokala batteries are not of the highest quality. You get what you pay for and a good high quality pack will use batteries that cost $5. each and a powerful pack will be 7000mah@36v, like the hoverboard battery I first bought from fullbattery.com.

I have built two smaller packs I built as shown in a previous post. They are only 10 cells each and so all of the current must run thru each of those batteries which is why I used batteries rated for 10-15A and used extra thick nickel strips to weld them together. I have to be extra careful when I'm running the pack down to not cut out early in the middle of a climb or generate too much heat. With all the current running thru one string the voltage can drop very low during a climb even on trail mode. And back on flat ground the battery will bounce back enough to get many more miles on eco on flat ground. But it's not good to run a battery down that low anyway so once I get an e20 error I'll switch over to the native pack. I also have a battery level indicator on my DIY pack so I know when I'm running low by looking at the pack voltage.
 

merlot

Member
Apr 27, 2021
25
7
ES
Thanks a lot @sdcoffeeroaster for your detailed answer.

Yes I know you get what you paid, and I'm waiting for a good quality one someone is making for me, not sure yet if 2p or 3p, and probably I'll made a 21700 2p. I'm waiting for the cells.

So thank you again for your suggestions
 

Lauste

New Member
Jul 31, 2021
1
0
69493
A Friend of me have a TEC Pack with a defect BMS.
For a short Test WE bought a BMS on Amazon ()
36V 35A 10s

With the new BMS the Bike turnes on an If you drive fast, the engine helps you.
But If you want top accelerate the Bike directly goes Off.

Does anybody know what ist wrong ?
Maybe Not enough Ampere from BMS to engine?

Thank you for your answers and stay healty
 

sdcoffeeroaster

Active member
Jul 22, 2018
563
209
San Diego, CA
A Friend of me have a TEC Pack with a defect BMS.
For a short Test WE bought a BMS on Amazon ()
36V 35A 10s

With the new BMS the Bike turnes on an If you drive fast, the engine helps you.
But If you want top accelerate the Bike directly goes Off.

Does anybody know what ist wrong ?
Maybe Not enough Ampere from BMS to engine?

Thank you for your answers and stay healty
You could have a faulty board. 35A is way more than enough. But I saw one review where they had a similar issue to yours, not enough voltage to prevent shut down. The BMS I used for one of my packs from Amazon ultimately failed because I wired it up in bypass mode and only one common connector for charge and discharge. Many BMS board do support this but the one I was using did not and now with that one pack I have two ports, one for charging and one for discharging. The first BMS quite and Amazon did refund that and the 2nd worked when I wired it up right. Many packs including my expensive hoverboard pack are wired in the by-pass mode and only one common port and work just fine.

The other issue could be that some of the cells in that pack are defective and the voltage gets below 30-31 volts during high demand. In that case the controller in the Focus is what is shutting the bike off. With a good pack the focus internal controller will always be the thing that shuts you down and it will be when the pack is weak (run down after a long ride and/or bad cells) and under a high load. If you can try to monitor the pack voltage while you are riding and I bet you will see the voltage drop very low before shut down and that means the Focus controller is doing it's job and the BMS is not shutting you down.
 

sdcoffeeroaster

Active member
Jul 22, 2018
563
209
San Diego, CA
Did anyone find any info if silicone dielectric grease is ok to use with these rosenberger plugs?
I did use some of that grease and the contacts got pretty dirty so I cleaned them with some spray on contact cleaner that has lube built in. I think I've worn one of my plugs out even though they look clean. You can wiggle it and it disconnects unlike a new one which doesn't seem to have the same issue. And I'm hearing a spark when I connect it up and I don't hear that with the new one. I've had lots of unexplained disconnects while riding lately too. I don't think the rosenberger design is very good for a long term connection during a ride that subjects it to lots of vibration and shock. It's great for a simple static charger connection but for a range extender I think it leaves a lot to be desired. Just this theory I have but I now have one plug I can't rely on any more and can't explain except for wear. I don't know what I can do to fix it or how to prevent this from happening long term with a new plug if I install it. Since I didn't use the grease from day one maybe that is the solution? Can't say right now.

I found this comment in the Rosenberger description: The system is not hot-plugable. So does this imply our DIY batteries need an on/off switch that can handle the current? I also did not find any reference to springs pins or any options in that regard, however the two battery connections do look different in their own picture of the connector. There is some sort of three pronged "thing" inside each of the contacts that I don't see with my connectors. What is that and since there aren't any options why do I have something that doesn't look like that? And another site shows a pic that looks more like my Rosenberger calling that rosenberger2. Is the first pic what they look like before they install the receptacle into the plug? Looks almost like an ultrasonic weld of the two receptacles in the 2nd picture.

rosenberger.jpg


rosenberger2.jpg
 
Last edited:

sdcoffeeroaster

Active member
Jul 22, 2018
563
209
San Diego, CA
I did use some of that grease and the contacts got pretty dirty so I cleaned them with some spray on contact cleaner that has lube built in. I think I've worn one of my plugs out even though they look clean. You can wiggle it and it disconnects unlike a new one which doesn't seem to have the same issue. And I'm hearing a spark when I connect it up and I don't hear that with the new one. I've had lots of unexplained disconnects while riding lately too. I don't think the rosenberger design is very good for a long term connection during a ride that subjects it to lots of vibration and shock. It's great for a simple static charger connection but for a range extender I think it leaves a lot to be desired. Just this theory I have but I now have one plug I can't rely on any more and can't explain except for wear. I don't know what I can do to fix it or how to prevent this from happening long term with a new plug if I install it. Since I didn't use the grease from day one maybe that is the solution? Can't say right now.

I found this comment in the Rosenberger description: The system is not hot-plugable. So does this imply our DIY batteries need an on/off switch that can handle the current? I also did not find any reference to springs pins or any options in that regard, however the two battery connections do look different in their own picture of the connector. There is some sort of three pronged "thing" inside each of the contacts that I don't see with my connectors. What is that and since there aren't any options why do I have something that doesn't look like that? And another site shows a pic that looks more like my Rosenberger calling that rosenberger2. Is the first pic what they look like before they install the receptacle into the plug? Looks almost like an ultrasonic weld of the two receptacles in the 2nd picture.

View attachment 70663

View attachment 70664
What I've begun to notice on my connector are some pits down in the bottom and I hear a spark when I connect it none of which is good. That corresponds to the spec sheet that says this connector is NOT designed for a hot connection. So I think I've mostly ruined one by doing a bunch of hot connections. So I could either find a switch or use the internal rc60 connector to turn it on, the later is a bit of a pain. I've found a 14A 36 volt rated connector at Mouser I'm going to try out. This is why the tec pac has an on/off switch I'm guessing. The charger doesn't seem to apply voltage until AFTER the connection is made so it must do some hand shaking with the data lines first to delay turning it on and that spark and resulting pitting.
 

themoon

Member
Sep 12, 2020
96
16
Ukraine
I've noticed this quite a while ago as well. Actually, several of the connectors have gone bad because of this -> see my posts with pictures above. Next time I'm building a pack (or repacking current one) I'm definitely incorporating a switch to take that initial connection `spark` away.
 

sdcoffeeroaster

Active member
Jul 22, 2018
563
209
San Diego, CA
I've noticed this quite a while ago as well. Actually, several of the connectors have gone bad because of this -> see my posts with pictures above. Next time I'm building a pack (or repacking current one) I'm definitely incorporating a switch to take that initial connection `spark` away.
It's very hard to find dc switches with the right ratings too. The one I found is 36 volt dc and 14 amp rating so it should be adequate for my riding. C1300ARBB-602AW Bulgin | Mouser

Otherwise I use the packs internal connection for now, which is a bit of a pain but better than destroying the rosenberger plug
 

themoon

Member
Sep 12, 2020
96
16
Ukraine
I've added the same switches to my two packs - one had to be inserted directly to the wire cause pack itself did not have any place for installation, to insert other I've rebuilt the smaller pack. Will post pictures a bit later, after I've given each of them a bit of real life testing, but so far they seem to work fine. Definitely there is a spark and loud pop in the switch when I turn it on as well - just hopefully it will last longer than the rosenberger connectors when hot plugged
 

sdcoffeeroaster

Active member
Jul 22, 2018
563
209
San Diego, CA
I've added the same switches to my two packs - one had to be inserted directly to the wire cause pack itself did not have any place for installation, to insert other I've rebuilt the smaller pack. Will post pictures a bit later, after I've given each of them a bit of real life testing, but so far they seem to work fine. Definitely there is a spark and loud pop in the switch when I turn it on as well - just hopefully it will last longer than the rosenberger connectors when hot plugged
I looked closer at the specs for my 1300 series switch and it's the 1330 that is 36v 14a rated even though mouser says it's 36 v. I have an inquiry to mouser and factory on this switch. I did wire one up, not much room, and no spark. It's a high in-rush switch and may be OK for dc voltage. We'll see. I might need a new soft pack and make an aluminum plate to hold the switch better.

It turns out the 1330 is the double throw and the one they submitted for 36v 14A approval and the 1300 is the same construction but single throw so should be OK. I had to epoxy it into my fabric bag to give it some stiffness and not fall out. Took it on a ride and it worked perfectly.

IMG_0457.JPG
 
Last edited:

sdcoffeeroaster

Active member
Jul 22, 2018
563
209
San Diego, CA
I've added the same switches to my two packs - one had to be inserted directly to the wire cause pack itself did not have any place for installation, to insert other I've rebuilt the smaller pack. Will post pictures a bit later, after I've given each of them a bit of real life testing, but so far they seem to work fine. Definitely there is a spark and loud pop in the switch when I turn it on as well - just hopefully it will last longer than the rosenberger connectors when hot plugged
I'm using the switch on my one large tech pack now. I use it all the time even when charging (last thing to get turned on). This plug did have some minor use before installing the switch so I still seem to get e20 at just below half way use of the pack. I then just switch it off and on and it works just fine. I also clean it with some contact cleaner and blow it out with compressed air after every ride. I'm not sure why it seems to quit on my rides and it's not necessarily under a high load when it does that. The plug is not loose or misaligned either. I wonder if it has anything to do with the torque sensor calibration, which doesn't seem to happen using these DIY packs?

I found a source for a right angle plug and I'm in the process of building another similar pack using my 180 wh and 125 wh batteries. I'll keep this one clean and will use a switch from day one to see how it goes. I wish I had noticed the item in the spec that said "not for a hot connection" but hindsight is 20/20, lol.
 

Wgm20

Member
Dec 12, 2021
6
3
Guildford
I've found this thread invaluable while making a range extender for my 2017 Jam2 so I thought I'd write up what I did in case anyone else finds this useful. First, some irrelevant background: my Jam 2 is running a -2 HA adjust headset, a 170mm fork and increased 153mm rear travel (using a 60mm stroke shock rather than 55mm). I run a 30mm wide rear rim and a 2.3 tyre , with a 2.8 front on the standard 40mm 27 in rim.
image3.jpeg
image2.jpeg


I liked the packaging of the orbea rise range extender. This is a 1.4kg 252Wh battery that fits in a waterbottle compatible mount so you can swap between bottle and battery in seconds: RS RANGE EXTENDER RISE M

To get it to fit I first needed to attach the orbea water bottle mount. To do this I had to turn down the large focus jam rail screw heads on a lathe to get enough clearance (very bottom screw head in this picture):
image0.jpeg


Once that was done, I cut the orbea power cable (that comes in the kit) and attached one end to a Jam 2 spec rosenberger cable I ordered from mouser: https://www.mouser.co.uk/ProductDetail/Rosenberger/C003-04-2000-C?qs=sGAEpiMZZMsvnOgGvSjZeLsLOOYFAZjZnmmFgZB4JFu6BZmNADaSRQ==

I had assumed the orbea battery would have a +36v, 0v somewhere, but it did not. I tried every possible combination of bus wire attachments while keeping the two power cables the same (literally all- I wrote out all combinations and went through them one by one- it took over an hour). None worked. So I opened up the battery.

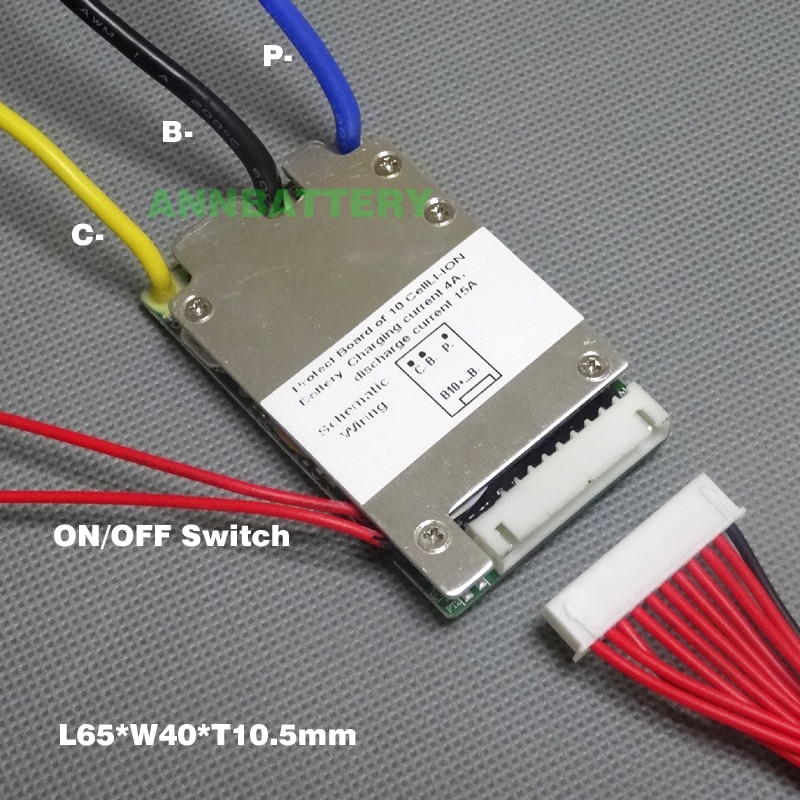
Inside I could see the pcb's controlling the battery. While it would have been great to keep this (it has an external on off switch and battery voltage led) I quickly abandoned hope of working out how to do it and simply bought the most compact bms I could find with an on off switch (space is very tight- I made a wooden mock up and it only just fitted).


Original bms:

image4.jpeg


When it arrived, I bought a soldering station, taught myself to solder, removed the old bms, and fitted the new. I soldered and used adhesive heat shrink on all joins.

new bms:
image1.jpeg


I didn't have a switch and I didn't want to put one on the case and lose the waterproof rating, so I soldered the switch wires together. I closed it all up and tested it and it worked fine- just like all the other range extenders in this thread (attach- instant power on and always reports battery state of the internal battery). Great, I thought, and went to bed happy. The next day after work, I connected it as before for a test and it did not work at all. I checked the outputs and both were at 0v. I opened the battery case up and cut the switch wires. On reattaching them it all reset and worked fine. For reliability, I realised I needed to be able to reset the switch. To get this, I wired the switch wires to two of the bus wires on the connector and then wired those together in the join in the external lead. Easy to say, hard to do when it means you have to cut your newly joined cable in half again..... However, I think this means that the bms will reset evey time I disconnect the cable and will only turn on once it is attached at the battery end. Which I hope will be quite a nice solution.

Finished? bms wiring:
image6.jpeg


Once this was all done, I connected everything back up and ...... nothing. The rosenberger connector had voltage but the bike would not turn on. Three terrible hours of undoing everything later (open case again cut open lead to check if bus wires were shorting), I realised the rosenberger connector was the problem. Another hour of testing (if I put swarf in the connector holes it worked, if I twisted it really hard, it worked) I realised the real problem. The voltmeter probes I used to check the voltage in the connector were precisely the correct size to bend the rosenberg connector springs back so they would not touch the male terminals on the bike. I cursed a lot. Then I bent them back gently with toothpick and a childs microscope and it all woked. Great. Now all I needed to do was to close the case up again (for the third time) and make the joining cable again (also for the third time). This was all plain sailing.
image3 (1).jpeg


Next up- charging. I had a £15 childs swegway charger (1 amp). Orbea wanted £100 for a charger. So I started with the swegway one. I also had the other half of the orbea cable I had cut off that I could wire to the charger. Sadly things were not simple. The orbea discharge cable had only the discharge cables wired and not the charge negative. So I had to open the connector up, dig out the termnals from some resin stuff then solder on a charge negative. Once done, it all worked fine.

I've tested it three or four times now and been very pleased. I've lost the use of the button and state of charge indicator, but it otherwise works very well. It's very convieniently packaged and completely rattle free. There is plenty of clearance to the (longer stroke and additional reservoir) shock.

When the reserve battery quits, I roll a ruber o ring onto the connector at the battery end then reattach. This is enough to disconnect the battery while still retaining it in place so I don't need to carry it.

Thank you to all the contributors to this thread- I would never have attempted this without seeing your solutions.
 
Last edited:

themoon

Member
Sep 12, 2020
96
16
Ukraine
@sdcoffeeroaster if you're still using the battery pack - how does that power switch button working for you? I had the same one, which gave noticeable sparks every time it was connected to a bike and I turned it on. Eventually it just gave up. Had to replace it with another (presumably more durable - according to local battery repair shop anyway) switch, which just broke on a second cycle. Well, faulty one I guessed, but no - a new one was gone after a single (!) actuation. Now looking for some industry-grade switch, probably the one you would usually install in home switch panel :)

Maybe that's due to a fact I run 2 x 10 21700 tesla batteries and their initial discharge (when connecting) is higher than 2 x 10 18650 lg batteries. Dunno
 

sdcoffeeroaster

Active member
Jul 22, 2018
563
209
San Diego, CA
@sdcoffeeroaster if you're still using the battery pack - how does that power switch button working for you? I had the same one, which gave noticeable sparks every time it was connected to a bike and I turned it on. Eventually it just gave up. Had to replace it with another (presumably more durable - according to local battery repair shop anyway) switch, which just broke on a second cycle. Well, faulty one I guessed, but no - a new one was gone after a single (!) actuation. Now looking for some industry-grade switch, probably the one you would usually install in home switch panel :)

Maybe that's due to a fact I run 2 x 10 21700 tesla batteries and their initial discharge (when connecting) is higher than 2 x 10 18650 lg batteries. Dunno
I sold my Focus and bought Specialized LEVO SL. But this is the switch I used and I did not have any issues with it and used it for a while before I sold my Focus. Only the double pole version was rated and tested for 36vdc and high current but the vendor said the one I bought should work and it did. Mouser part #number 167-C1300ARBB-602AW.

Spec sheet from vendor: https://4donline.ihs.com/images/Vip...2-1.pdf?hkey=7AA05C660CCA9132E746D40E28FE424C

Good luck.
 

EMTB Forums

Since 2018

The World's largest electric mountain bike community.

555K
Messages
28,046
Members
Join Our Community

Latest articles


Top