Invisiframe install Done - Post Thoughts

Captain45

Active member
Oct 1, 2019
91
86
Usa
I wasn't happy with how badly my matte finish was wearing on my new 2020 Comp so I decided to go Invisiframe Matte protection. Installers near me were looking to charge around $50-70/hour, estimating about 4-6 hours total for the job so I decided to do it on my own and quite enjoyed the process and I think I did a pretty dang good job. It wasnt too bad to be honest. I spent about 2 hours a night over the past 3 days, taking my time along the way.

Few initial thoughts on the kit... There is definitely room for improvement on precision and layout. In the end, my bike is about 70% more protected which is the end goal but there is some room in aesthetic department to be honest. This probably will only apply to the Matte kit users as glossy paint installation is near invisible, but on Matte, it does turn the frame to more of a satin finish which spots that are unprotected stand out from those that are. Now keep in mind these are knitpicks and speak only for the looks department and not its purpose but I thought other potential Matte owners may want to see details.

Some of my complaints:

The largest downtube section is meant to be wrapped around the bottom of the tube to meet around the top of the tube. With this design there would be a clearly visible 1" gap in the seam staring right up at the rider and the rest of the world. I decided to cut holes around the water cage frame taps and wrap it the other way around. This clearly looks better but leaves that 1" gap on the underside of the downtube where protection is most needed. I'm going to custom cut a custom piece of xpel to fill this strip or actually order the original OEM film which is about 3 times thicker and rewrap this underside section (air bubbles around the decals are still settling)
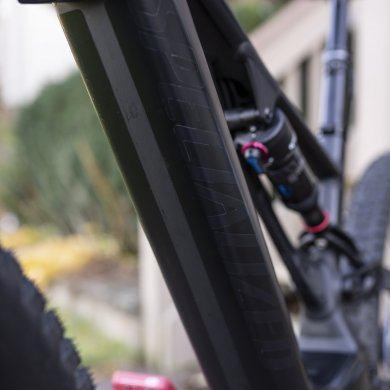
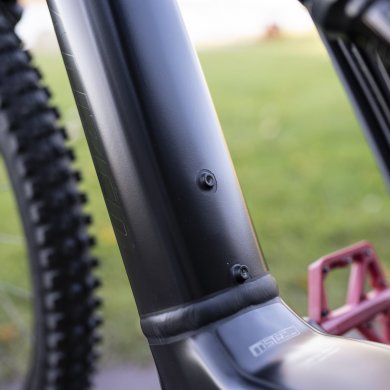
DSC05825.JPG
DSC05817.JPG

There are two separate kit sections (left and right) for where the headtube meets the downtube. These are fairly small pieces and I have no idea why they didn't just make it part of the larger downtube section to have one continuous not seamed section. I spent a lot of time working to get these to bunt up as closely as possible but the frame welds hindered this.
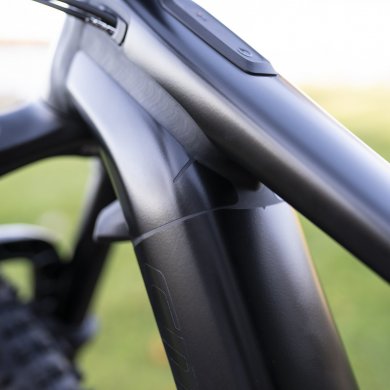
DSC05818.JPG

Upper seat Tube section doesnt wrap all the way around, Its about 3/4 coverage. I'd like this to meet a bit closer around the front. It also doesnt extend all the way down behind the rear shock so its open to some rock abuse.
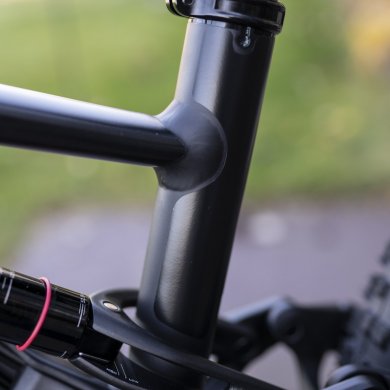
DSC05819.JPG

Motor housing is 3 separate parts, left, right and top. Id like this to just be one piece to eliminate the visibility of seams, Im sure it would take a but longer to work with but to be honest the larger the pieces are, the easier to squeegee. Also having all the edges from 3 separate pieces, I can see the top edges getting pulled up by my shoes etc.
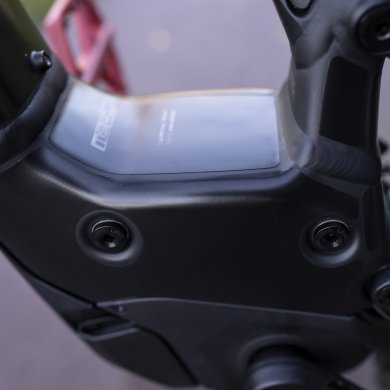
DSC05823.JPG

This one really blows my mind. The head tube section is made of two small sections, left and right. They are only about 2x4 inches in size....why not just make one larger piece that wraps around the front so I dont have this gap in between the sections. I tried to get the gap a little smaller but it did look a little weird on the rear part near the down/top tube being so far forward.
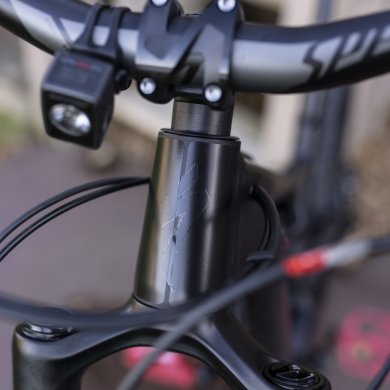
DSC05824.JPG

The Rear triangles were actually the best fitted spots. Thats where I started the job and was very satisfied with the fitment.
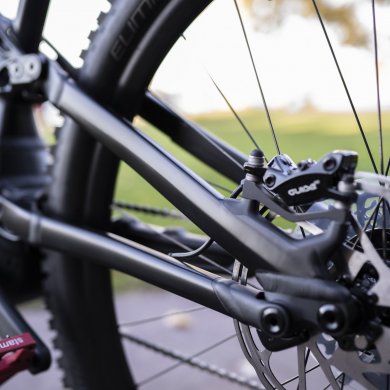
DSC05830.JPG

But overall, Im really happy with the kit, the ease of install, the protection it provides and I think she looks pretty bada**. Now for the Grip2 and DPX2 installation!
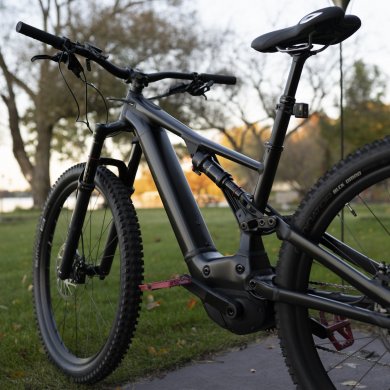
DSC05837.JPG
 
Last edited:

wepn

The Barking Owl ?
Jul 18, 2019
1,006
1,145
AU
Yes that looks very nice. I bought RideWrap which was then expertly installed by the Spesh store. The gaps are similar all < 5 mm and facing upwards or towards the rear. Quite a few visible hits I can see that would've otherwise gone deep into the substrate to expose metal.
 

Gabypb

Member
Nov 8, 2019
38
19
Ecuador
I wasn't happy with how badly my matte finish was wearing on my new 2020 Comp so I decided to go Invisiframe Matte protection. Installers near me were looking to charge around $50-70/hour, estimating about 4-6 hours total for the job so I decided to do it on my own and quite enjoyed the process and I think I did a pretty dang good job. It wasnt too bad to be honest. I spent about 2 hours a night over the past 3 days, taking my time along the way.

Few initial thoughts on the kit... There is definitely room for improvement on precision and layout. In the end, my bike is about 70% more protected which is the end goal but there is some room in aesthetic department to be honest. This probably will only apply to the Matte kit users as glossy paint installation is near invisible, but on Matte, it does turn the frame to more of a satin finish which spots that are unprotected stand out from those that are. Now keep in mind these are knitpicks and speak only for the looks department and not its purpose but I thought other potential Matte owners may want to see details.

Some of my complaints:

The largest downtube section is meant to be wrapped around the bottom of the tube to meet around the top of the tube. With this design there would be a clearly visible 1" gap in the seam staring right up at the rider and the rest of the world. I decided to cut holes around the water cage frame taps and wrap it the other way around. This clearly looks better but leaves that 1" gap on the underside of the downtube where protection is most needed. I'm going to custom cut a custom piece of xpel to fill this strip or actually order the original OEM film which is about 3 times thicker and rewrap this underside section (air bubbles around the decals are still settling)

View attachment 20754
View attachment 20763

There are two separate kit sections (left and right) for where the headtube meets the downtube. These are fairly small pieces and I have no idea why they didn't just make it part of the larger downtube section to have one continuous not seamed section. I spent a lot of time working to get these to bunt up as closely as possible but the frame welds hindered this.

View attachment 20755

Upper seat Tube section doesnt wrap all the way around, Its about 3/4 coverage. I'd like this to meet a bit closer around the front. It also doesnt extend all the way down behind the rear shock so its open to some rock abuse.

View attachment 20756

Motor housing is 3 separate parts, left, right and top. Id like this to just be one piece to eliminate the visibility of seams, Im sure it would take a but longer to work with but to be honest the larger the pieces are, the easier to squeegee. Also having all the edges from 3 separate pieces, I can see the top edges getting pulled up by my shoes etc.

View attachment 20758

This one really blows my mind. The head tube section is made of two small sections, left and right. They are only about 2x4 inches in size....why not just make one larger piece that wraps around the front so I dont have this gap in between the sections. I tried to get the gap a little smaller but it did look a little weird on the rear part near the down/top tube being so far forward.

View attachment 20759

The Rear triangles were actually the best fitted spots. Thats where I started the job and was very satisfied with the fitment.

View attachment 20760

But overall, Im really happy with the kit, the ease of install, the protection it provides and I think she looks pretty bada**. Now for the Grip2 and DPX2 installation!

View attachment 20762

Hello!

I just received my Levo with the Invisiframe installed, and the installer explained the reason for the horrible gap on top of the downtube. I want to have this part rewrapped, can you tell me where can I order what you mention “custom piece of xpel to fill this strip or actually order the original OEM film which is about 3 times thicker“.
504C65C2-1986-4B98-81D5-3309B7A04A4C.jpeg
 

CjP

PRIME TIME
Subscriber
Jan 1, 2019
1,671
2,394
Everywhere
Yes that looks very nice. I bought RideWrap which was then expertly installed by the Spesh store. The gaps are similar all < 5 mm and facing upwards or towards the rear. Quite a few visible hits I can see that would've otherwise gone deep into the substrate to expose metal.
+ 1 for ride wrap. Had a little bit more coverage
 

MrSimmo

E*POWAH Elite World Champion
Apr 24, 2020
1,096
1,047
The Trail.
Fitted Invisiframe myself last week to my Levo. Rob mentioned in one of his videos about the downtube gap so when I ordered it I asked for some extra and they added some off cuts to the order foc. I cut them to width and fitted which hid the gap.

Tbh my bodge job left loads of bubbles anyhow so the gap was the least of my worries ?
 

Gabypb

Member
Nov 8, 2019
38
19
Ecuador
Fitted Invisiframe myself last week to my Levo. Rob mentioned in one of his videos about the downtube gap so when I ordered it I asked for some extra and they added some off cuts to the order foc. I cut them to width and fitted which hid the gap.

Tbh my bodge job left loads of bubbles anyhow so the gap was the least of my worries ?
Hi, this morning my Levo shows some peeling of the Invisiframe, has anyone experienced this? I tried to reattach it using the squeegee, but it keeps getting peeled off. ?

36A8E0CC-38B1-4A95-A60C-63B98751708F.jpeg
 

p3eps

E*POWAH Elite World Champion
Subscriber
Dec 14, 2019
1,982
2,401
Scotland
Hi, this morning my Levo shows some peeling of the Invisiframe, has anyone experienced this? I tried to reattach it using the squeegee, but it keeps getting peeled off. ?

When installing you need to use something like 5ml of baby shampoo to 250ml of water (can’t remember the exact ratio, but I imagine it’ll be on the Invisiframe site) and spray it all over the back before sticking it on.

I’d mix some up and spray the back, then press it down whilst continually squeezing out the liquid.
 

Captain45

Active member
Oct 1, 2019
91
86
Usa
Hello!

I just received my Levo with the Invisiframe installed, and the installer explained the reason for the horrible gap on top of the downtube. I want to have this part rewrapped, can you tell me where can I order what you mention “custom piece of xpel to fill this strip or actually order the original OEM film which is about 3 times thicker“.

The shop that wrapped my car gave me some spare xpel sheets. Seemed to be the same thickness as the Invisiframe.

Yeah that gap is crazy. Id just get some auto xpel and fill it in. Its only cosmetic but on matte it shows for sure.
 

Captain45

Active member
Oct 1, 2019
91
86
Usa
Worth trying to heat it with a hairdryer then hold it down for a few mins to see if that gets it to stick ?

+1 to this. When I was doing mine i would notice small edges would lift off the metal a bit. What I would do was use a hairdryer and press really hard down on the edge for about a minute or two. TBH that was the most time consuming part as I did this around every single edge on the wrap.

I'd soap it up real good, get it clean underneath and then heat it up and press down for a few minutes slowly in each spot leading out to the edge until it adheres well.
 

jwrx

Well-known member
Jul 22, 2018
206
243
Malaysia
i have xpel on my car, love it. but i wasnt going to spend the same cash on my bike...i ride pretty rough terrain and it was bound to get scratched and damaged.

i ordered ali express invisifilm..its basicly usd3-5 for metres of the stuff. slightly thinner than original xpel, but it works fine. The best part is..if i have a bad crash, i just remove the film and slap on a fresh new sheet
 

Gabypb

Member
Nov 8, 2019
38
19
Ecuador
Worth trying to heat it with a hairdryer then hold it down for a few mins to see if that gets it to stick ?
Thanks for the tip ??
When installing you need to use something like 5ml of baby shampoo to 250ml of water (can’t remember the exact ratio, but I imagine it’ll be on the Invisiframe site) and spray it all over the back before sticking it on.

I’d mix some up and spray the back, then press it down whilst continually squeezing out the liquid.
thanks, I’ll try that ?
 

Tim1023

Well-known member
Aug 25, 2020
662
585
Hamburg, Germany
I wasn't happy with how badly my matte finish was wearing on my new 2020 Comp so I decided to go Invisiframe Matte protection. Installers near me were looking to charge around $50-70/hour, estimating about 4-6 hours total for the job so I decided to do it on my own and quite enjoyed the process and I think I did a pretty dang good job. It wasnt too bad to be honest. I spent about 2 hours a night over the past 3 days, taking my time along the way.

Few initial thoughts on the kit... There is definitely room for improvement on precision and layout. In the end, my bike is about 70% more protected which is the end goal but there is some room in aesthetic department to be honest. This probably will only apply to the Matte kit users as glossy paint installation is near invisible, but on Matte, it does turn the frame to more of a satin finish which spots that are unprotected stand out from those that are. Now keep in mind these are knitpicks and speak only for the looks department and not its purpose but I thought other potential Matte owners may want to see details.

Some of my complaints:

The largest downtube section is meant to be wrapped around the bottom of the tube to meet around the top of the tube. With this design there would be a clearly visible 1" gap in the seam staring right up at the rider and the rest of the world. I decided to cut holes around the water cage frame taps and wrap it the other way around. This clearly looks better but leaves that 1" gap on the underside of the downtube where protection is most needed. I'm going to custom cut a custom piece of xpel to fill this strip or actually order the original OEM film which is about 3 times thicker and rewrap this underside section (air bubbles around the decals are still settling)

View attachment 20754
View attachment 20763

There are two separate kit sections (left and right) for where the headtube meets the downtube. These are fairly small pieces and I have no idea why they didn't just make it part of the larger downtube section to have one continuous not seamed section. I spent a lot of time working to get these to bunt up as closely as possible but the frame welds hindered this.

View attachment 20755

Upper seat Tube section doesnt wrap all the way around, Its about 3/4 coverage. I'd like this to meet a bit closer around the front. It also doesnt extend all the way down behind the rear shock so its open to some rock abuse.

View attachment 20756

Motor housing is 3 separate parts, left, right and top. Id like this to just be one piece to eliminate the visibility of seams, Im sure it would take a but longer to work with but to be honest the larger the pieces are, the easier to squeegee. Also having all the edges from 3 separate pieces, I can see the top edges getting pulled up by my shoes etc.

View attachment 20758

This one really blows my mind. The head tube section is made of two small sections, left and right. They are only about 2x4 inches in size....why not just make one larger piece that wraps around the front so I dont have this gap in between the sections. I tried to get the gap a little smaller but it did look a little weird on the rear part near the down/top tube being so far forward.

View attachment 20759

The Rear triangles were actually the best fitted spots. Thats where I started the job and was very satisfied with the fitment.

View attachment 20760

But overall, Im really happy with the kit, the ease of install, the protection it provides and I think she looks pretty bada**. Now for the Grip2 and DPX2 installation!

View attachment 20762
Thank you for the detailed description and pics. Just bought a matt black Levo and you helped me decided to get the film.
Question: It's now over four years later. Were you happy with the result long term?
 

Tim1023

Well-known member
Aug 25, 2020
662
585
Hamburg, Germany
Just bought matt Invisiframe for my gloss black Levo Alloy (awaiting delivery)

I wanted to note two points:
  • Sending to Germany is a pain thanks to Brexit. Invisiframe did everything correctly and service was great (thank you Sarah!), but it took nearly two weeks to get through customs. Sarah mentioned that Germany seems to be particularly bad.
  • Invisiframe now also include fitting fluid (soapy stuff, I guess), two alcohol wipes and a cloth along with the squeegee.
It's my first wrap, so I'll report back how it goes.
 

Tim1023

Well-known member
Aug 25, 2020
662
585
Hamburg, Germany
A couple of months later, I'm finally getting around to posting about my experience with Invisiframe: newbie experience, results and lessons learnt

Thank you to others such as @Captain45 for sharing their experiences!

First, a tip for all Levo gen 3 owners: NEVER, EVER, EVER remove both bottle cage screws at the same time. You will save yourself a whole lotta pain. See here: Levo Gen 2 - Bottle Cage Screws?

Product selection: Ride Wrap or Invisiframe?
There didn't seem to be much of a difference if you're going for a full frame, some found Ride Wrap easier to apply, some Invisiframe. They now both include similar things in the box.

Gloss or Matt?
Unfortunately, the only colour left in my size was gloss black. I'll never buy another bike is gloss black. Shows up every little thing. I also wasn't particularly keen on the look, so decided to go for the matt option. Good decision. Looks much better!

Included in the pack
This has recently changed. Now included is:
• The Invisiframe sheet
• Alcohol wipes. Nice, but only work if you clean the whole bike with them before starting, otherwise they dry out. I just used a tar remover (no Autoglym available in Germany) and a couple of clean, soft, lint-free microfibre cloths.
• Slip solution (i.e. soap). Great that they include this now: I was having real trouble finding an equivalent of baby shampoo without Aloe!). This is much weaker than what Ride Wrap provide, which is a good thing as it allows you finer control over the concentration. I started too weak, meaning that the pieces were sticking too quickly and was able to ramp up the slipperiness in steps. There was conflicting information from Invisiframe re how much to use, so I just started at the lower level.
• A couple of "cloths". Ride Wrap make this a nice branding opportunity, but what you get from Inivisframe is no more than a couple of glorified tissues. However, as I already had decent cloths, these tissues were actually very effective at absorbing the solution as you push the liquid out to the edges of the film.
• The squeegee
• Instructions and guide to the pieces.

It was nice to see spare cutouts of many of the smaller pieces. I didn't need any of them, but it was good to know they were there.
There were also some pre-cut rounded rectangles to use as you fancy. The rest of the foil was removed from the sheet, probably to make removing the individual pieces easier to remove, but it would have been handy to had had the rest of the sheet available to make my own shapes.

Product suggestions
• Give clear instructions as to whether factory-fitted film should be removed or not. I removed all of mine and wish I hadn't. The factory fitted film is much thicker and more rubbery than Invisiframe. I would expect that it gives even better impact protection, especially on the underside of the downtube and around the chain stay bridge. I wish I'd kept mine on.
• Assuming one keeps the factory film on, it would have been better if the downtube piece wrapped from the top and not underneath. As it is, the edges of the film sit on top of the down tube where they happily collect dust and other crap.
• Keep rest of foil on the sheet for users to cut their own extras

Preparation
• Heated the cellar to 19°C as recommended. I can see that this would help with the flexibility of the film.
• A small bowl of water to dip the fingers before peeling off the next piece. Easier than using the spray gun
• Lighting. You can't have enough light. I saw a suggestion that you use a head-mounted lamp, which I wish I had had. You also need a torch to light along the surface.
• Lighting from the side helps to spot dust on the frame before application and some bubbles afterwards.
• Block the cat flap. Cat hairs are a real bugger to get off!
• Mentally prepare yourself for some frustration and just be willing to take the time.

Bubbles and zombie bubbles
• Don't be in a hurry to put the edges down. Quite the opposite. Leaving them up for a while gives you a much better chance with the bubble battles.
• Once the film has been down for a while, the bubbles are very reluctant to move. So much so, that you can damage the film. Better to soak the edges and try to carefully peel them back to where the bubble is.
• Even after I thought that I had managed to get all bubbles out, some very subtle bubbles seemed to creep back in. Very flat and difficult to discern. I tried to get rid of these, but gave up on one and was left with a small boil (1mm) on the top tube. Next morning it had simply disappeared. I suspect that if I had simply left the original bubble, that might have gone too.
• You will miss some bubbles. It's frustrating, but just accept it. Focus on getting the top tube right as you see that much more of the time!

Results
Overall, I'm very glad I went through the process and that I went for the matt option. If one tries to get the gaps looking consistent, they're not that bad, but clearly visible with matt on gloss.

I felt a bit stupid in hindsight putting so much care into the seat stays when I was going to slap the mudguard on it!

Some little shit dinged my bike with his padlock on the second day of using the bike. At least only the foil was damaged (doing its job!)

Hope the above provides some help to someone else about to go through the process for the first time.

Some pics (sorry - taken after a couple of rides, so no immaculate!)
1716128274532.png

1716128308117.png

This piece has been redesigned looking at the pics from the OP:
1716128344269.png

Would probably be nicer on the carbon frame without the welds:
1716128397794.png

1716128421371.png
 
Last edited:

Polar

Well-known member
Jun 16, 2023
410
508
Norway
A couple of months later, I'm finally getting around to posting about my experience with Invisiframe: newbie experience, results and lessons learnt

Thank you to others such as @Captain45 for sharing their experiences!

First, a tip for all Levo gen 3 owners: NEVER, EVER, EVER remove both bottle cage screws at the same time. You will save yourself a whole lotta pain. See here: Levo Gen 2 - Bottle Cage Screws?

Product selection: Ride Wrap or Invisiframe?
There didn't seem to be much of a difference if you're going for a full frame, some found Ride Wrap easier to apply, some Invisiframe. They now both include similar things in the box.

Gloss or Matt?
Unfortunately, the only colour left in my size was gloss black. I'll never buy another bike is gloss black. Shows up every little thing. I also wasn't particularly keen on the look, so decided to go for the matt option. Good decision. Looks much better!

Included in the pack
This has recently changed. Now included is:
• The Invisiframe sheet
• Alcohol wipes. Nice, but only work if you clean the whole bike with them before starting, otherwise they dry out. I just used a tar remover (no Autoglym available in Germany) and a couple of clean, soft, lint-free microfibre cloths.
• Slip solution (i.e. soap). Great that they include this now: I was having real trouble finding an equivalent of baby shampoo without Aloe!). This is much weaker than what Ride Wrap provide, which is a good thing as it allows you finer control over the concentration. I started too weak, meaning that the pieces were sticking too quickly and was able to ramp up the slipperiness in steps. There was conflicting information from Invisiframe re how much to use, so I just started at the lower level.
• A couple of "cloths". Ride Wrap make this a nice branding opportunity, but what you get from Inivisframe is no more than a couple of glorified tissues. However, as I already had decent cloths, these tissues were actually very effective at absorbing the solution as you push the liquid out to the edges of the film.
• The squeegee
• Instructions and guide to the pieces.

It was nice to see spare cutouts of many of the smaller pieces. I didn't need any of them, but it was good to know they were there.
There were also some pre-cut rounded rectangles to use as you fancy. The rest of the foil was removed from the sheet, probably to make removing the individual pieces easier to remove, but it would have been handy to had had the rest of the sheet available to make my own shapes.

Product suggestions
• Give clear instructions as to whether factory-fitted film should be removed or not. I removed all of mine and wish I hadn't. The factory fitted film is much thicker and more rubbery than Invisiframe. I would expect that it gives even better impact protection, especially on the underside of the downtube and around the chain stay bridge. I wish I'd kept mine on.
• Assuming one keeps the factory film on, it would have been better if the downtube piece wrapped from the top and not underneath. As it is, the edges of the film sit on top of the down tube where they happily collect dust and other crap.
• Keep rest of foil on the sheet for users to cut their own extras

Preparation
• Heated the cellar to 19°C as recommended. I can see that this would help with the flexibility of the film.
• A small bowl of water to dip the fingers before peeling off the next piece. Easier than using the spray gun
• Lighting. You can't have enough light. I saw a suggestion that you use a head-mounted lamp, which I wish I had had. You also need a torch to light along the surface.
• Lighting from the side helps to spot dust on the frame before application and some bubbles afterwards.
• Block the cat flap. Cat hairs are a real bugger to get off!
• Mentally prepare yourself for some frustration and just be willing to take the time.

Bubbles and zombie bubbles
• Don't be in a hurry to put the edges down. Quite the opposite. Leaving them up for a while gives you a much better chance with the bubble battles.
• Once the film has been down for a while, the bubbles are very reluctant to move. So much so, that you can damage the film. Better to soak the edges and try to carefully peel them back to where the bubble is.
• Even after I thought that I had managed to get all bubbles out, some very subtle bubbles seemed to creep back in. Very flat and difficult to discern. I tried to get rid of these, but gave up on one and was left with a small boil (1mm) on the top tube. Next morning it had simply disappeared. I suspect that if I had simply left the original bubble, that might have gone too.
• You will miss some bubbles. It's frustrating, but just accept it. Focus on getting the top tube right as you see that much more of the time!

Results
Overall, I'm very glad I went through the process and that I went for the matt option. If one tries to get the gaps looking consistent, they're not that bad, but clearly visible with matt on gloss.

I felt a bit stupid in hindsight putting so much care into the seat stays when I was going to slap the mudguard on it!

Some little shit dinged my bike with his padlock on the second day of using the bike. At least only the foil was damaged (doing its job!)

Hope the above provides some help to someone else about to go through the process for the first time.

Some pics (sorry - taken after a couple of rides, so no immaculate!)
View attachment 140609
View attachment 140610
This piece has been redesigned looking at the pics from the OP:
View attachment 140611
Would probably be nicer on the carbon frame without the welds:
View attachment 140612
View attachment 140613
I don't have Invisiframe since I think the stock protection on Levo is good but I did consider it and found a bicycle shop that was fitting Invisiframe and they told me it was only one person in the shop that was doing it and have done it for many years so he was what they called an expert. He told me he recommended the bike to be new (not ridden) if not he would not guarantee it would be 100% perfect and he would take off all the stock protection since otherwise it would not be smooth and he would put the protection back on top of the Invisiframe. The job was done by the hour which could be between 1.5-3.0 houres and in Norway an houre labor pay is ~$100 at bike shops and the job was 100% guaranteed if you wasn't satisfied he would do it all over again.
As I said I didn't do it but if I should I would never try to do it myself since I want it done perfectly.
Total cost would be ~$500 so instead I spent the money on some upgrades to the Levo.
 

kntr

Active member
Sep 19, 2019
198
282
USA
Ive wrapped all my 6 Levos and it takes less time each time. The first one took me close to 10 hours now it takes about 4. The bubbles do disappear after a bit... not all though. I did thick 3M clear on the bottom of the downtime over the invisiframe and it has protected it really well. The Amygos bash and fenders really help protect the bike and I ride a lot. I even have crank arm protectors. All these help with resell as I usually only keep my bike for 1-2 seasons.

tempImage2IT8yN.png tempImaged8EW3a.png
 

EMTB Forums

Since 2018

The World's largest electric mountain bike community.

556K
Messages
28,099
Members
Join Our Community

Latest articles


Top